
Week 8 CSA Newsletter 2019
Week 8 | August 11-17, 2019 | “B” Week
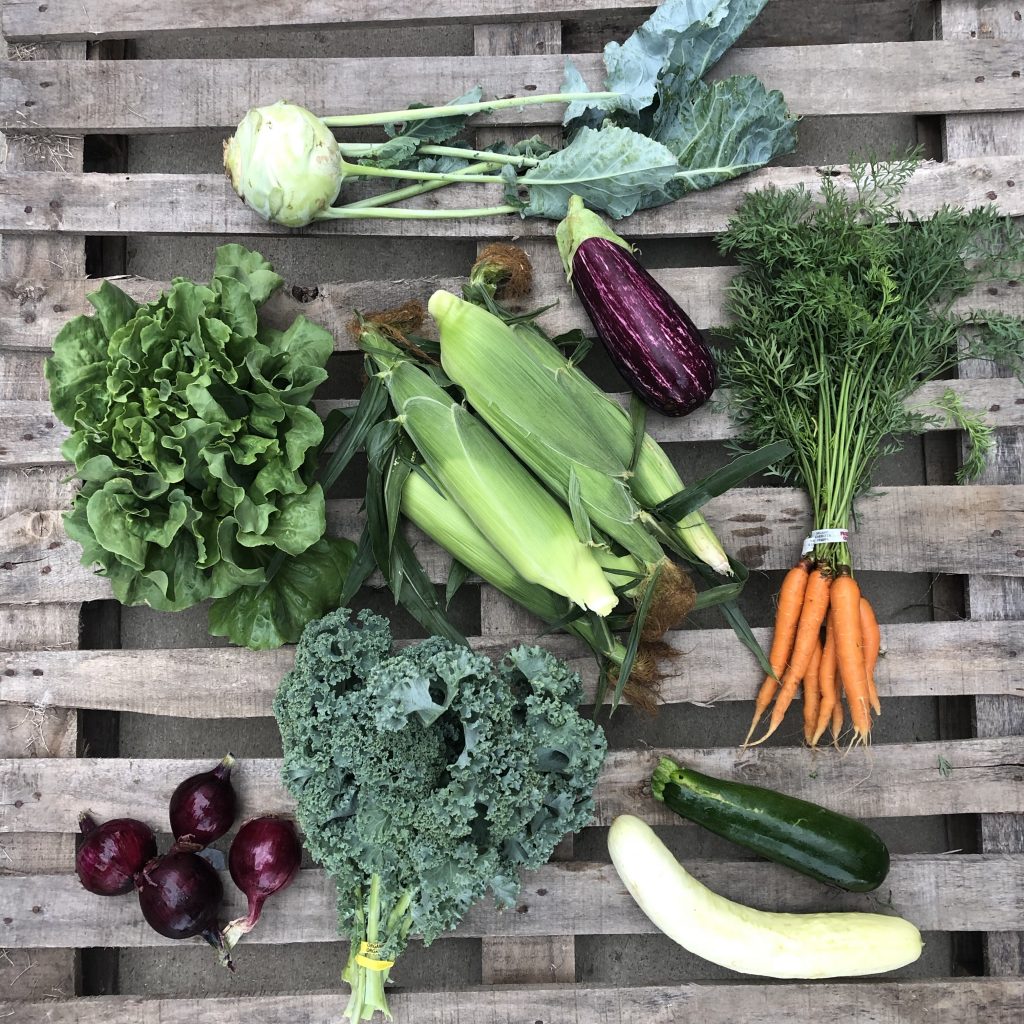
IN YOUR VEGGIE BOX THIS WEEK:
RED CABERNET ONIONS ~ The bulbs of the onions should be stored in the fridge, since they have not yet been cured/dried. They will last about 2-3 weeks. If onions are starting to take over your pantry, you can easily freeze them for later use. Simply chop to desired size and freeze them in a Ziploc.
HEAD LETTUCE ~ Store your lettuce in a Debbie Meyer Green bag and place in your fridge. Use this within the first 5 days, as it has a short shelf life.
CARROTS ~ Since our carrot crop is depleted, we will be buying in our carrots from Wayward Seed Farm in Fremont until ours return! Cut the tops off the carrots right away and use them for pesto, hummus, or our now famous “frozen green cubes.” Store the roots in a bag in your crisper for 3 weeks.
KALE ~ Store these in a plastic bag in your fridge, and try to use it within 4 days. Remove the stem from the leaves. Massage the leaves with your hands (and a bit of salt) to break down the leaves if you’re using it for a salad. You can also blanch the kale and then freeze it into ice cube trays for later use in soups or sauces. I also like it in kale pesto or chips.
KOHLRABI ~ Store this in a plastic baggie in your fridge and use within a week. When ready to eat, cut the thick skin off from around the vegetable using a chef’s knife. Then chop and eat raw with dip. Or roast with other veggies. I also like to boil kohlrabi and then add some to my mashed potatoes.
SWEET CORN (not organic) ~ Standard boxes get 5 ears. Large boxes get 10. This sweet corn comes from our parents David and Cindy Bench. They farm this crop conventionally. That’s why we make it an optional item on the extras table, so you will have to pack it yourself. Sweet corn turns starchy the longer you store it, so for best taste, eat this within a few days. Keep the cobs in their husk until ready to use in your fridge. Take off the outer leaves and silks inside when ready to eat. Then remove any worm-damaged tip with a knife. You can also eat this corn raw. Just cut the kernels off the cob with a knife, and add to salads.
SUMMER SQUASH (extras table) ~ This could take the form of zucchini or yellow squash. Store in your fridge crisper drawer in a Green bag. When you’re ready to eat it, cut the ends off. Peel if desired. If the zucchini is large, cut long-ways, and scoop out the seeds inside. Then dice. Zucchini is also good for making “stuffed zucchini boats!”
CUCUMBERS (extras table) ~ We don’t have a lot of these yet, so they are going on the extras table, first-come first-serve. These are a new yellowish skinned color. Tell us what you think! Store these in your fridge in a bag and use them within 7 days. You don’t need to peel them, but you will want to wash them to get the spines off.
One of our entries in the SLFHerbChallenge
FRUIT SHARE
WHITE PEACHES ~ One bag; If the peaches are still hard, leave them out on the counter top until they ripen and soften up. Then refrigerate in a plastic bag. Once you refrigerate them, you stop the ripening process.
BLUEBERRIES ~ One pint; from Michigan. Refrigerate immediately.
BLACKBERRIES ~ half pint. Store in the refrigerator, and eat as fast as possible! (so good).
MADDIE & BELLA COFFEE: Ethiopia Yirgacheffe – flowery and deep citrus flavors
WEBER RANCH EGGS: It’s “B” week! Remember, because we doubled up on eggs a few weeks ago to catch up on our over-supply — we will be ending the egg share earlier than the rest of the CSA season.
CHEESE ~ this is the “off week” for cheese; it will return next week!
WEEK 8 ANNOUNCEMENTS

Join our Food Composting Program — if you pick up locally in Elmore.
- NOW TAKING BULK CANNING PEACHES PRE-ORDERS. DEADLINE TO ORDER IS THIS FRIDAY, AUG 16 ~ We will be taking pre-orders for half-bushels of canning peaches. These will be sourced from Quarry Hill Orchard and/or Eshleman Orchards and will come in a box. These are Red Haven peaches. There is roughly 25 pounds — enough for about 10 quarts of peaches. Cost is $33. To place your order, go to our Online Store link here. It will first ask you to choose your pick up site. Then the site button will take you to the correct store for that site. We WILL take bulk peach orders for the Toledo site.
- NOW TAKING BULK CORN ORDERS – See details above. Visit our online store link to order.
- Want to participate in our Local Food Composting Challenge? If you’re an Elmore pick-up, you can now collect food waste and bring it to our farm on Tuesdays for our compost pile! Cost is $10 to cover the cost of 2 five-gallon buckets. You take one bucket home, fill it, and then return it each Tuesday. We swap it out with a newly cleaned bucket to take back. We even give you a cheatsheet to help you know what items you CAN’T put into the compost bucket. If you want to participate, please email Corinna at slfarms2@gmail.com and we will have a bucket ready for you a week later!
- Watch our weekly Live Unboxing video this Tuesday around 8 PM inside the private Facebook group. Cadie Jardin, our CSA coach and dietitian, will show you what’s in the box, share storage tips and ideas for how to use your product. You can find the Facebook group at this link.Only CSA members or paying members of the Academy can access this group.
- If you want to PRE-ORDER a Thanksgiving turkey from Weber Ranch, please place your order in their online store here. We will be partnering with them again this season for a special pick-up at their farm. For details read the Week 7 newsletter.
- The Herb Challenge is GOING CRAZY! Keep tagging your photo entries #slfherbchallenge now through August 24 for a chance to win $100, $75, or $50 off next year’s CSA fee. For details on the challenge see the Week 5 newsletter here.
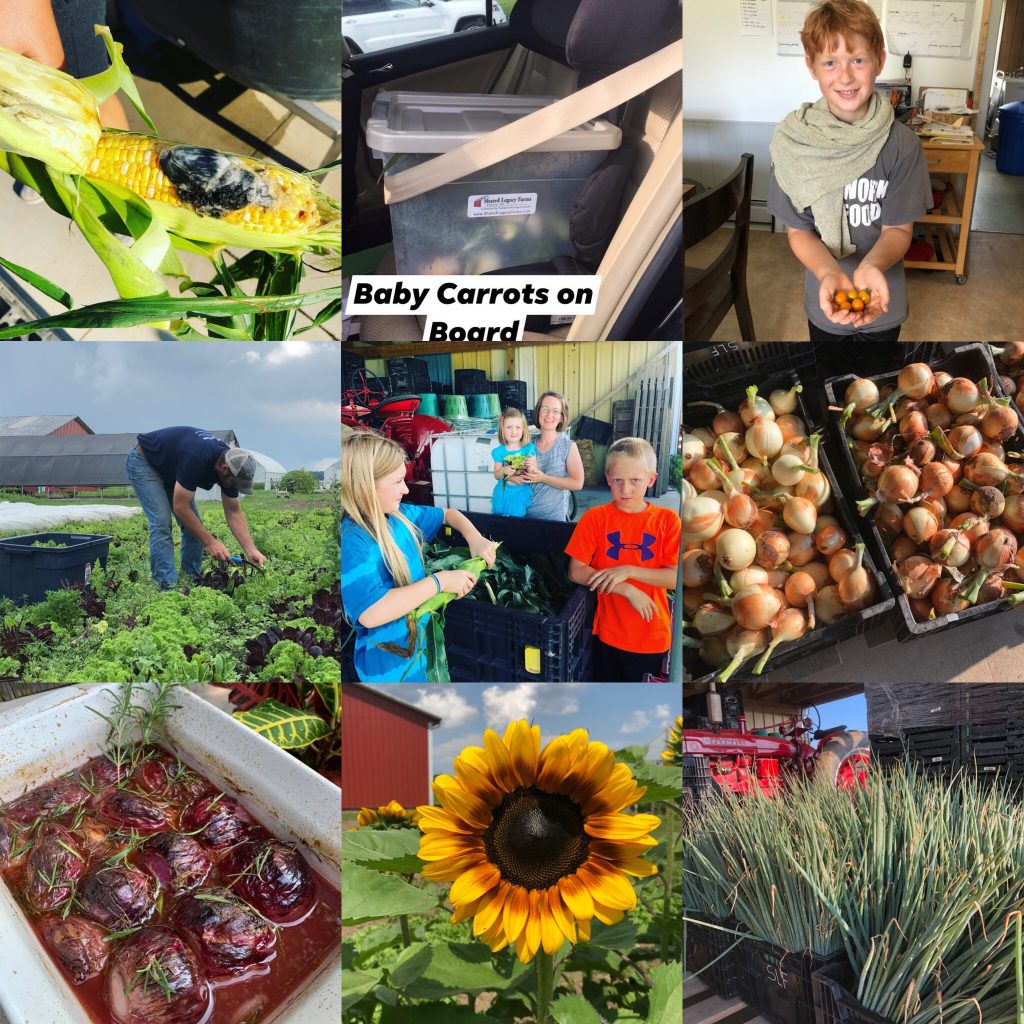
KURT’S FIELD NOTES ~ WEEK 8
Thanks to Mary Davies and her family (Hannah, Paul, and Naomi) for coming out last Monday to help us pack the CSA boxes! This mighty crew was in charge of counting the corn ears for our extras bins. And they got it right (and saved us about 30 minutes of labor time!) If you ever want to come out and show your kids a “working good time,” just email Corinna and we’ll be happy to schedule an hour or two.

The greenhouse tables are being pulled out and transitioned into onion curing stations.
This week, my crew has been heavily focused on our onions. I planted several acres of onions this year as part of a wholesale experiment for the new Whole Foods in Toledo. I know they’re ready when their green stalks start to lie down. Well, it’s time to harvest them. My crew pulls the onions and leaves them to “dry” on the poly for a few days, before collecting them in black bins and bringing them back to our greenhouse to “cure.” We spent a lot of hours completing this task for the red cabernet onions. I’ll be doing the next batch this week.
Now that my greenhouses are empty of transplants, I transfer the space into an onion curing station. I’ll set up tables inside with wire racks and layer the onions in a single row. Several fans blow on the tables to dry them out. The skins turn a dark, papery consistency, and effectively “cures” the onion. (That means you can store them in your cupboard instead of the fridge, and gives them a longer shelf life).
Unfortunately, I accidentally cooked some of these onions. This is the first year I used the silver poly mulch on my onion bed, and that stuff must get really hot. The result?… soft spots on sections of the onions. I won’t be able to sell those onions to Whole Foods. But rather than compost them all, I’m going to offer them up on our extras line — but also in the online store at a discounted rate in 5# portions. I know you guys will find a way to cut out the small bad soft spot. Most of the onion is still perfectly good. You’ll just need to process it sooner, rather than later.
We also finished planting most of our fall crops, so the greenhouses are clear. We tied a final row of tomato twine and mulched the tomato beds. My green beans are starting to flower, although my boys’ garden looks a heck of a lot fuller than mine do. (They must be doing something to their soil). Cucumbers are coming out like crazy right now. And the boys harvested the first 4 Sun Sugar cherry tomatoes today. I’m already bracing myself for the onslaught of tomatoes when they finally turn. I’ll need to hire another staffer, because tomato harvest can consume your to-do list if you’re not careful.
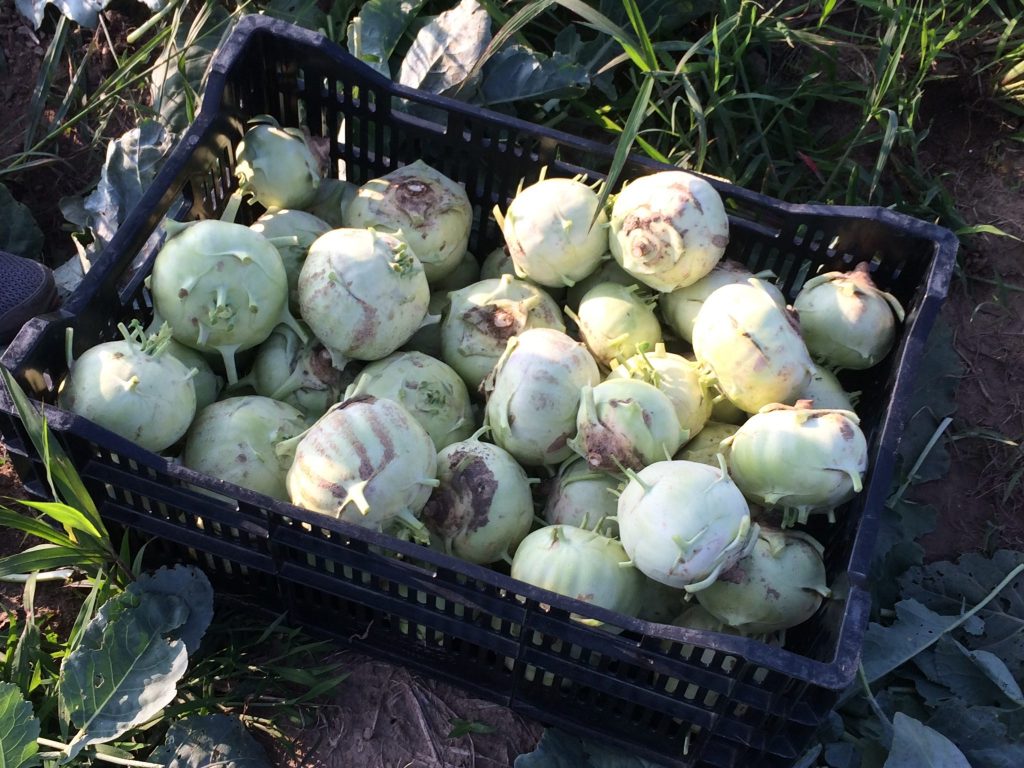
More kohlrabi coming your way this week!
My nasturtium beds (edible flowers) didn’t do much, so I ripped those out last week. I’ll be pulling out the Napa cabbage beds this week. These plants were looking so strong, but never fully headed out for some reason. Now they’re bolting in the heat, so they’ve got to go. I spent quite a bit of time this week running to Toledo Whole Foods with deliveries from our CSA coop. We’re excited to grow that relationship, so I’m keen not to screw it up. I also delivered our rye seed to Ludwig Mill in Grand Rapids. Head on down there this summer/fall, and you’ll see them demonstrating their stone-grinding mill to MetroParks visitors using our rye. We then collect the flour and sell it to you and All Crumb Bakery!
Well Project Update: Man, this is getting embarrassing… No, it’s still not done. The good news is the well works. We started throwing water this week, and the well is cranking out water like a charm.

The field crops are watered using this irrigation wheel. It slowly pulls in the sprinkler head and respools the hose. Unfortunately, this machine is not functioning properly. If it ain’t something! LOL.
The bad news?… my generator isn’t working. My electrician is stumped, so we’re calling in the big guns — a generator technician specialist this Monday. In the meantime, I’ve been renting a big-ass generator to run the well, so it’s keeping us afloat. The other issue is that our irrigation wheel (the big machine that coils the water hose and pulls the sprinkler across the field) has got some holes, so it’s not running at the right pressure.
This sure is turning into a great story.
Until next week! Farmer Kurt
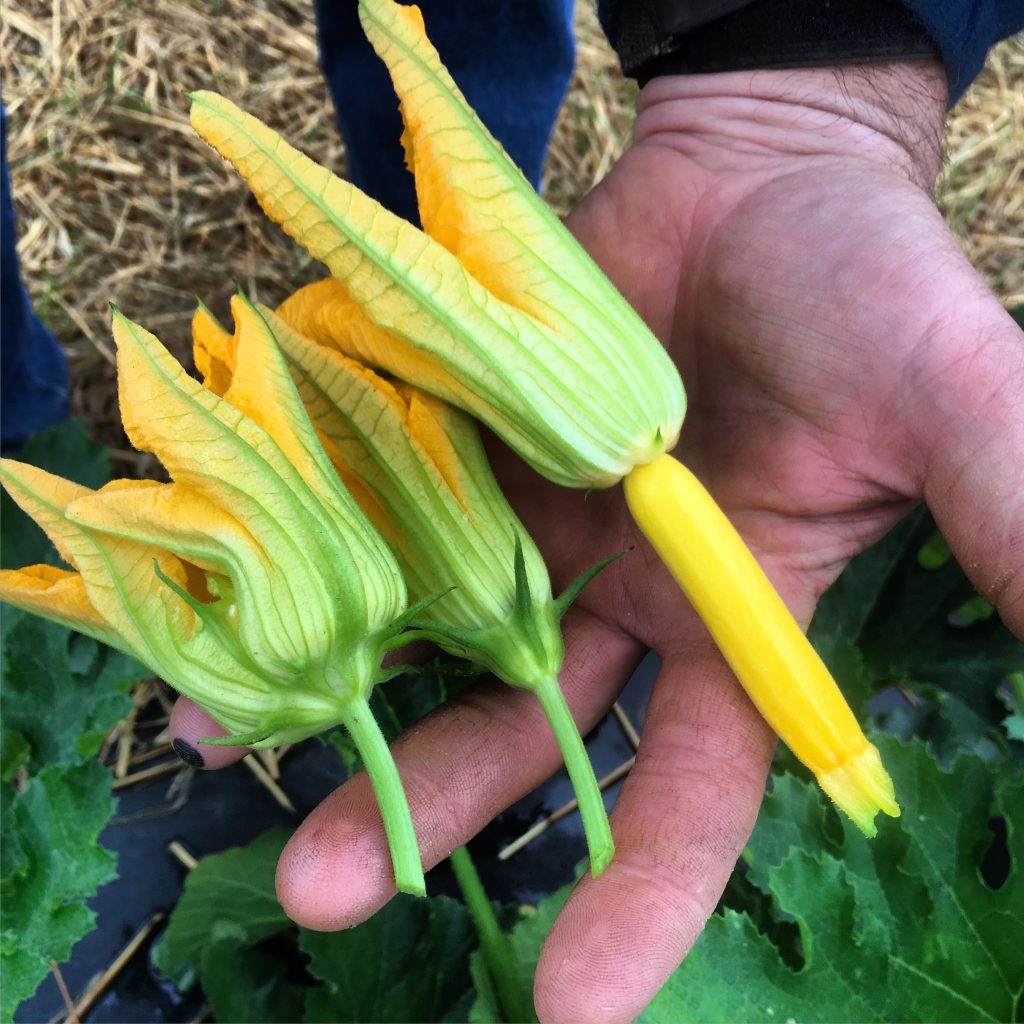
The two flowers on the left are “male” blossoms. The one on the right contains the female “ovary” — which turns into the zucchini.
The Difference Between Male & Female Squash Flowers
If you’ve ever grown a zucchini in your garden, you know how prolific it can be. Even for one family, one plant will keep producing zucchini after zucchini until you can’t figure out what to do with them.
You may have noticed that each zucchini started from a fertilized flower. The flower gets fertilized and then a zucchini begins to grow behind it. (The flower then fades and dies off, having done its job).
But have you ever noticed that not every flower turns into a zucchini? Why?
Each zucchini plant produces both male and female flowers interchangeably.
Actually it’s a set pattern: First three male flowers, then one female.
Over and over again.
You can tell the two types of flower apart. The bigger male flower has a simple stem behind the flower and a stamen inside. The female flower has a bulbous ovary (that looks like the beginning of a zucchini plant), and a stigma inside the flower.
When the flowers open, the pollinators are attracted by the bright yellow color and come in and transfer the pollen from male to female.
Here’s the rub: The male and female flowers must be open at the same time for fertilization to work.
So Mother Nature increases the odds of fertilization by having 3 male flowers for every female. If a female gets pollinated, it will grow into a zucchini. But the male flowers die off.
Plant sex! Isn’t it amazing?
PRE-ORDER YOUR BULK SWEET CORN BAGS NOW
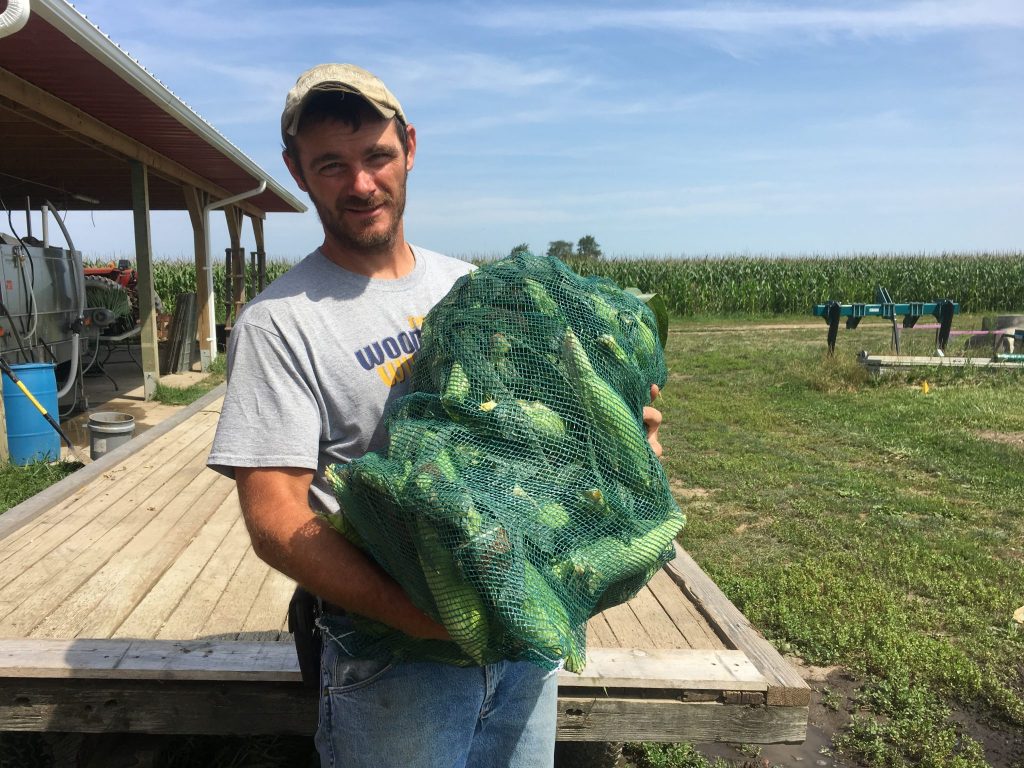
This is what a bag of corn looks like.
Imagine eating this sweet corn all winter. Do what many of our CSA members do, and FREEZE SOME CORN. The best time to do it is in August, when the ears are biggest (and you get your best value).
If this is your first year, I recommend getting ONE bag of corn. That should be enough.
To see our cheatsheet for how to blanch and freeze sweet corn, download it here.
We are now taking pre-orders for bags of bulk sweet corn. A bag of corn has 5 dozen ears, and it comes from David Bench Farms. The cost is $28. The best time to order bulk corn is in August, when the ears are biggest. (Since you pay by the ear, you’re getting the best bargain.)
NOTE: Since this is a pre-order, you may not get your bag of corn the very next week. We will try to fulfill the orders in the order we receive them. But with limited space on our delivery truck, you may have to wait a week. Please keep this in mind. I will send you a confirmation email when we have your order ready.
You can place your order in our online store link here.
You’ll be asked to choose your pick-up site first. Then the button will take you to that site’s online Square store where you will pay with a credit card.
Not sure how to freeze corn?… Watch my YouTube video of the Bench family freezing corn, click on this link.
One Way to Use that Kale This Week…
WEEK 8 RECIPES
Members: You can download these recipes separately as a PDF inside the Membership Academy. Look under the RECIPES section, Week 8.
Tomato Salad with Corn, Summer Squash & Roasted Onions
Adapted from Food 52 (www.food52.com)
Serves 6
Nike in the group shared this recipe with me! It uses a lot of what you have in your fridge right now!
Ingredients:
2 medium onions
5 Tbs EVOO, divided
Salt
1 yellow summer squash
2 small ears corn, blanched
1 scallion, finely chopped (or use fresh green onion tops if you have them)
2 cups Sungold tomatoes (or other small, sweet tomatoes)
Coarsely ground black pepper
2 tsp sherry vinegar
1 tsp honey
10 large basil leaves
Directions:
Heat the oven to 400 degrees F. Peel and slice the onions into 1/2-inch rings, and then arrange them on a rimmed baking sheet. Drizzle the onions with 2 tablespoons of the olive oil, sprinkle generously with salt, and smush everything around to coat the onions on both sides.
Roast them for about 40 minutes, flipping them over halfway through, until they’re brown and soft. Let the onions cool and then roughly chop them. Set aside.
Dice the squash (aim for 1/4 inch) and put it in a large bowl; you should have about a cup. Strip the kernels from the ears of corn and add them to the bowl with the squash. Finely chop the scallion and add to the bowl.
Halve the tomatoes (or quarter them if they’re bigger than a cherry) and add them to the bowl. Add the chopped roasted onions, a tablespoon of olive oil and a few pinches of salt and pepper. Stir everything together gently.
In a small bowl, whisk the vinegar with the honey; whisk in the remaining 2 tablespoons of olive oil and some more salt and pepper. Stir about two-thirds of the dressing into the salad, taste, adding more if you like. Roughly chop the basil, stir it into the salad and serve.
This salad travels well and is still good the next day!
Southwest Cilantro Lime Corn Salad
Adapted from The Chunky Chef (www.thechunkychef.com)
Serves 6
Similar to my go to corn salad all summer, this one has a lime based dressing! You can add almost any veggie to this salad! You don’t even need to cook that corn, I would just leave it all raw and mix it together!
Ingredients:
2 tsp EVOO
4 cups frozen corn, thawed (or 5 ears of fresh corn)
1/3 – ½ cup diced red bell pepper
1-2 jalapeños, minced
½ medium red onion, peeled and finely diced
½ tsp kosher salt
¼ tsp black pepper
3 Tbs fresh cilantro, minced
1 Tbs lime juice, fresh is best
Directions:
Heat a 12 inch skillet (cast iron works beautifully here) over MED HIGH heat. Add olive oil and heat through.
Add corn, bell pepper, jalapeno, and onion. Cook, stirring occasionally, about 8 minutes, until lightly golden brown.
Season with salt and pepper and stir in cilantro and lime juice.Serving size is approximately 1/2 – 2/3 cup
Grilled Corn and Kale Salad
Adapted from Adams Farms (www.adamsfarms.com)
Serves 4
Grill those veggies and use those fresh herbs, this is delicious!
Ingredients:
4 ears fresh corn, husks and silks removed
4 Tbs EVOO, divided
3 cups trimmed and coarsely chopped kale leaves
1 ½ cups diced tomatoes
½ cup diced red onion
¼ cup chopped fresh basil
¼ cup white wine vinegar
2 Tbs fresh lemon juice
Directions:
Coat grill rack with nonstick cooking spray. Preheat grill to medium-high (350°F to 400°F). Brush corn evenly with 1 tablespoon of the oil.
Grill corn, uncovered, 10 to 15 minutes or until tender, turning frequently. Remove from grill and let cool.
When cool enough to handle, cut kernels from cob and place in a large bowl; set aside.
Drizzle 1 tablespoon of the oil over kale; toss gently. Place kale in a grill basket or on a sheet of heavy-duty foil. Grill kale 3 to 5 minutes, turning frequently until slightly wilted. Let cool.
To the large bowl add kale, tomatoes, onion, basil, vinegar, lemon juice, remaining oil, and pepper to taste; toss gently to combine. Chill at least 30 minutes before serving.
Spiced Chickpeas with Wilted Kale and Roasted Carrots
Adapted from Food 52 (www.food52.com)
Serves 4-6
Love this combination, combining kale with carrots…something new with something familiar?
Ingredients:
1 pound carrots
Olive oil
Salt
Freshly ground black pepper
3 shallots, peeled and cut into thin half moons
1 bunch cilantro
1 tsp sumac
½ tsp ground coriander
½ tsp ground cumin
½ tsp ground ginger
½ tsp aleppo chile (substitute 1/4 teaspoon red chili flakes if you must)
2 15 ounce cans chickpeas, drained and rinsed
1 bunch red kale, washed, leaves torn into bite size pieces, stems discarded (substitute any hearty greens)
Juice of 1 lime
3 tablespoons creme fraiche
Directions:
Preheat the oven to 450 degrees. Using a chef knife, remove and discard the top of each carrot. Wash the carrots in cold water, but do not peel them (they look beautiful when roasted with the skin on). Cut the carrots into bite size pieces.
Line a rimmed baking sheet with parchment paper. Place the carrots on the rimmed baking sheet in a single even layer. Toss the carrots with olive oil to coat, and season them with salt and freshly ground black pepper. Cook for 10-12 minutes, until the edges begin to caramelize. When the carrots are just cooked through and beginning to brown, remove them from the oven and set them aside to cool.
While the carrots are cooking, set a large skillet over medium heat, and add enough olive oil to barely cover the bottom of the skillet. Add the shallots, and season lightly with salt. Cook the shallots until they become soft and start to turn translucent, stirring occasionally. While the shallots are cooking, separate the cilantro leaves from the stems. Save the leaves in the refrigerator for later. Organize the stems into a single even pile (like a bunch of chives) and slice the cilantro stems into very thin slivers.
By the time you finish dicing the cilantro stems, the shallots should be soft and translucent. Add the diced stems to the skillet, along with the sumac, coriander, cumin, ginger, and aleppo chile. Stir, cooking for 1-2 minutes, until the oil smells fragrant. Add the chickpeas, and stir to coat them in the flavorful oil. Cook for 2 minutes, to allow the chickpeas to take on some of the flavor of the skillet. Add the kale, and stir to help the kale begin to wilt. Season lightly with salt.
When the kale has begun to wilt, remove the skillet from the heat. You do not want to overcook the kale (it will shrink too much). The moment when the kale leaves are no longer raw is the time to remove the skillet from the heat (the kale leaves will soften and darken slightly in color).
Add the lime juice and stir. Add the creme fraiche and stir. The residual heat from the skillet should melt the creme fraiche and create a delicate sauce. Taste a few chickpeas and a small piece of kale. Adjust with more salt and/or lime juice as necessary.
Add the roasted carrots, and gently stir to incorporate. Serve immediately, or serve at room temperature. Garnish with a handful of chopped cilantro leaves. Enjoy.
Zucchini Kohlrabi Carrot Fritters with Herb Yogurt Sauce
Adapted from Karalydon (www.karalydon.com)
Total time ~35 minutes
Serves 8
Fritters is considered an exit strategy by many members; you can use such a large variety of your box this way!
Ingredients:
For the Fritters:
1 medium-large zucchini, grated
1 spring onion, minced
3 small carrots, peeled and grated
2 small kohlrabi, leaves removed, peeled and grated
¼ cup chopped parsley
1 egg
¼ cup flour
¼ tsp garlic powder
¼ tsp salt
¼ tsp pepper
3 Tbs EVOO
For the Yogurt Sauce:
1 cup low-fat Greek yogurt
½ Tbs lemon zest
½ Tbs chopped parsley
1 Tbs avocado oil
1/8 tsp salt
Directions:
For the Fritters:
Combine zucchini, carrots, kohlrabi, and spring onion in a cheese cloth* and wring out any excess water. Transfer to a medium mixing bowl.
Add egg, flour, garlic powder, salt and pepper and mix to coat evenly.
Add olive oil to cast iron skillet (or a regular frying pan is OK) over medium-high heat. Once oil is hot enough, drop 1/4 cup of fritter batter into the pan and flatten out with a spatula. Depending on the size of your skillet, cook a few fritters at a time, leaving space in-between. Cook for a 3-5 minutes on each side, or until golden-brown and crispy.
Transfer cooked fritters to a paper towel to absorb some oil. Serve with yogurt sauce.
For the Yogurt Sauce:
Mix yogurt, lemon zest, parsley, avocado oil, and salt until combined. Serve alongside fritters.
*If you don’t have a cheese cloth, add veggies to a strainer and sprinkle with salt and let sit for 10 minutes and then wring out excess liquid with hands.
**To save time, shred vegetables in a food processor instead of hand grating them.
Kohlrabi Fries
Adapted from Rachel Ray (www.rachelray.com)
Serves 2
If you’re looking for easy you’ve found your kohlrabi recipe!
Ingredients:
2 kohlrabi roots, stems and leaves removed
1 tsp EVOO
½ tsp ground cumin
½ tsp chili powder
Directions:
Preheat oven to 425°F. Wash the kohlrabi, then use a sharp paring knife or good vegetable peeler to peel. Cut them into thin strips.
In a medium bowl, toss the kohlrabi fries with olive oil, chili powder and ground cumin, coating them evenly.
Spread the kohlrabi in a single layer on a baking sheet and bake for 25 minutes, flipping once, until they are soft and getting blistered and dark on the outside. Remove and eat warm.
Kale, Black Bean and Red Chile Tacos with Queso Fresco
Adapted from Food and Wine (www.foodandwine.com)
Total time ~50 minutes Serves 4
Great way to have a plant based meal! Taco Tuesday can have a new spin this week.
Ingredients:
3 Tbs oil
8 guajillo chiles (about 2 ounces), stemmed and seeded
2 cups boiling water
3 garlic cloves, chopped
½ tsp dried oregano, preferably Mexican
¼ tsp freshly ground black pepper
Salt
½ tsp sugar
1 bunch of kale, stems discarded and leaves cut into 1/2-inch-wide strips (about 8 cups)
One 15-ounce can black beans, drained and rinsed
¼ cup crumbled queso fresco or farmer cheese (1 ounce)
12 warm corn tortillas, for serving
Directions:
In a medium saucepan, heat the oil. Add the chiles in batches and toast over moderately high heat until pliable and fragrant, about 1 minute. Using tongs, transfer the chiles to a heatproof bowl and cover with the boiling water; set a plate on top to submerge the chiles. Let stand until softened, about 20 minutes. Reserve the saucepan and oil.
Drain the chiles, reserving 2/3 cup of the soaking liquid. Transfer the chiles and their soaking liquid to a blender along with the garlic, oregano and pepper and puree until smooth. Strain the chile puree through a fine sieve.
Reheat the oil in the saucepan. Add the chile puree and ¾ cup of water and cook over moderate heat, stirring constantly, until slightly thickened, about 5 minutes. Season the chile sauce with salt and the sugar.
Add the kale and black beans to the chile sauce and cook, stirring occasionally, until the kale is wilted and the beans are hot, about 5 minutes. Transfer to a wide bowl and sprinkle with the queso fresco. Serve with the warm tortillas.
Kale Rice Bowl
Adapted from Food and Wine (www.foodandwine.com)
Total time ~30 minutes Serves 4
Love the combination you could come up with for this bowl.
Ingredients:
2 Tbs oil
5 garlic cloves, thinly sliced
2 Tbs chopped peeled fresh ginger
¾ pound ground pork
1 pound red kale (2 bunches), stemmed and leaves torn into large pieces (16 cups)
1 Tbs Asian fish sauce
1 cup mixed chopped basil and cilantro
Kosher salt
Pepper
Steamed rice and Sriracha, for serving
Directions:
In a large nonstick skillet, heat the oil. Add the garlic, ginger and pork and cook over moderate heat, stirring, until the pork is just cooked through, 3 minutes.
In batches, add the kale and stir-fry until tender, about 5 minutes. Stir in the fish sauce and herbs and season with salt and pepper.
Serve with rice and Sriracha.
Mashed Kohlrabi and Cauliflower
Adapted from The Lemon Bowl (www.thelemonbowl.com)
Serves 4
Much lighter version of mashed potatoes!
Ingredients:
1 head cauliflower cut into florets
1 kohlrabi peeled and cut large chunks
½ cup plain yogurt low fat or Greek yogurt
1 Tbs horseradish
1 tsp sea salt
½ tsp pepper
¼ cup chives minced + 2 Tbs for garnish
Directions:
Using a steamer basket, bring 3 inches of water to a boil then add cauliflower and kohlrabi.
Steam until veggies are fork tender – about 8-10 minutes. Once veggies are cooked, pour out the cooking water and remove steamer basket.
Add veggies back into the same pan and use a potato masher to smash the cauliflower and kohlrabi together.
Next, add in yogurt, horseradish, salt, pepper and ¼ cup of chives.
For an even smoother texture, use an immersion blender or electric mixer. Serve with extra chives on top.
Spicy Roasted Carrots
Adapted from Cooking Light (www.cookinglight.com)
Serves 4
A different spin on those simple roasted carrots!
Ingredients:
12 ounces trimmed small carrots with tops
2 tsp EVOO
½ tsp ground cumin
½ tsp paprika
¼ tsp ground cinnamon
¼ tsp kosher salt
3 Tbs light sour cream
1 Tbs fresh lime juice
¼ cup chopped toasted unsalted pistachios
1 Tbs cilantro, chopped
Directions:
Preheat oven to 425°F. Toss together trimmed small carrots with tops, olive oil, ground cumin, paprika, ground cinnamon, and kosher salt in a bowl. Place carrots on a rimmed baking sheet lined with parchment paper.
Bake until tender, about 15 minutes.
Combine light sour cream and fresh lime juice in a bowl.
Place carrots on a platter; top with sour cream mixture, ¼ cup chopped toasted unsalted pistachios, and 1 Tbs chopped fresh cilantro.
Spiced and Seared Flank Steak with Carrot Mash and Snap Peas
Adapted from Cooking Light (www.cookinglight.com)
Total time ~25 minutes Serves 4
Just leave those snap peas out and sub in another veggie from your box!
Ingredients:
2 cups water
2 cups finely chopped carrot
2 Tbs unsalted butter
1 Tbs light sour cream
¾ tsp salt, divided
1 tsp garlic powder
1 tsp paprika
¾ tsp black pepper, divided
1 pound flank steak
1 Tbs EVOO, divided
1 (12-oz.) pkg. frozen steam-in-bag sugar snap peas
1 Tbs unseasoned rice vinegar
Directions:
Bring 2 cups water and carrots to a boil in a medium saucepan over medium-high. Cover and cook 15 minutes or until tender; drain. Place carrots in a bowl with butter, sour cream, and ¼ teaspoon salt; mash with a fork until almost smooth
Combine remaining 1/2 teaspoon salt, garlic powder, paprika, and 1/2 teaspoon pepper in a small bowl; rub over steak. Heat 1 1/2 teaspoons oil in a large nonstick skillet over medium-high. Add steak to pan; cook 5 minutes on each side. Let stand 5 minutes. Cut across the grain into slices
Cook snap peas according to package directions. Add remaining 1 1/2 teaspoons oil and snap peas to pan; cook 3 minutes or until lightly browned, stirring frequently. Stir in remaining ¼ teaspoon pepper and vinegar.
Serve snap peas with carrot mash and steak.
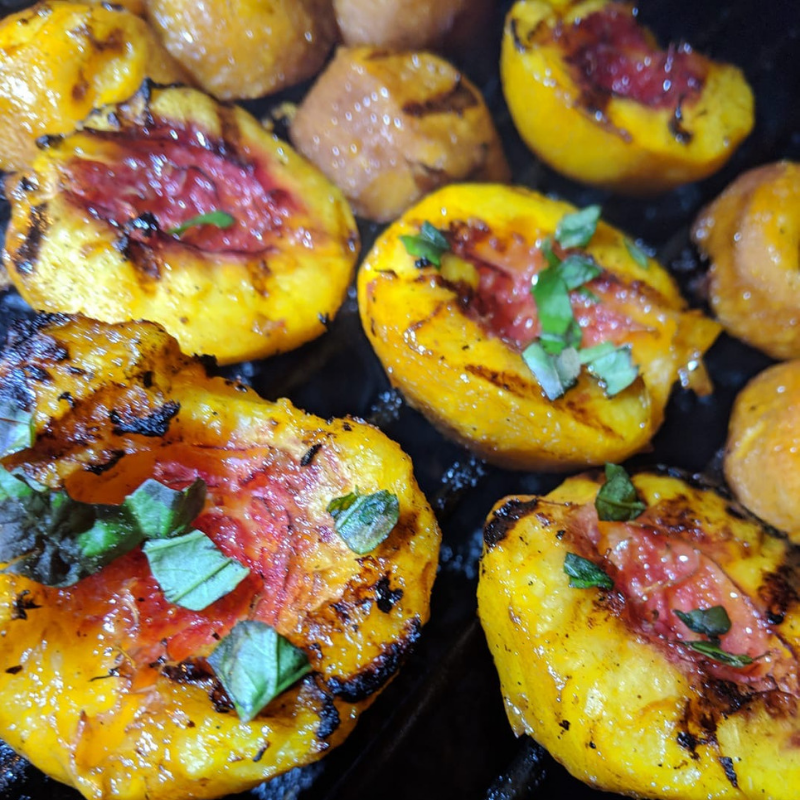
Grilled Peach, Onion and Bacon Salad with Buttermilk Dressing
Total time ~45 minutes Serves 8
Dare you to try this! Someone passed it along to me with rave reviews!
Ingredients:
¼ cup mayonnaise
¼ cup sour cream
¼ cup buttermilk
2 Tbs chopped mint
2 Tbs chopped parsley
2 Tbs snipped chives
1 tsp apple cider vinegar
Salt
Freshly ground pepper
1 pound thick-sliced bacon
¼ cup light brown sugar
½ tsp cayenne pepper
3 pounds Vidalia or other sweet onions, cut into 1-inch-thick slabs
Extra-virgin olive oil, for brushing
4 large ripe peaches, cut into 1/2-inch wedges
Directions:
Preheat the oven to 325°. In a small bowl, whisk the mayonnaise with the sour cream, buttermilk, mint, parsley, chives and vinegar and season with salt and pepper. Refrigerate.
Line a large rimmed baking sheet with parchment paper. Arrange the bacon slices on the sheet in a single layer and sprinkle with the brown sugar and cayenne. Bake for about 25 minutes, until caramelized (the bacon will crisp as it cools). Let cool, then cut the bacon into bite-size pieces.
Meanwhile, light a grill or preheat a grill pan. Brush the onions with olive oil and season with salt and pepper. Grill over moderate heat, turning occasionally, until softened and browned, 10 minutes. Separate the onions into rings. Brush the peaches with olive oil and grill over moderately high heat until tender, 2 minutes. Transfer to a plate.
In a large bowl, toss the onions with the peaches and bacon. Add the buttermilk dressing and toss to coat. Serve right away.
Peach Crostata
Adapted from Fifteen Spatulas (www.fifteenspatulas.com)
Total time ~55 minutes Serves 8
Ingredients:
2 lbs fresh peaches
¼ cup brown sugar
¼ tsp ground cinnamon
2 Tbs spiced rum
1 tsp vanilla extract
1 Tbs lemon juice
2 Tbs flour
1 standard pie crust
1 Tbs heavy cream
2 Tbs turbinado sugar
Directions:
Preheat the oven to 400 degrees F.
Cut the peaches into quarters, then cut the quarters into quarters, for a total of 16 slices per peach.
Toss the peaches in a big mixing bowl with the brown sugar, cinnamon, spiced rum, vanilla extract, lemon
juice, and flour. Set this mixture aside.
Roll the pie crust out into a big circle, about 12 inches in diameter. Don’t worry if it’s not a perfect circle.
Transfer the pie crust onto a rimmed baking sheet.
Dump the peaches, along with any of the liquid in the bowl, onto the center of the rolled out pie crust, leaving a 2 inch rim on all sides of the peaches.
Distribute the peaches as necessary to form into a relatively flat layer (it’s okay to have the peaches piled up on top of each other).
Fold the sides of the pie crust up and over the peaches, then brush the crust with heavy cream.
Sprinkle turbinado sugar all over the heavy cream brushed pie crust. Bake the crostata for about 40 minutes until the edges are golden brown and the peaches are bubbling.
Serve warm with a big scoop of ice cream, if desired. Enjoy!