Week 6 CSA Newsletter 2019
July 28-August 3, 2019 | “B” Week
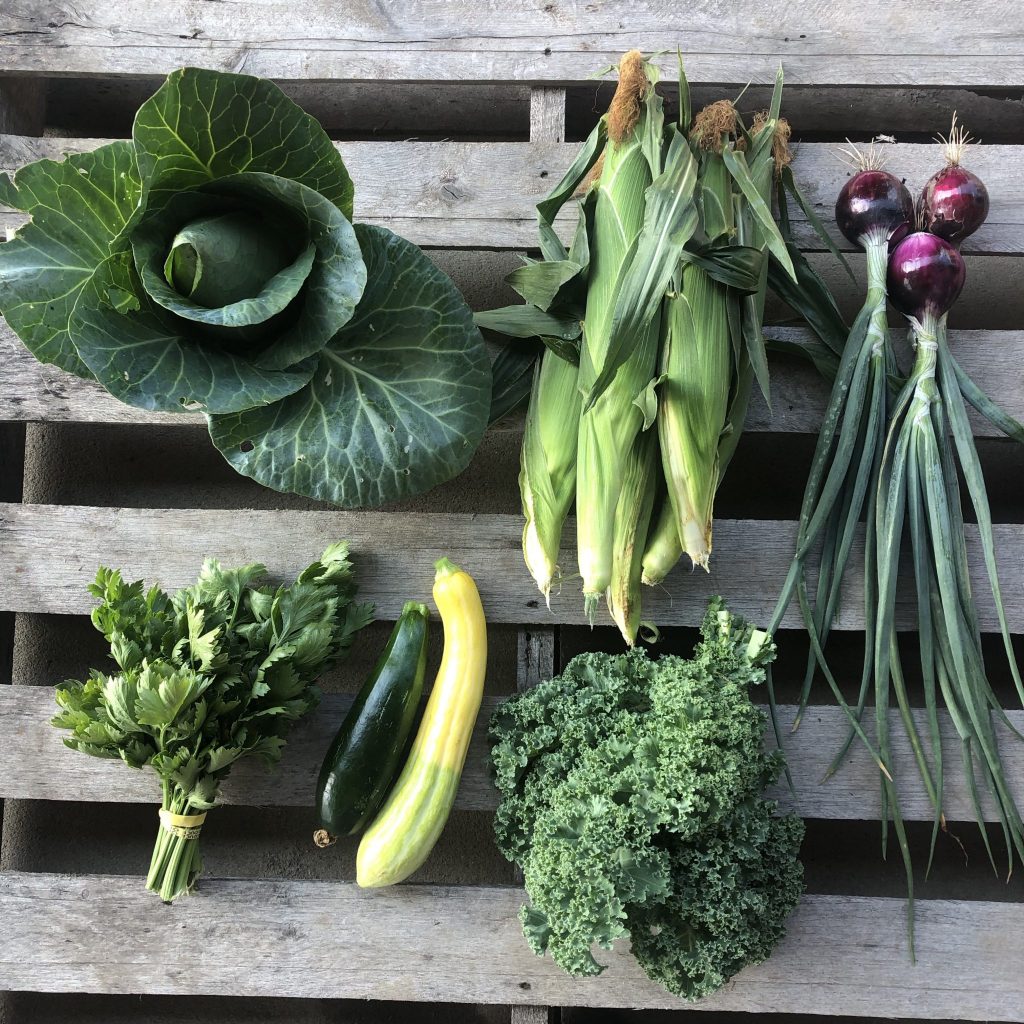
IN YOUR VEGGIE BOX THIS WEEK:
SWEET CORN (not organic) ~ Standard boxes get 6 ears. Large boxes get 12. This sweet corn comes from our parents David and Cindy Bench. They farm this crop conventionally. That’s why we make it an optional item on the extras table. (Don’t worry… we bring enough for everyone). It is also known for being the best sweet corn in NW Ohio. Sweet corn turns starchy the longer you store it, so for best taste, eat this within a few days. Keep the cobs in their husk until ready to use in your fridge. Take off the outer leaves and silks inside when ready to eat. Then remove any worm-damaged tip with a knife. You can also eat this corn raw. Just cut the kernels off the cob with a knife, and add to salads.
RED ONIONS ~ Cut the tops off. The tops can be chopped off and frozen in 1-inch segments in a freezer bag! Add them to chilis, chicken noodle soup, salad, Mexican dishes.The bulbs of the onions should be stored in the fridge, since they have not yet been cured/dried. They will last about 2-3 weeks. You can also chop up those onion bulbs and freeze them in a Ziploc for later too!
KALE ~ Store kale in a Debbie Meyer Green bag and place in your fridge. Try to use it within 5 days as it will get limp. Slice out the rib and saute the leaves. Or chop them fine and add to salads. I like to blanch and freeze and add them to soups/stews/green cubes. They’re also good for kale chips. Here’s a recipe for kale salad that is Jed’s FAVORITE salad he takes to school.
ZUCCHINI (extra’s table) ~ Store zucchini in your fridge crisper drawer in a Green bag. When you’re ready to eat it, cut the ends off. Peel if desired. If the zucchini is large, cut long-ways, and scoop out the seeds inside. Then dice. Zucchini is also good for making “stuffed zucchini boats!”
CELERY ~ This is fresh celery, and its stalks will be thinner than the water-pumped stuff you buy at the grocery store. That translates to stronger celery flavor. This is a majorly popular item in the box each year. Store in the fridge in a bag. Wrap the bottom in some foil. If it goes limp on you, crisp it up by putting the ends in water.
ARROWHEAD CABBAGE ~ So named for its pointy-head, this cabbage will store for a LOOONG time in the back of your fridge. I like to wrap mine in a Green bag. Before use, remove the outer limp leaves. Use for cole slaw, sauteed cabbage (with salt and pepper and onions), for making a DIY lacto-fermented jar of sauerkraut.
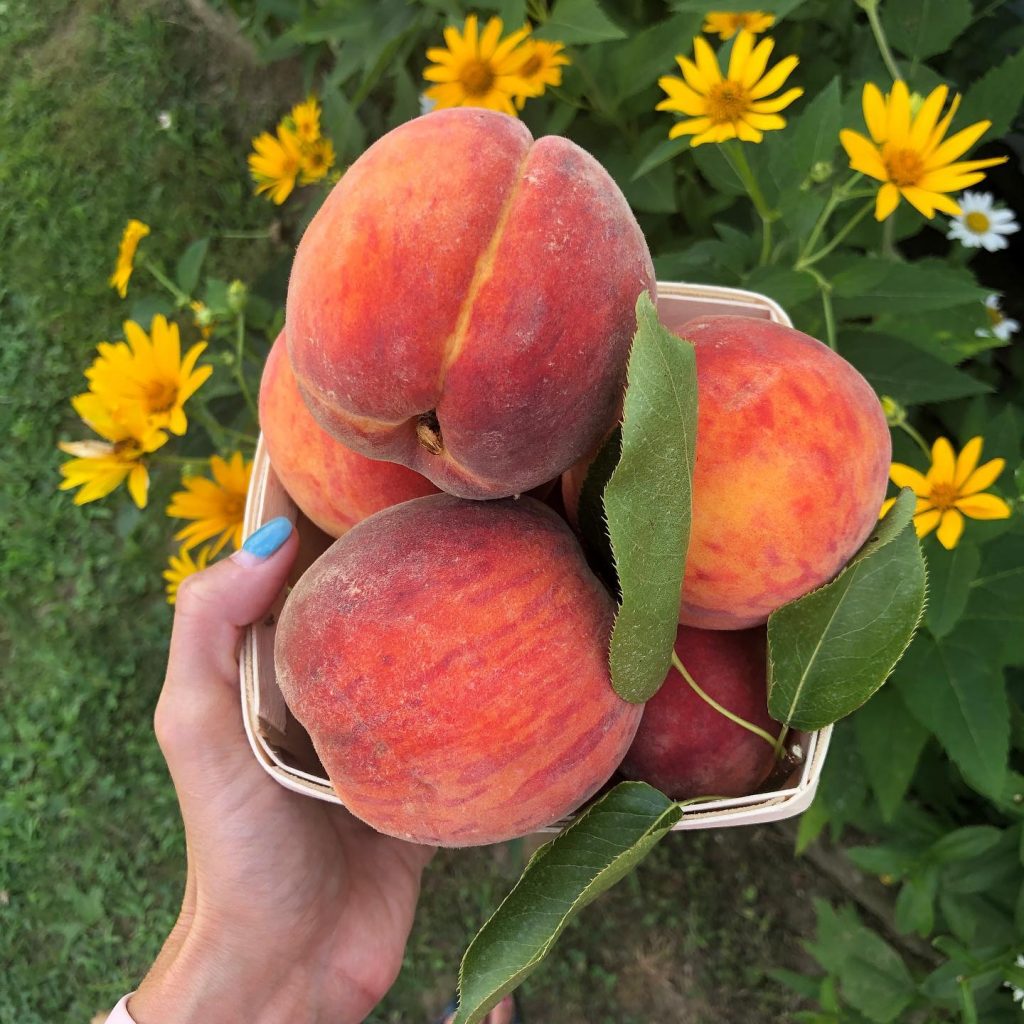
Photo courtesy of Quarry Hill Orchards.
FRUIT SHARE
PEACHES ~ If the peaches are still hard, leave them out on the counter top until they ripen and soften up. Then refrigerate in a plastic bag. Once you refrigerate them, you stop the ripening process.
BLUEBERRIES ~ you’ll be getting a pint of blueberries this week from Michigan — sourced through Ben’s connections as a fruit grower. I’m pretty sure you’ll just eat these out of hand in about 5 minutes. If for some reason you don’t eat them right away, refrigerate immediately.
BLACKBERRIES ~ a half pint portion. Short shelf life. So eat them fast. To keep them lasting longer, try dousing them in a vinegar bath — 8 cups water to 1 cup vinegar. (The vinegar kills off any of the spores). Then dry and store in fridge.
MADDIE & BELLA COFFEE: Kenya Embu – bright, sweet cranberry, dark chocolate tones
WEBER RANCH EGGS: It’s “B” week! Remember, because we doubled up on eggs a few weeks ago to catch up on our over-supply — we will be ending the egg share earlier than the rest of the CSA season.
CHEESE (NO CHEESE THIS WEEK) ~ The week 5 Black Rock hard cheese will be delivered to all our Sylvania customers this week who should have gotten it last week.
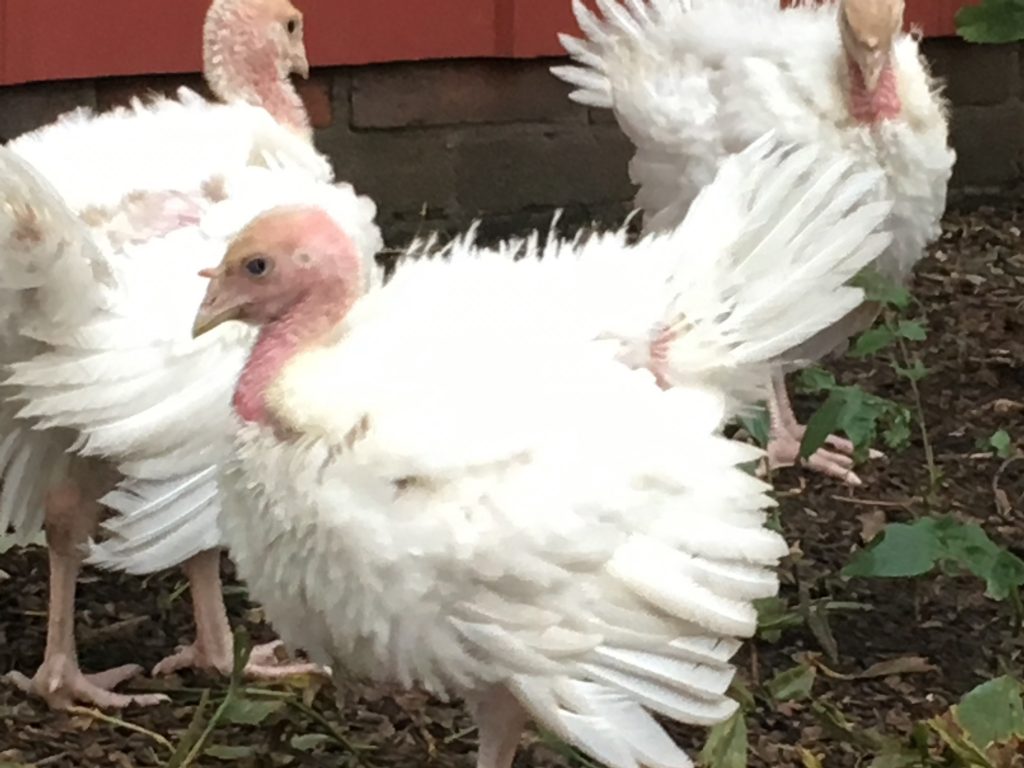
Turkeys for Thanksgiving are for sale now through Weber Ranch’s website.
TURKEYS & THANKSGIVING SHARES
It’s time to place your orders for Thanksgiving turkeys with Weber Ranch. Tony & Michelle Weber from Weber Ranch are partnering with us to provide you with vittles for your Thanksgiving dinner. You can order the turkey directly from their website. See details below.
VEGETABLE ORDERING DETAILS:
In years past, we have also offered a Vegetable share to go along with this Thanksgiving turkey. This year, we are changing things up a bit. Instead of a prepaid vegetable share, SLF will be offering a big “Thanksgiving Pop Up” market pre-order 2 weeks before Thanksgiving in our online store. At that time, you’ll be able to order WHATEVER you want in large quantities. That way, you get to pick and choose the veggies you really want and get the quantities you really need. (This also helps us, because we can just concentrate on growing the things that do well in the fall.)
We will offer two pick up locations for this Pop-Up market.
- Either Weber Ranch (same date/time as listed below) so you can grab your turkey at the same time
- OR we’ll have a pickup at our farm that weekend for “Veggie only” customers.
Either way, ORDER YOUR TURKEY NOW. And trust us… we’ll let you know about our Veggie Thanksgiving Pop Up Market when we hit November.
TURKEY ORDERING DETAILS:
Order from Weber Ranch here. You pay $38 downpayment to order. This deposit is for the first 8 lbs of your bird. $4.75/lb. The remaining balance is due upon pickup based on the finished weight.
Our Thanksgiving turkeys are farm fresh and pasture raised! Each turkey is fresh and not frozen. They come with the neck. Sizes range 11-20 lbs. We DO NOT take size requests as we raise both Toms and hens. **WE DO NOT KEEP GIBLETS**
Pick up date/time: 11/24/19 Time TBA
Location: Weber Ranch 4965 Defiance Pike, Wayne, OH 43466
**Sizes vary year to year as we let our birds free range and grow naturally**
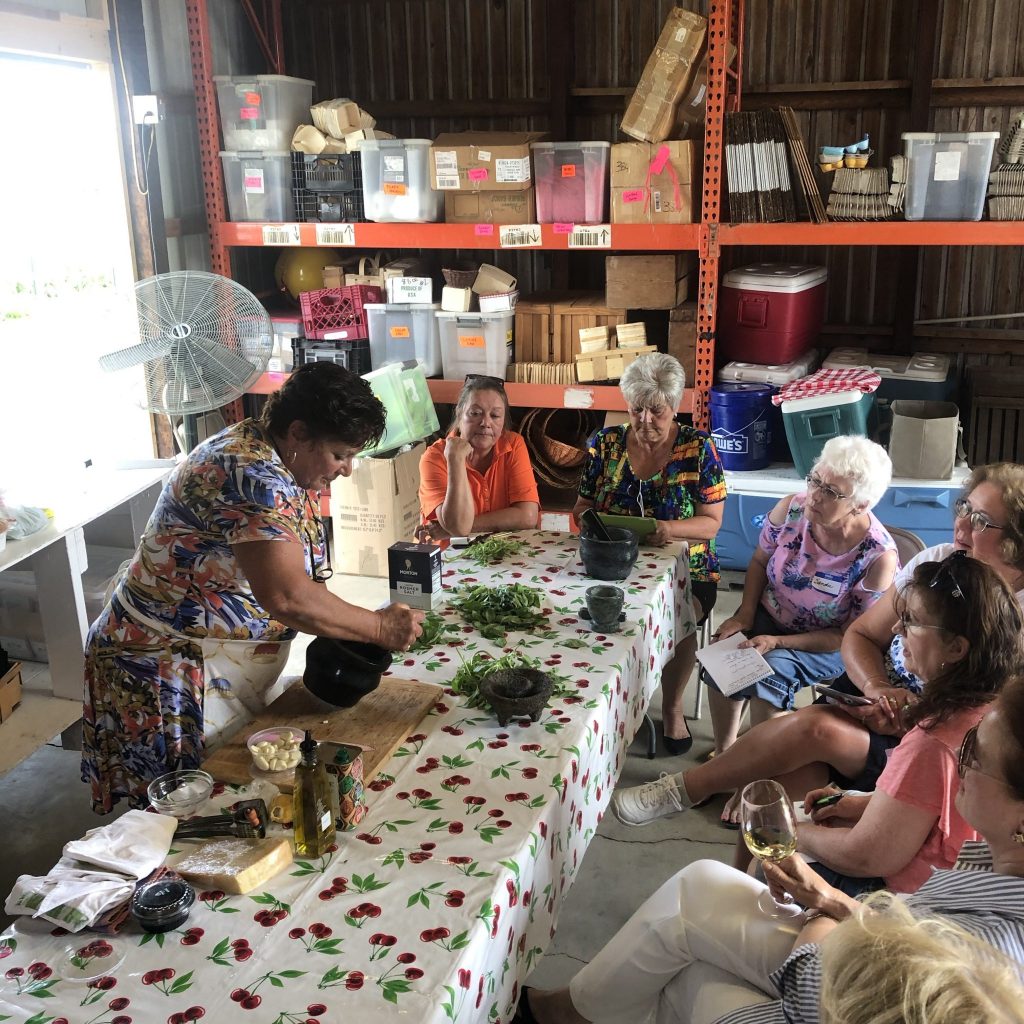
CSA members attend the Pesto with a Pestle cooking class with Diane Rogers of Syd and Diane’s. The pesto’s taste via pestle was incredible.
WEEK 6 ANNOUNCEMENTS
- Watch our weekly Live Unboxing video this Tuesday around 8 PM inside the private Facebook group. Cadie Jardin, our CSA coach and dietitian, will show you what’s in the box, share storage tips and ideas for how to use your product. You can find the Facebook group at this link.Only CSA members or paying members of the Academy can access this group.
- If you want to PRE-ORDER a Thanksgiving turkey from Weber Ranch, please place your order in their online store here. We will be partnering with them again this season for a special pick-up at their farm. See our brief article below that explains how we are doing the Thanksgiving share differently this year.
- Buy your Taste of the Farm Dinner tickets now. We’ve scheduled this paid dinner event for Sunday, September 8, from 6-9 PM. 14 tickets still available. Price: $75 each. Or buy a reserved table for 8 at $600. See details in our article below. Purchase your tickets online here.
- BULK BLUEBERRY orders ~ All remaining orders will be delivered by August 1st.
- BULK CANNING PEACHES ~ We will be taking pre-orders for half-bushel crates of canning peaches, starting next week. We are still in the “Cling” peach stage (when the stone pit remains attached to the pulp.) Once canning peaches are in season, we will let you know!
- The Herb Challenge is HOT! Keep tagging your photo entries #slfherbchallenge now through August 24 for a chance to win $100, $75, or $50 off next year’s CSA fee. For details on the challenge see the Week 5 newsletter here.
FARMER KURT’S FIELD NOTES ~ WEEK 6
Well Update: Still not done. After waiting and waiting for a key part to arrive in the mail, I finally decided to make it myself. I spent Sunday night with my brother machining the plate for the generator head section, using specs emailed by the company. Wouldn’t you know it, I came home to put it on, only to find out it didn’t fit. The very next morning, UPS delivered the same part to my doorstep. (Also didn’t fit). So my brother Arik ordered some more steel. This Monday, we’ll be back at it again — this time using exact custom measurements from our generator head. Pray for my patience, as this is driving me crazy.
Luckily, the weather continues to be in our favor. Last week was a mild temperature week with some occasional showers. We were able to get tomatoes tied again, stake the pepper plants in the high tunnel, knock out some weeding, and a sneak in little bit of planting. Last week, with the scorching heat, I had to push back my planting schedule, as I knew my transplants wouldn’t survive in those conditions. This week was looking perfect — cooler temps. But with the occasional rains popping in, it screwed up my plan. I don’t know if you saw the Facebook post, but I came back on Tuesday night from the Sylvania CSA drop-off to ominous skies and blustery winds. I called in the reinforcements (aka my wife and kids) and I practically ran my way through bed preparation and seeding arugula. I have more winter squash and kale to plant this weekend.
It’s an interesting challenge every week to manage my time. Obviously I have the same repetitive jobs that trump everything else on the list. Sweet corn harvest (every morning), CSA box harvest (every Monday, Wednesday, and Friday morning til 2 PM). Then I have pick up sites on Tuesdays and Thursdays from 3-7 PM. That leaves only certain blocks of time for my crew or me to fit in the other jobs. Makes things tricky when you “have to plant”, have a PLAN to plant, and then… it rains.
SWEET CORN gets harvested at last! A major highlight of the week was when we picked the first crop of sweet corn. I’ve been having so many friends texting me, stopping by — all asking the same question: “Is the sweet corn ready yet?” So when it’s finally here, people go a little nuts over it. My parents can’t keep it in stock at their Roadside Stand on St Rte 2! For the next 2 months, sweet corn harvest will be a part of my daily early-morning ritual. It’s always fun to do the first few times.
There’s a familiar ritual to the first sweet corn harvest for me… Feeling the ears with my hands, checking to see if they’re ripe by grabbing an ear, the sound of pulling back the husk, looking for how plump the kernels are, and then bringing it to my lips and tasting the first juicy kernels. Here’s a video we took this week of the watershed moment. As you can see, my boys tagged along in back so they could be a part of the action (and the tasting). You’ll be getting the first of this sweet corn in your share this week.
Please remember the corn is the ONE thing in our CSA that is not organic, so you will have the option to add it to your box from the extras table. My parents, David and Cindy Bench, have been farming this crop conventionally for decades, and it is their signature product. I hope you enjoy it!
I had to disk up my most recently planted carrot bed. It just wouldn’t germinate well enough. Starting over, but I’m planting a TON for the fall weeks plus extra for all of you who want to freeze them for winter. I harvested my last batch of carrots this Friday. I’ll be buying in a few rounds over the month of August from Wayward Seed farm in Fremont (also certified organic) for the CSA to supplement the boxes, because I know they are a major bonus for you. We are sitting in a bit of a production gap right now… I’m waiting for those peppers and tomatoes to turn. The sweet corn has come at just the right time!
Our rye was harvested this Friday. My close neighbor Gary Bach came in with his massive Gleaner combine to cut it for me. It takes his impressively large header just 2 passes to get my small field cut. I’ve already called Ludwig Mill out in Grand Rapids. They’ll be taking our rye seed and grinding it down for us (as demonstrations too). We’ll then be able to sell that rye flour to YOU this fall.
Until next week! Farmer Kurt
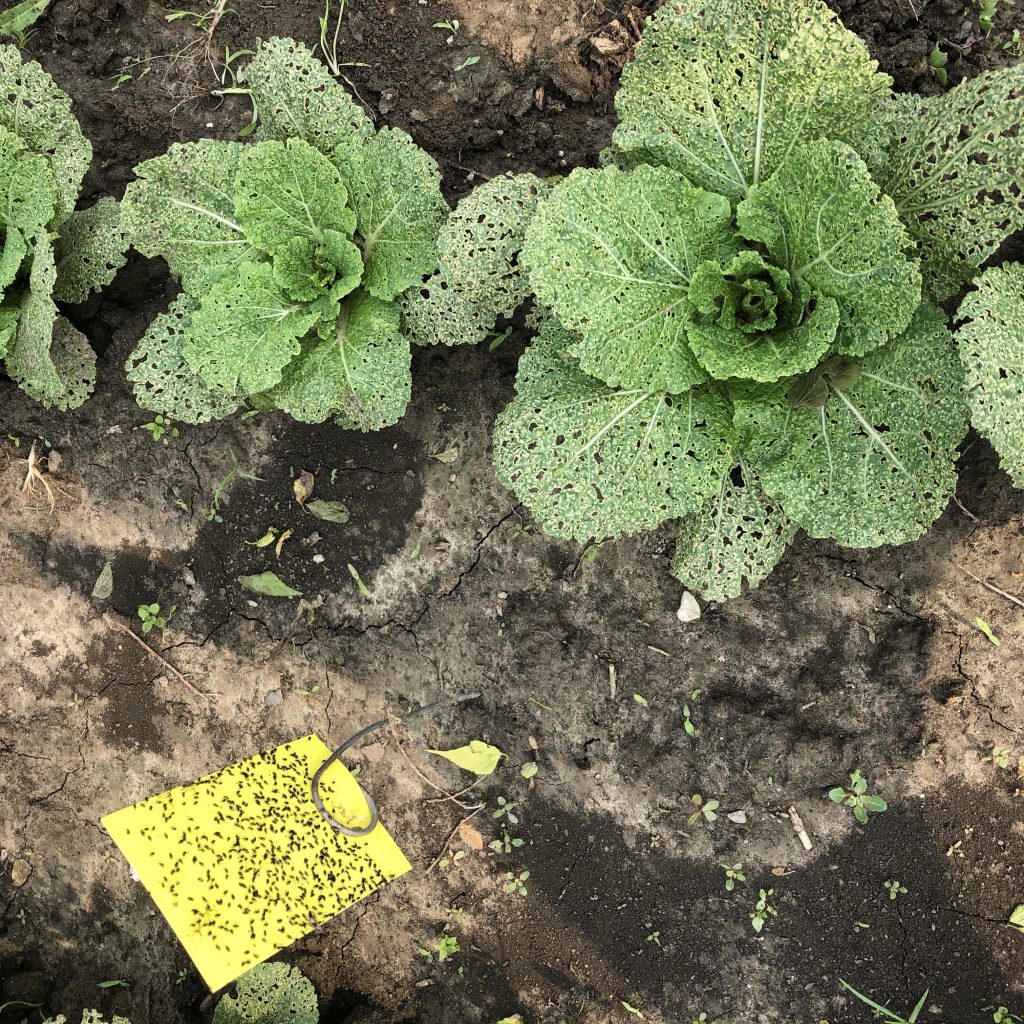
Would you want to eat this? Exactly. This is what happens when flea beetles get out of control. Pest management is a MUST for all farmers. Find out how we combat pests as organic farmers.
Organic Pest Management 101: Do Organic Farmers Spray?
If you signed up for our CSA because we were “certified organic,” you may be wondering, how do you keep those bugs off? What exactly are you doing different?
This blogpost is designed to answer those questions. (Cuz I know you’re asking them).
The reality is that pest management is a necessity for every farmer. Why?…
Because no one likes finding flea beetles in their Napa cabbage or worms on their broccoli — (even gracious, accommodating CSA members).
Americans expect perfect produce.
Grocery store chains also have strict quality standards as a result. If our produce is scarred, misshapen, or marked with a few holes — it’s rejected. (I don’t blame them. They’re just delivering what their customer wants.)
This week, I want to peel back the layers and educate you about how organic pest management works for us as organic growers.
I’m also going to bust a common myth — namely that certified organic farmers don’t spray.
Because we do.
Is your mind blowing up right now? And before you freak out, keep reading because there is WAY more to this story. I’ll spell it all out by the end of this article.
But first things first: Shared Legacy Farms has been certified organic since 2016.
That’s a big deal. And it’s not “easy” to do.
If you see the “USDA Organic” or “Certified Organic” seal on your food, it means that: they are free of synthetic additives like pesticides, chemical fertilizers, and dyes, and must not be processed using industrial solvents, irradiation, or genetic engineering, according to the USDA.

The certified organic seal
To keep our certified status, we have to abide by these rules.
That means there are certain growing practices that are flat out NOT ALLOWED. Many of them revolve around:
- what you can and cannot do to amend your soil,
- what you can and cannot spray on your plants, (there’s that scary word again) — and
- what kinds of seeds you can and cannot use (i.e. no GMOs ever).
We must also document everything we do — from seed varieties and yields per bed row, to compost applications, to wash water concentrations, to soil testing results, to every chemical we spray on our plants. And once a year, a 3rd party inspector comes to the farm and spends several hours grilling Farmer Kurt — all in an attempt to verify that our documentation and practices match the certified organic “standard.”
So let’s talk about those bugs.
Bugs like to feast on our plants.
It’s what they do.
And we can’t take it personally. They’re just trying to survive.
They’ll either eat the leaves and roots, which stunts the plant’s growth and causes it to go into defense mode, or they’ll eat the vegetable itself!
Every farm has a list of top 5 bug offenders. Our pests include thrips (for onions), flea beetles, cucumber beetles, cabbage looper worm, and the Colorado potato beetle.
As certified organic growers, we have several tools in our arsenal for combatting bugs. Here’s a brief summary of the more common ones we use…
8 Organic Preventive Measures for Bugs:
Promoting healthy soil — Farmer Kurt likes to say, “Healthy soil produces healthy plants.” We focus a lot of our energy on the front end trying to build up our soil health BEFORE we ever plant. Cover crops, cow manure, chicken manure, fish fertilizer, molasses, nematodes, mineralization. The theory is that if your soil is balanced, it will create stronger plants with the energy to fight pests off when they come (or at least minimize their damage).
Knowing Bug Life Cycles — So all bugs follow a life cycle. For example, the adult potato beetle lives about 30 days and spends its 4 weeks laying batches of orange eggs on the underside of the leaves. These hatch after 4-10 days into larva. The larva feed for 21 days. They then fall into the soil and form a pupa. They emerge 5-10 days later as an adult, and start the whole process over again. If you know the different phases of the pest’s development, you can create counter-measures to attack them when they are most vulnerable. Or at the very least, you might know when you have a period of relief in bug pressure.

This reflective poly is also a bug deterrant. It disorients the pest known as “thrips” and keeps their population down.
Plastic Mulch — Have you seen any of our pictures of the plastic row covering on our beds? We sometimes use a reflective kind — it looks like aluminum foil. This shiny surface disorients certain bugs and significantly decreases the number that fly down to take a snack. The downside: it’s made of plastic so we have to throw it away after one use. It’s also more expensive than other plastic mulches.
Row cover — If you walk around our fields, you’ll always find a few beds that are currently covered with a big white permeable “blanket.” This is called “Agribon” or row cover. It basically acts as a kind of shield. The bugs can’t get in as long as we keep it covered. However, sometimes they come in through the soil, and then the cover is like a trap that keeps them inside! A double-edged sword. But this usually works well for us with cole crops and leafy greens.
Picking them off by hand — Oh yes. This is fun. When the potato beetles come, we sometimes pluck them off one by one by hand and throw them in a bucket of kerosene — just to keep them from laying more eggs. And I remember a year when our boys collected tomato horn worms (big green suckers) off the tomato plants, threw them in a 5 gallon bucket, and then fed them to the frenzied chickens.
Bug traps — We’ve got several of these that we practice. For example, we fill old milk jugs with water and then paint the surface of the jug with a sticky substance. These jugs are placed every 5 feet in the bed. The water in the jugs heats up during the day. Then at night, the flea beetles flock to its warmth and get stuck. You can also plant an entire bed row of “decoy” crops to lure a certain bug away.

This is a tomato horn worm. It will devour our tomato plants. The white cylinders are actually the pupa of the Brachonid wasp larva, feeding on the insides of the worm.
Beneficial Insects — Sometimes we use the “circle of life” and rules of predator/prey to our advantage. For example, we know that the Brachonid wasp is a natural predator to the tomato horn worm. The female wasp lays its eggs in the body of the worm, and once they hatch, the larvae feed on the insides of the worm until it dies. We buy these wasp eggs and introduce them to our tomato fields at just the right time. It helps a TON.
Spraying the bugs — Wait, did you say “SPRAY?!!”…Yes.
So here’s the part of the blogpost where we bust the myth that organic farmers aren’t allowed to spray.
I assure you, organic farmers ARE legally allowed to spray chemicals on pests. But just certain kinds...
Specifically the kinds that are listed on the approved products list by OMRI (Organic Materials Review Institute). You can see this list here is you want… (We use Entrust, Pyganic, Azaguard most frequently). These OMRI approved products contain a type of naturally occurring biology that causes undesirable effects for the bug. For example, one variety might cause a bug’s exoskeleton to soften. Another disorients the metabolism of the pest so that they die.

This is Agribon — row cover. We use it as as “shield” against the flea beetle.
Kurt scouts for pests on a regular schedule each week. He has learned to pay attention to certain threshold indicators that a pest may be getting out of control. We’ll place bright yellow sticky cards in the beds. The color attracts bugs; they get stuck to the card. And we count the population on the cards periodically to see how bad the pest pressure is. For example, when he notices more than say 5 plants in a given area contain thrips, he will know that he needs to spray to keep them from getting even more out of control.
We also spray fish emulsion and micro-biology/nutrients onto the soil before we ever even plant things. These kind of sprays are for building soil health — nothing to do with bugs.
As I said before, we must document every time we spray something — what we sprayed, how much concentration, which section of what row bed, what day and time, and keep a detailed log.
Can I tell you something?…
I have never posted a picture on Facebook of Farmer Kurt spraying our fields.
And that’s done intentionally. Not because I’m trying to hide it.
But because I don’t want it misinterpreted and taken out of context.
Perception is reality. And a completely legitimate application of fish emulsion or Pyganic could easily be taken for something else entirely to the untrained eye. And suddenly our branding takes an unfair hit.
So we’re just careful.
So if you run into someone else who believes the myth that organic farmers don’t spray… I want you to educate them.
Share with them some of the things you’ve learned in this article. We do a LOT of things to reduce the bug population.
Sometimes they work. Sometimes they don’t.
18 Tickets Left for Farm Fundraiser Dinner
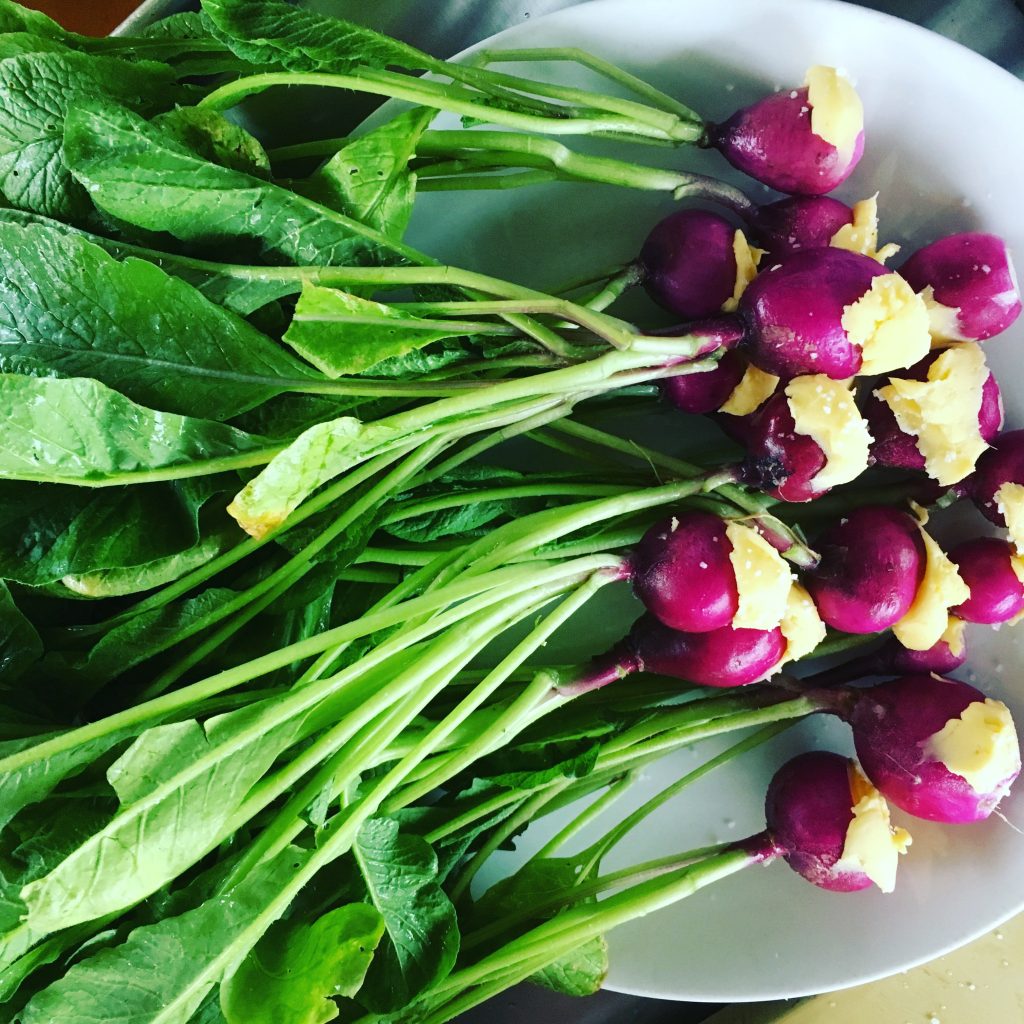
Get your tickets now for the Taste of the Farm dinner event served right in our fields. The date is Sept. 8 (Sunday), from 6-9 PM. Cost is $75 per ticket. (Does not include alcohol). You can also get a table for 8 at $600.
The evening is designed to celebrate our season and bring together the many players who help make our farm a success. Walk our fields while sipping our non-alcoholic cocktail drink (or BYO wine or beer), take a self-guided tour of farm, graze on appetizers, then join us for a sit-down meal served “family style” right in our fields with a beautiful view.
Order your tickets online here.
This event is also a fundraiser for Bistro 163, Food for Thought, and Jewish Family Service Food Bank. All our chefs and food partners have agreed to donate their products and services so we can make a larger donation to our charities!
WEEK 6 RECIPES
Members: You can download these recipes separately as a PDF inside the Membership Academy. Look under the RECIPES section, Week 6.
Kale Salad with Apples & Cheddar
Serves 5, Adapted from New York Times Cooking
This is Jed and Josiah’s favorite salad. Jed routinely makes this for his school lunch.
Ingredients:
4 cups very finely chopped curly kale
2 tablespoons coarsely chopped toasted almonds
1 apple, sweet, like a Fuji, or a sweet-tart, like a Gala, Braeburn or Pink Lady, cored and cut in 1/4-inch dice
1/3 cup dried Craisins
1 ounce Cheddar cheese, cut in 1/4-inch dice
2 tablespoons fresh lemon juice
Salt to taste
1 very small garlic clove, puréed
5 tablespoons extra virgin olive oil
2 tablespoons freshly grated Parmesan
Directions:
Combine the kale, almonds, apple, Craisins, and Cheddar in a large bowl.
Whisk together the lemon juice, salt, garlic and olive oil. Add to the salad, and massage well into the kale. Sprinkle the Parmesan over the top, and serve.
Kale and Cabbage Slaw with Walnuts
Adapted from Cooking NYT (www.cooking.nytimes.com)
Serves 6
A great slaw is a summer staple! Throw in some kohlrabi if you still have some from last week!
Ingredients:
4 cups stemmed, slivered curly kale
Salt to taste
1 Tbs EVOO
3 cups finely sliced or shredded red cabbage
¼ cup finely chopped walnuts
2 Tbs seasoned rice vinegar
2 tsp sherry vinegar
2 to 3 tsp Dijon mustard (to taste)
1 small garlic clove, minced or puréed (optional)
1 Tbs walnut oil
¼ cup plain yogurt
Freshly ground pepper
Directions:
Place the slivered kale in a large bowl. Sprinkle with salt and add 1 tablespoon olive oil. Toss together and massage the leaves with your hands for about 3 minutes. The kale will lose some volume.
Add the cabbage and walnuts to the kale and toss together.
In a small bowl or measuring cup, combine the rice vinegar, sherry vinegar, Dijon mustard, optional garlic, walnut oil, yogurt and salt and pepper to taste. Whisk together and toss with the salad. Taste and adjust seasonings.
Cover and refrigerate for 1 hour or longer before serving. Toss again and serve.
Corn and Zucchini Salad
Adapted from Epicurious (www.epicurious.com)
Serves 6
Corn salads are my obsession during the season, I never cook the corn and I always throw in more veggies!
Ingredients:
1 cup fresh corn kernels (about 2 ears)
1 bunch kale, tough stems and center ribs removed and leaves chopped
½ cup finely chopped onion
1 clove garlic, chopped
¼ cup vegetable broth, no-salt-added or low sodium
¼ cup chopped walnuts and/or slivered almonds, very lightly toasted*
1/8 tsp black pepper, if desired
Directions:
If using fresh corn, boil ears of corn until tender, about 4 minutes. Cut kernels from cobs with a sharp knife. Set aside.
Steam the kale for 15 minutes or until tender. When the kale is done, place in a colander and press to remove excess liquid.
Heat 2 tablespoons water in a skillet over medium-high heat. Saute onion and garlic until soft, about 2 minutes, Add the corn, kale and vegetable broth.
Reduce heat to low and cook until kale and corn are heated through, stirring frequently.
Toss in the lightly toasted nuts and add black pepper if desired.
*toast walnuts and almonds in a preheated oven at 300 degrees for 3 minutes, stirring frequently.
Sautéed Cabbage and Kale
Adapted from My Gourmet Connection (www.mygoumetconnection.com)
Total time ~ 45 minutes Serves 4-6
Simple recipe for any variety of cabbage all season! Sub in any greens you have!
Ingredients:
1 small head of cabbage, chopped
1 lb fresh kale, stemmed and roughly chopped
3 Tbs EVOO
½ cup onion, chopped
2 cloves garlic, very finely chopped
1 Tbs butter
1 bunch scallions (4 to 5), chopped
Salt and freshly ground black pepper
Directions:
Heat the olive oil in a large pan over medium heat. Add the chopped onion and cook for 3 to 4 minutes, until it begins to soften. Add the garlic and continue cooking just until fragrant, 1 minute longer.
Add about 1/3 of the chopped cabbage, season with a pinch of salt and cook until wilted and reduced in bulk. Repeat with the other two batches of cabbage, being sure to season with a bit more salt each time.
Continue cooking, stirring often, until the cabbage is caramelized and golden in color, 15 to 18 minutes. Add the butter, a few grinds of black pepper, and adjust the salt to taste.
Add the kale and continue cooking until it’s wilted and tender, 3 to 4 minutes, then add the scallions cook until they’re slightly softened, but still bright green. Transfer to a serving dish.
Celery Soup
Adapted from Bon Appetit (www.bonappetit.com)
Serves 4
SLF celery is loaded with flavor, a soup is a great way to enjoy this gem! Bonus if you make your own borth with your veggie scraps!
Ingredients:
1 head celery, stalks chopped, leaves reserved
1 large waxy potato, chopped
1 medium onion, chopped
½ cup (1 stick) unsalted butter
Kosher salt
3 cups low-sodium chicken broth
¼ cup fresh dill
½ cup heavy cream
Flaky sea salt (such as Maldon) and olive oil (for serving)
Directions:
Combine celery, potato, onion, and butter in a medium saucepan over medium heat; season with kosher salt. Cook, stirring, until onion is tender, 8–10 minutes.
Add broth; simmer until potatoes are tender, 8–10 minutes. Purée in a blender with dill; strain. Stir in cream.
Serve soup topped with celery leaves, sea salt, and oil.
Celery Spiked Guacamole with Chiles
Adapted from Bon Appetit (www.bonappetit.com)
Serves 8
Add some crunch and flavor to that guacamole for taco Tuesday!
Ingredients:
4 avocados, chopped
1 celery stalk, finely chopped
2 serrano chiles, seeds removed if desired, finely chopped
2 cloves garlic finely grated
3 Tbs fresh lime juice
¼ small red onion, chopped, divided
½ cup chopped fresh cilantro, plus leaves for serving
Kosher salt
Directions:
Mash avocados, celery, chiles, garlic, lime juice, ½ of onion, and ½ cup chopped cilantro in a medium bowl to desired consistency; season with salt.
Top guacamole with remaining onion and cilantro leaves.
One Pot Beef and Cabbage Stir Fry
Adapted from Cooking Light (www.cookinglight.com)
Total time ~25 minutes Serves 4
My Dietitian challenge to you is to add more veggies to this dish! Sneak in some more greens, and add more carrots; leave the sugar out. I promise it will still be tasty!
Ingredients:
½ cup unsalted beef stock/broth
2 tsp cornstarch
2 Tbs oil, divided
12 ounces flank steak, cut against the grain into thin strips
3 ½ Tbs soy sauce (or coconut aminos), divided
1 ½ tsp granulated sugar, divided
4 cups chopped cabbage
1 Tbs minced fresh ginger
4 garlic cloves, thinly sliced
1 cup matchstick cut carrots
¼ cup chopped scallions
1 Tbs toasted sesame oil
1 Tbs sherry vinegar
4 cups cooked brown rice, warm
2 tsp toasted sesame seeds
Directions:
Heat 1 tablespoon oil in a large cast-iron skillet over high. Add steak; cook, stirring occasionally, until browned, 2 to 3 minutes.
Add 1 ½ tablespoons soy sauce and 1 teaspoon sugar. Cook, stirring often, until meat is charred, 1 to 2 minutes.
Remove steak to a plate. Add cabbage, ginger, garlic, and remaining 1 tablespoon oil; cook, stirring often, until cabbage begins to wilt, 2 to 3 minutes.
Add stock mixture, remaining 2 tablespoons soy sauce, and remaining ½ teaspoon sugar. Bring to a boil; reduce heat to medium, and simmer until cabbage is crisp-tender, about 2 minutes.
Stir in steak, carrots, scallions, sesame oil, and vinegar. Cook 1 minute. Serve over brown rice.
Sprinkle with sesame seeds.
Grilled Mexican Street Corn
Adapted from Cooking Classy (www.cookingclassy.com)
Total time ~ 20 minutes Serves 6
A favorite way to enjoy the season’s sweet corn is to grill it! Try this method for a different spin on it!
Ingredients:
6 ears yellow corn, shucked
½ cup mayonnaise
2 Tbs finely chopped cilantro, plus more for garnish
1 small clove garlic minced
1 fair pinch cayenne pepper, plus more for topping, to taste
1 cup finely crumbled Cotija cheese
½ tsp ancho chili powder, then more to taste
Lime wedges, for serving (optional)
Directions:
Preheat a grill to medium-high heat (to about 450 degrees F).
Meanwhile, in a mixing bowl whisk stir together mayonnaise, cilantro, garlic, cayenne pepper. Set aside. Place cotija cheese in a shallow dish long enough to fit corn.
Once grill is preheated, place corn on grill, leaving space between them. Let grill until charred on all sides, turning every few minutes, about 8 – 9 minutes total.
Working with one cob of corn at a time, using a spatula brush all sides with the mayonnaise mixture then lightly roll in cheese to coat with a thin layer (it should look somewhat sparse, don’t overdue it or the cheese will be overwhelming and you won’t have enough to coat all of them).
Transfer to a serving platter or baking sheet and repeat with remaining corn. Sprinkle corn with chili powder then a little cayenne pepper if desired, then turn to opposite side and sprinkle with more chili powder.
Sprinkle lightly with more cilantro and serve with lime wedges if desired.
Chopped Zucchini Salad
Adapted from Martha Stewart
Total time ~10 minutes Makes ~3 cups
Chopped zucchini makes a great quick, cold salad. This one could not be any easier!
Ingredients:
1 medium zucchini, trimmed and cut into 1/2-inch cubes
¾ cup crumbled feta cheese (3 ounces)
3 Tbs EVOO
2 Tbs small dill sprigs
Thin strips lemon zest, plus 1 tablespoon plus 1 teaspoon fresh lemon juice
Coarse salt and freshly ground pepper
Directions:
Toss together zucchini, cheese, oil, dill, and lemon juice.
Season with salt and pepper.
Sprinkle with lemon zest. Enjoy!
Pickled Peach Salad
Adapted from Southern Living (www.southernliving.com)
Total time ~4 hours Makes 4 servings
I’ve heard great things about this “retro” salad, especially how pretty it looks on your table!
Ingredients:
½ cup sugar
½ cup light corn syrup
2 Tbs cider vinegar
1 cup water
2 whole cloves
1 ½ envelopes (1 Tbs) unflavored gelatin
½ cup cold water
2 cups sliced peaches, drained
Directions:
In a saucepan bring sugar, corn syrup, vinegar, 1 cup water, and cloves to a boil over high heat, then lower heat and simmer 20 minutes.
Dissolve gelatin in 1/2 cup cold water. Remove cloves from syrup mixture and add gelatin; stir until dissolved. Add peaches.
Spoon into lightly greased (with cooking spray) 4-ounce molds, dividing fruit evenly. Refrigerate until set, 4 hours.
Unmold and serve on lettuce leaf.
Grilled Balsamic Peaches
Adapted from A Family Feast (www.afamilyfeast.com)
Makes ~3 cups
Such a savory way to enjoy those peaches! Make sure your peaches are ripe and not “too ripe.” If they are too ripe they will get mushy!
Ingredients:
1 cup balsamic vinegar
¼ cup molasses
1 Tbs freshly ground black pepper (you can add more or less based on your tastes but the pepper is really great against the other sweet flavors in this dish)
4 ripe peaches
2 Tbs oil
Directions:
In a small sauce pan, bring vinegar to a boil and reduce to a simmer. Simmer until reduced by half (15-20 minutes). Remove from heat and add molasses and black pepper.
Cut the peaches following the natural line that circles the fruit. Cut all the way down to the pit and just run the knife right around keeping the blade against the pit. Gently grab each half and twist in opposite directions. Then pop the stone out with a paring knife or a spoon.
Heat the grill to medium. Keep glaze warm so it does not harden up.
Brush each cut side with oil and place cut down on the grill. Grill for about 2 minutes and flip. Brush the cooked tops with the glaze and cook for about two more minutes. Remove to a platter and brush on more of the glaze.
Serve with extra glaze on the side.
Balsamic Blueberries and Peaches
Adapted from Epicurious (www.epicurious.com)
Makes 4 servings
Ingredients:
3 Tbs sugar, or to taste
2 Tbs balsamic vinegar
3 cups blueberries (about 1 lb)
1 lb peaches or nectarines, sliced
½ tsp black pepper (optional)
Directions:
Boil 3 tablespoons sugar with vinegar, and 1 cup blueberries in a 1- to 1 1/2-quart heavy saucepan, stirring, 1 minute. Remove from heat.
Combine remaining 2 cups blueberries with peach slices in a large bowl. Toss with hot blueberry syrup and black pepper, then add sugar to taste. Let stand, tossing occasionally, 30 minutes.

