
Week 1 CSA Newsletter 2019
June 24-29, 2019 | “A” Week
CSA Week #1
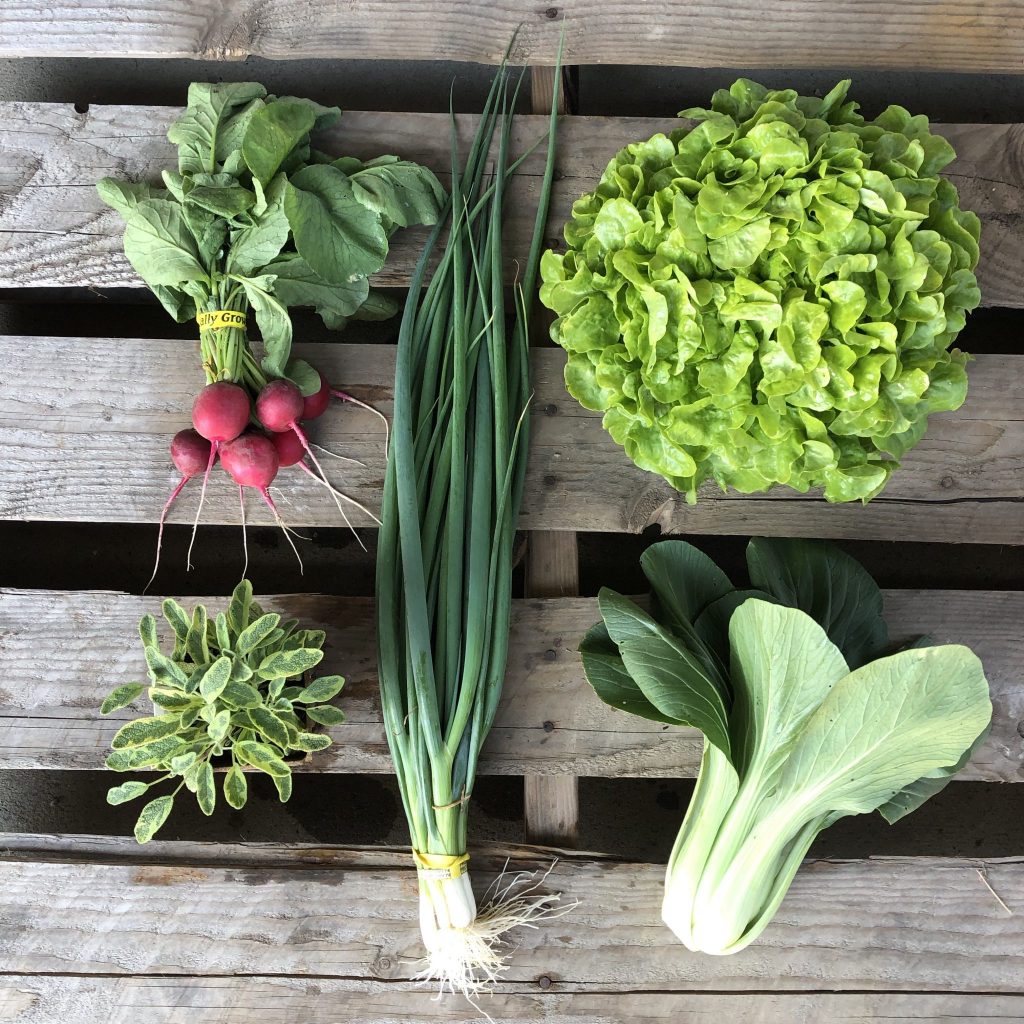
IN YOUR VEGGIE BOX THIS WEEK:
BOK CHOY (WITH STEMS) ~ This Asian green is awesome in a stir fry. You can use the white stems too — chop them and use them like celery for some crunch. Store wrapped loosely in plastic bag (or a Debbie Meyer Green Bag) in the refrigerator.
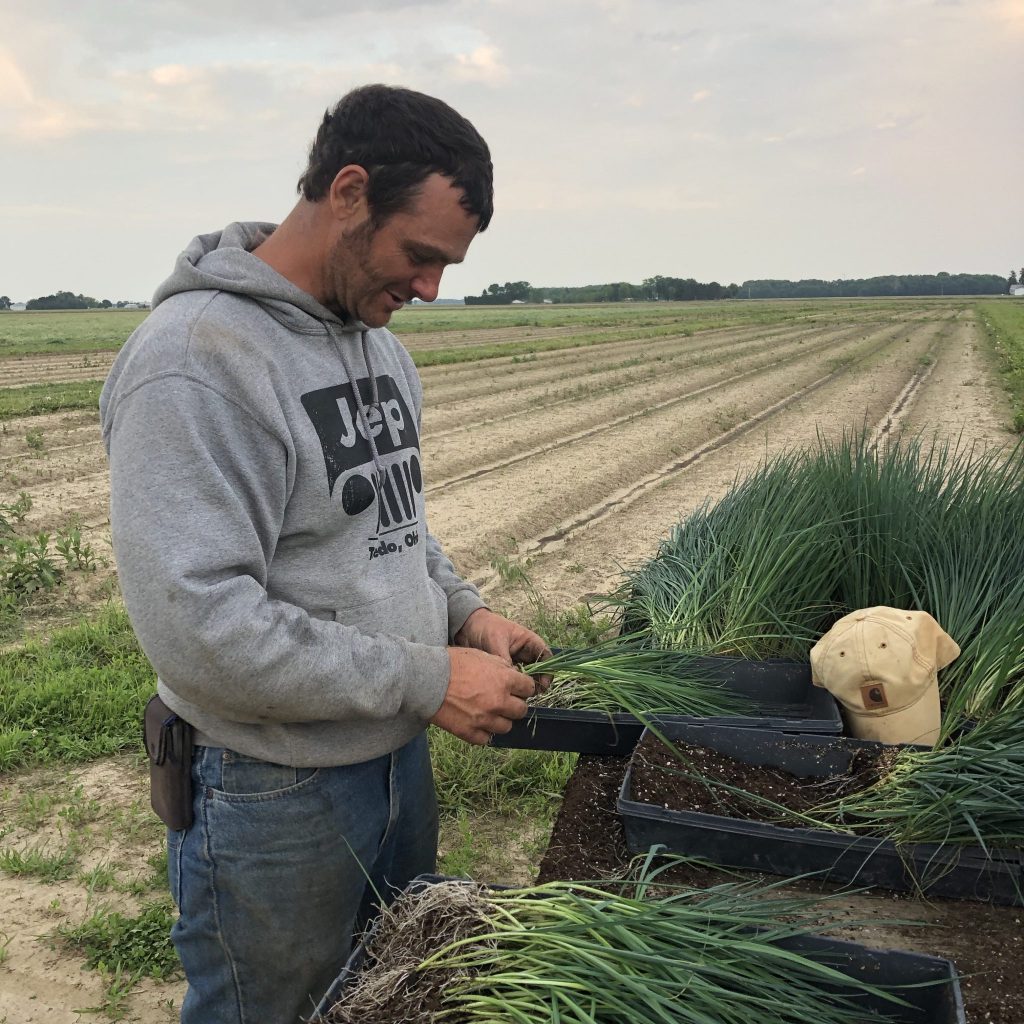
GREEN ONIONS (USE THE TOPS TOO) ~ Also known as “bunching onions,” these are best stored in a jar of water (about an inch worth) in your fridge, with a baggie placed over the top of the greens. (PS: You can use the greens to flavor stir fries of salads, so don’t just compost them! I also freeze the green tops after chopping them about an inch thick.
HEAD LETTUCE ~ I wouldn’t wash this until you’re ready to use it. In the meantime, put your head lettuce in a Debbie Meyer Green bag right away and leave it in the fridge. Use within a week. Lettuce falls into the category of “danger zone veggies” — ie they are in danger of rotting more quickly than other items. So use your lettuce early on in the week for maximum efficiency.
RADISHES (WITH GREENS) ~ Remove radish leaves if they are still attached. Store the unwashed greens in a loosely wrapped plastic bag in the crisper bin of your refrigerator and eat them ASAP. (Try them wilted with a scrambled egg sandwich). Store radish roots dry and unwashed in a plastic bag in the refrigerator for 1 week. I like to sprinkle the red roots with a little salt and just eat them raw! They’re also amazing when pickled. Or try them roasted on a sheet pan with potatoes and carrots. (They taste almost like potatoes).
POTTED HERB (PICK YOUR OWN) ~ At the pick-up site, you’ll be given a chance to “pick your own” potted herb on the extras table. You can either re-pot these herbs into a large pot when you get home OR plant them in your garden. Don’t just leave them in the pot they came in forever — or they’ll never grow very big. Place them in the sun. Water them once a week or as needed. These herbs come from Mulberry Creek Farms — and they are certified organic.
It’s also important to PRUNE your herbs so that they “bush out” and get bigger. Pruning means you cut or pinch off the top 2-3 inches once it gets “too big.” This will stimulate more growth at the cut-point. You’ll need to do this a few times this summer to keep the plant growing. Also be on the lookout for flowers; you want to pinch them off as they form. To see how you prune an herb, watch my video.
FRUIT SHARE
RHUBARB ~ (Fruit share) Rhubarb is actually a vegetable although we think of it as a fruit. It has the same consistency as celery. I store it in a plastic bag in the fridge for up to a week. I’ve also put one end in a glass of water to keep it nice and crisp like celery. This rhubarb comes from our certified organic partner farm Wayward Seed Farm in Fremont. Try making a rhubarb sauce to drizzle over pound cake or ice cream. If you need more ideas, check out our Rhubarb ebook inside the Membership Academy under “Veggie U.” If you’re not a member yet, email me so I can let you in. Membership is free to all CSA members.
SWEET CHERRIES ~ (Fruit share) The local cherry crop is JUST starting to come out, and recent heavy rains caused their earliest crop to split on the trees. So we’ve got a short supply this week. I could tell you all kinds of ways to use your cherries, but frankly, I think you’ll probably just eat them out of hand this week! Be sure to pit these before eating. These cherries come from Quarry Hill Orchard in Berlin Heights, courtesy of Farmer Ben.
CHEESE SHARE
Peppercorn chevre, Flat Rock (French mountain cheese Abondance style), mmBossie Cheddar
NOTE! THERE WILL BE NO PICK UP ON JULY 4TH.
Perrysburg and Port Clinton pick up on July 5th instead.

Perrysburg and Port Clinton customers who normally pick up on Thursdays will pick up their WEEK 2 box next week on Friday, July 5th instead at the same location and time.
PBURG: July 5, 5-6:30 PM at Grace UMC parking lot
PORT CLINTON: July 5, 6-6:30 PM at the Sutton Center parking lot in Port Clinton
*If you would rather come out to the farm to pick up your box on Wednesday night or Thursday July 4th, that can be arranged. Simply email us at slfarms2@gmail.com.
FARMER KURT’S FIELD NOTES
Well howdy everyone! And welcome to WEEK 1!!!
So you may be wondering how things are doing at the farm these days, now that the rains have stopped…
I’m here to tell you things are looking up.
In fact, if you walk our fields right now, you’d say they look pretty darn good. It’s true that this is the wettest spring on record for the last 20 years. And it’s true that very few farmers around my neck of the woods got their soybeans or field corn planted.
But we managed to catch a break and have most of our transplants in the ground now. We’re still behind about 3 weeks, but we are back on schedule with “the new schedule.”
The two main concerns at this point are:
1) the cooler temperatures are slowing things down. A few of our crops like lettuces and broccoli really love the cool temps, but the summer veggies like corn, tomatoes, peppers, and basil are inching along begging for sunshine and heat.
2) some of our transplants may be stressed because they were planted in compacted soil. Plants don’t like compacted soils because there’s less air and it takes more energy to grow extra roots. We’ll just have to see how they do long-term.
Planting windows have been tight. We grabbed them when we could, and I’ve been finding all kinds of volunteers to come out and get things in the ground. But compared to most farmers around us — we feel like we are incredibly lucky and have very little to complain about.
I also “hilled our tomatoes” this past week. This involves driving a tractor over the plants and building up a mound of soil around the sides with a disk. This extra soil acts as a support for the stem and keeps them from bending. Because our overgrown tomato plants were so TALL when they went into the ground, they really needed this extra step to keep them from bending at their delicate stem. Here’s a before/after shot:

I also had to re-seed the summer squash and cucumbers last week since the transplants didn’t survive the long wait in their greenhouse trays. The very next day wouldn’t you know it? Those darn birds had pecked my new seeds right out of the ground.
Sometimes I feel like Farmer McGregor.
So it goes. Carrots are looking good. Lettuce is sweet with full heads. The celery looks strong. We’re caught up on weeding. And I got my organic re-certification documents in by the deadline.

Bartolo punches a hole in the plastic mulch. We had to plant tomatoes by hand because the stems were just too long to fit into the mechanical transplanter.
NEW TRUCK ~ I finally bought a new refrigerated box truck truck. Also known as a “reefer,” this truck is much bigger than our white truck/trailer combo we’ve used the past 10 years. This is going to make packing for pick ups so much easier. Not to mention I can now deliver wholesale orders in bulk without borrowing my friend’s truck all the time.
I had to work hard to get my CFO (aka my wife) to okay this purchase. The compromise entailed me promising to sell off my carrot harvester and my favorite Toyota Tacoma truck to help pay for it. (If you’re in the market for a used Tacoma, give me a shout.) I’ve already got a name for my new reefer. I’m calling her “HINO.” [hee-noh]

Meet the newest member of my farm fleet: HINO.
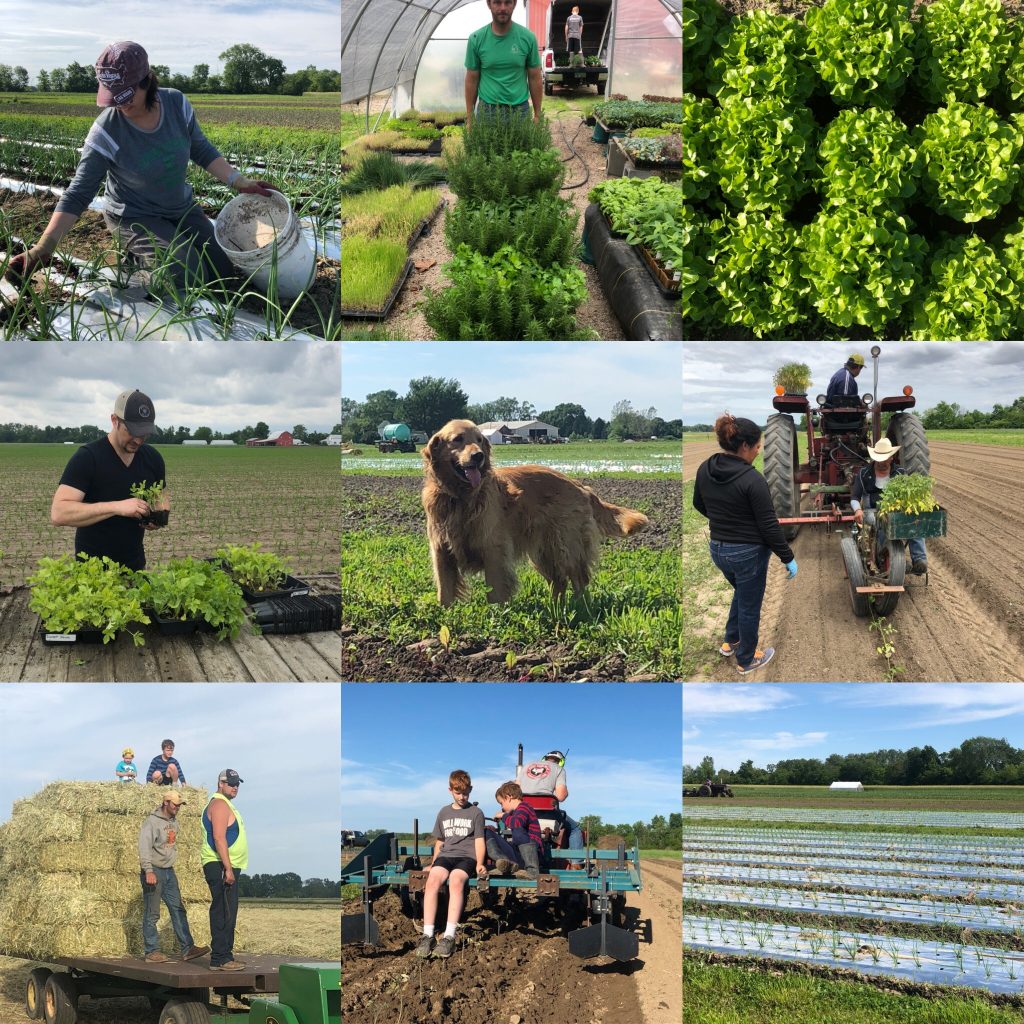
One of the upsides to the Flooding Armageddon was that I’ve had an unbelievable number of folks offer to help us out this spring. God has provided enough help to get us to the other side.
Case in point: with rain on the way a few weeks back, I had just cut my rye field and I needed to bale my straw before the rains came. I called my buddy Jake Flagg. “Sure thing. I’m just sittin’ here drinking beer anyway.” Jake then convinced my neighbor-buddy Josh to come out too. What started out as an overwhelming task turned into a great time with friends. We busted our tails and filled an entire wagon in about 4 hours.
Another case in point: long-time farm supporters Jahnine, Tyler, Wendy, and Chef Scott (from Fowl and Fodder fame) came out to help hoe, plant melons, and mulch 8 beds of onions last week. That involved hauling buckets of wood mulch down long pathways, strewing them onto the mulch and spreading them by hand.
Four hours later: impossible job done.

Jahnine spreads mulch on the onions.
There are lots of stories like this…
- Dee and Mom showing up to plant our tomatoes and peppers.
- Josiah, Jed, and Corinna working playing second shift, planting eggplant and basil until midnight to beat the rain.
- Jen Trombley and her dad spending 4 hours organizing our packing shed.
- Peter Hug coming out to hoe OUR beets first, before tending to his own garden at home.
These are all real stories of a community coming together to back up the farmer.
And because of it, these hard times suddenly don’t feel quite so hard.
They feel downright hopeful.
I’ve been reminded that this CSA thing is so much more than a box of veggies. It’s a bunch of people trying to make the world a better place.
I wanted you to know that you chose the right farm to be a part of this summer. This CSA changes lives, and you’re about to become a witness to it.
Welcome to the family. I can’t wait to see you all this week!
~Your Farmer, Kurt

WEEK 1 ANNOUNCEMENTS
- Don’t forget to bring back your plastic veggie tote on week 2. We’ll sub it out with a fresh one. Please return any egg cartons the following week. Fruit bags should not be returned.
- Watch our weekly Live Unboxing video this Tuesday around 8 PM inside the private Facebook group. Cadie Jardin, our CSA coach and dietitian, will show you what’s in the box, share storage tips and ideas for how to use your product. You can find the Facebook group at this link.
- Sign up for our DIY Mozzarella Class on July 13 from 2-4 PM. Join Instructor Diane Rogers as you work together to make your own mozzarella from scratch in this hands-on workshop. You’ll walk away knowing how to do this at home, plus you’ll get supplies to do your own batch — enough to make a pound of cheese! We’ll have plenty of yummies for tasting. Cost is $55 per person. Please register and pre-pay in Diane’s online store.
- If you’re a new CSA member, we may take your photo at your first pickup. We will not use them in any way other than to learn your name. If you don’t want your picture taken, just decline at the pick up site.
- Bring some cash to pick up. We’ll be selling our insulated bags for $6 each AND we’ll have maple syrup ($10/pint), possibly some cherries and honey too.
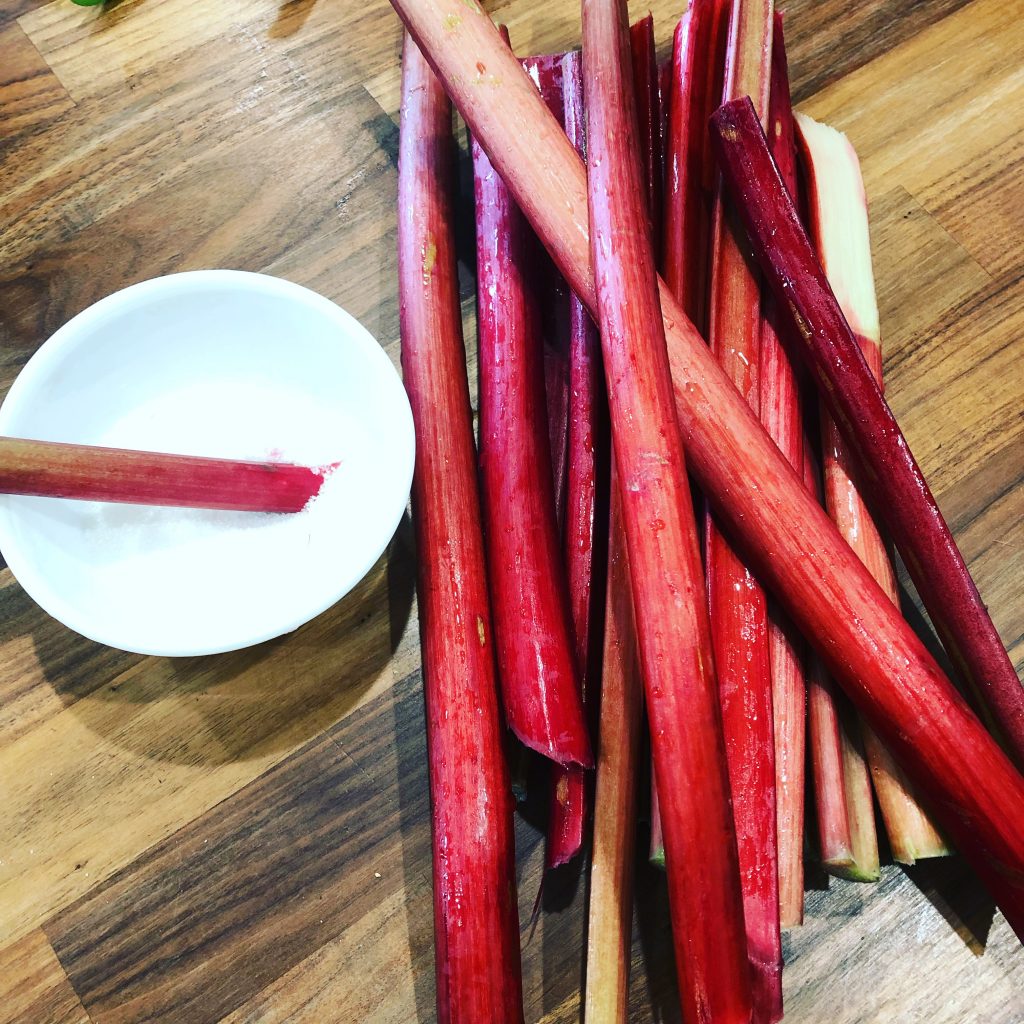
Rhubarb is also just good raw — it’s pretty sour so dip it in a bit of sugar and take a bite!
WEEK 1 RECIPES
Members: You can download these recipes as a PDF inside the Membership Academy.
Pickled Vegetable Lettuce Cups
Adapted from Bon Appetit (www.bonappetit.com) | Serves 8
Pickled vegetables are a go to for a lot of our members! We will talk so much about this throughout the season, or check out the academy and the exit strategies for a tutorial! You could swap out ingredients in this salad if you don’t have all those veggies, use what you have! Veggies can be prepped ahead of time but wait to assemble.
Ingredients:
¼ cup apple cider vinegar
2-3 Tbs white wine vinegar
1 Tbs kosher salt, plus more
½ fennel bulb, thinly sliced
1 small shallot, thinly sliced
1 baby beet, trimmed, scrubbed, very thinly sliced
2 radishes, trimmed, thinly sliced
1/3 cup buttermilk
1/3 cup while milk plain yogurt
1 Tbs lemon juice
Freshly ground black pepper
4 heads of Little Lettuce, leaves separated, or 1 head of romaine, leaves separated, cut in half crosswise
½ cup cilantro leaves with tender stems
½ cup torn mint leaves
Directions:
Combine apple cider vinegar, white wine vinegar, 1 Tbs kosher salt, and ½ cup water in a large bowl. Add fennel, shallot, beet, and radishes and let sit 10 minutes, then drain.
Whisk buttermilk, yogurt, and lemon juice in a small bowl; season dressing with salt and pepper.
Spoon some dressing onto lettuce leaves and top each with some drained pickled vegetables, cilantro, and mint.
Serve with any remaining dressing alongside.
Seared Steak Lettuce Cups
Adapted from Epicurious (www.epicurious.com) | Serves 16
A different spin on your traditional lettuce cups!
Ingredients:
¼ cup finely chopped English hothouse or Persian cucumber
¼ cup thinly sliced scallions
1 ½ Tbs fresh lime juice
1 tsp finely grated peeled ginger
½ tsp kosher salt, plus more
1 (8-oz) flank steak
¼ tsp chili powder
16 small crunchy inner leaves of butter lettuce, romaine, or endive
2 Tbs chopped salted roasted peanuts
2 Tbs thinly sliced fresh mint leaves
Sweet Asian sauce as garnish
Directions:
Combine cucumber, scallions, lime juice, and ginger in a medium bowl. Season to taste with kosher salt and set aside.
Heat a grill pan or a lightly oiled cast-iron skillet over high heat. Season steak with 1/2 teaspoon salt and 1/4 teaspoon chili powder. Grill steak, turning once, until charred on both sides, about 8 minutes for medium-rare.
Transfer to a cutting board and let rest for 10 minutes.
Arrange lettuce leaves on a large platter. Thinly slice steak against the grain, then cut slices crosswise into 1″ pieces. Add steak to cucumber mixture and toss to mix. Season to taste with salt and more lime juice, if desired.
Divide steak salad among lettuce cups; garnish with peanuts and mint leaves. Drizzle with Asian sweet chili sauce.
Wonton Meatballs
Adapted from Nom Nom Paleo (www.nomnompaleo.com)
Total Time ~ 1 hour (including cook time) | Serves 4
Freezer Friendly
This is a family favorite for us, I really love it because it’s FREEZER FRIENDLY! Make several batches and then freeze the cooked meatballs in a zip lock. Grab a few out as needed for another fast dinner or quick, delicious lunch! I also have made this without the shrimp and substituted ground turkey, still tasty!
Ingredients:
¼ ounce dried shiitake mushrooms soaked in water for at least 30 minutes
½ pound shrimp peeled and deveined
1 pound ground pork
2 scallions finely chopped
¼ cup cilantro minced
1 Tbs coconut aminos (or substitute soy sauce)
½ tsp Kosher salt
½ tsp fish sauce
¼ tsp ground white pepper
¼ tsp toasted sesame oil
Ghee or cooking fat of choice
1 scallion sliced on the bias (optional garnish)
Siracha sauce (optional)
Directions:
Check that your dried ’shrooms are hydrated. I throw the dried mushrooms in a bowl of water in the morning so they’ll be ready by the time I make dinner.
Preheat the oven to 400°F, and squeeze the water out of the shiitake mushrooms. Cut off the hard stems, and finely mince them.
Finely chop the shrimp until you’ve got a chunky paste.
Place the shrimp in a large bowl and add the pork, mushrooms, scallions, cilantro, coconut aminos, salt, fish sauce, white pepper, and sesame oil.
Use your hands to squeeze and mix the meatball mixture until a sticky and tacky mass is formed.
Heat up a small frying pan over medium heat and add a little cooking fat. When the pan is hot, form a little patty and cook it in the pan. Taste it and see if the seasoning is right. Adjust with additional salt if needed. (Not cooking yet? You can store the meatball mixture in the fridge for up to 12 hours.)
Form the mixture into 1½-inch balls. I like to scoop the balls out with a #20 disher, which holds 3 tablespoons. Roll the mixture into round balls and arrange on a parchment-lined rimmed baking sheet. You should end up with about a dozen balls.
Bake the meatballs in the oven for 15-20 minutes or until cooked through. Wanna cook them in an air fryer? In a Breville Smart Oven Air, cook on the airfry mode at 375°F for 12 minutes. You can also cook a half-batch at a time in a Philips Air Fryer at 375°F for 10 to 12 minutes.
Creamy Scallion Dressing
Adapted from New Entry Sustainable Food Project (www.nesfp.org)
If you’re not making your own dressing, get ready to change your life this summer. Homemade dressings are SO much tastier and healthier than the store bought ones. Not only are they usually made with better oils, but also tend to be higher in all the fancy nutrients that you can add at home!
Ingredients:
2-3 whole green onions
¼ cup EVOO
2-3 Tbs apple cider vinegar (or sub another variety)
1 Tbs honey (preferably raw)
Salt & Pepper to taste
Directions:
Add all ingredients to food processor or blender and blend until creamy. Store in the fridge for up to one week.
Seared Scallions with Poached Eggs
Adapted from New Entry Sustainable Food Project (www.nesfp.org)
Yes, I want people eating eggs and fresh produce for breakfast! Leave that cereal at the store. This recipe originally called for microwaving your eggs, but I included some super simple poaching instructions below. I would recommend using them and not the microwave.
Ingredients:
2 bunches scallions
3 Tbs EVOO, divided
1 tsp fresh lemon juice
Kosher salt and freshly ground black pepper
2 large eggs
Directions:
Mince 1 whole scallion, transfer to a bowl, and whisk in 2 tablespoons oil and lemon juice. Season to taste with salt and pepper and set scallion sauce aside.
Put the remaining scallions on a plate. Drizzle with remaining oil and toss to coat. Season to taste with salt and pepper. Heat a large cast-iron grill pan or skillet over medium-high heat. Cook scallions, turning occasionally, until tender and slightly charred, about 5 minutes. Divide scallions between plates. Pour ½ cup water into each of two 8-ounce microwave-safe coffee cups. Crack 1 egg into each cup, making sure it’s completely submerged. Cover each with a saucer. Microwave 1 egg on high until white is set but yolk is runny, about 1 minute (cooking time will vary depending on microwave).
Uncover; using a slotted spoon, transfer egg to top of 1 serving of scallions.
Dress with half of the scallion sauce. Repeat with remaining egg and sauce; serve.
How to poach an egg:
Crack your egg into a bowl or onto a saucer, this makes it easier to slide into the pan. If there is any very runny white surrounding the thicker white then tip this away.
Add a drop of vinegar (you can add this to the water in the pan if you prefer).
Bring a pan of water filled at least 5cm deep to a simmer. Don’t add any salt as this may break up the egg white.
Stir the water to create a gentle whirlpool to help the egg white wrap around the yolk.
Slowly tip the egg into the center. Make sure the heat is low enough not to throw the egg around – there should only be small bubbles rising.
Cook for 3-4 minutes or until the white is set.
Lift the egg out with a slotted spoon and drain it on kitchen paper. Trim off any straggly bits of white. If you need to cook more than one poached egg, keep it at the right temperature in warm water, but make sure the water isn’t hot enough to overcook the egg.
Apple Bok Choy Salad
Adapted from Epicurious (www.epicurious.com) | Serves 4
Love, love this salad with fresh apples. It uses raw bok choy, which is a nice change for summer! Bonus is that it’s super simple. Add some chicken or protein to make it a main dish.
Ingredients:
6 cups finely chopped bok choy
1 large apple, shredded
1 large carrot, shredded
½ cup chopped red onion
½ cup unsweetened soy, hemp, or almond milk
½ cup raw cashews or 1/4 cup raw cashew butter
¼ cup balsamic vinegar
¼ cup raisins
1 tsp Dijon mustard
Directions:
Combine bok choy, apple, carrot, and chopped onion in a large bowl.
Blend plant milk, cashews, vinegar, raisins, and mustard in a food processor or high-powered blender. Add desired amount to chopped vegetables.
Ginger Garlic Soup with Bok Choy
Adapted from The Forked Spoon (www.theforkedspoon.com)
Total Time ~ 30 minutes | Serves 2-3
Normally I wouldn’t have too many soups this time of year, but this year calls for some vegetable soups!
Ingredients:
1 Tbs olive oil
3 shallots, diced
1 bunch green onions, chopped, green and white divided
4 cloves garlic, minced
2 Tbs ginger fresh, minced
5 ½ cups chicken or vegetable broth
2 whole star anise
2 Tbs soy sauce (or coconut aminos)
10 oz crimini mushrooms, sliced
6 oz rice noodles
1 ½ heads bok choy, roughly chopped
sesame seeds for garnish
red pepper flakes for garnish
Directions:
Heat 1-2 tablespoons olive oil in a medium-sized stockpot over medium heat.
To the oil add the diced shallots and mix well. Cook over medium heat for 4-5 minutes, or until the shallots turn translucent and start to soften. Stir often.
Chop the end off of each green onion- dividing the white part from the green part. Chop and set aside the green part for topping. Meanwhile, finely chop the white part of each green onion.
Add the white part of the green onions, minced garlic, and ginger to the shallots and mix. Cook, stirring occasionally, for 1-2 minutes or until garlic and ginger is fragrant.
Carefully pour the chicken stock into the pot and bring to a simmer. To the pot add the star anise and soy sauce. Cover and continue to simmer for 10 minutes.
Remove lid from the pot and carefully remove and discard each star anise from the soup.
Add the sliced mushrooms, uncooked noodles, and bok choy to the pot and simmer for 5-8 minutes, or until noodles and bok choy are tender. Season to taste.
Divide soup between bowls and garnish with sesame seeds, the green parts of green onions and red pepper flakes (if desired).
Sautéed Baby Bok Choy
Adapted from Martha Stewart (www.marthastewart.com)
Total Time ~ 10 minutes | Serves 2
My favorite way to enjoy this veggie! I also like to add some red pepper flakes at the end.
Ingredients:
2 tsp safflower oil or oil of choice
1 tsp minced garlic
2 tsp minced ginger (from a 1-inch piece)
12 ounces baby bok choy (about 6 small heads), halved lengthwise, then thoroughly washed and drained
1 Tbs low-sodium soy sauce, plus more for serving (or coconut aminos
Directions:
Heat oil in a medium skillet over medium-high. Add garlic and ginger; cook until fragrant and golden, about 30 seconds. Add bok choy, stirring to evenly coat.
Add soy sauce and 2 tablespoons water; cover and cook 2 minutes.
Remove lid and continue cooking, stirring a few times, until liquid has evaporated and bok choy is tender, about 2 minutes.
Season with more soy sauce, if desired, and serve.
Radish and White Bean Salad
Adapted from Bon Appetit (www.bonappetit.com)
Total time ~15 minutes | Serves 6
Don’t let the anchovy’s scare you! You can always leave them out! I love the radish and white bean combo! This is a great salad to make ahead of time, the taste improves with time.
Ingredients:
2 anchovy fillets packed in oil, drained (or make without)
¾ cup extra-virgin olive oil
2 Tbs drained capers
2 ½ cups (packed) fresh flat-leaf parsley leaves, divided
¼ cup (or more) white wine vinegar
Kosher salt, freshly ground pepper
1 bunch radishes, trimmed, cut into thin wedges
2 scallions, thinly sliced
3 15-ounce cans cannellini (white kidney) beans, rinsed
¾ cup oil-cured black olives, pitted, quartered
Directions:
Blend anchovies, oil, capers, and 1 cup parsley in a blender until a coarse purée forms.
Transfer to a large bowl, mix in 1/4 cup vinegar, and season with salt, pepper, and more vinegar, if desired.
Add radishes, scallions, beans, olives, and remaining 1 1/2 cups parsley to bowl and toss to combine.
Roasted Radishes with Radish Greens
Adapted from Food & Wine (www.foodandwine.com)
Total time ~25-30 minutes | Serves 4
I LOVE this, it’s great way to introduce radish greens and has been a staple of mine the past two years.
Ingredients:
1 bunch radishes with greens
2 Tbs olive oil
Salt and freshly ground pepper
1 Tbs butter
2 Tbs lemon juice
Directions:
Preheat oven to 500 degrees. Trim the radishes and wash the greens, pat dry.
In large ovenproof skillet (I like a cast iron pan), heat the oil until hot. Add the radishes, season with salt and pepper and cook until lightly browned in some spots. This will need stirring and should only take 2-3 minutes.
Transfer the skillet to the oven and roast the radishes for 15 minutes, until crisp-tender.
Return the skillet to the burner, removing carefully from the oven. Stir in the butter to coat the radishes. Add the radish greens and cook over moderate heat until they are wilted, about 2 minutes.
Add the lemon juice and season with salt. Serve immediately.
Fresh Cherry Crisp
Adapted from Fit Foodie Finds (www.fitfoodiefinds.com)
Total Time ~ 50 minutes | Serves 6-8
A healthier version of some of those crisps out there! Enjoy the taste of those cherries!
Ingredients:
Cherry Filling:
4 cups pitted Bing cherries, halved
2 Tbs white whole wheat flour
1/3 cup orange juice (option to sub water or lemon juice)
Crisp Topping
1.5 cups rolled oats
½ cup white whole wheat flour (any kind of flour will work!)
½ cup brown sugar (option to use coconut sugar)
1 tsp cinnamon
1/8 tsp salt
½ cup unsalted butter, softened (option to use coconut oil or half and half)
Directions:
Preheat oven to 375ºF and spray a cake pan (or any casserole dish) with nonstick cooking spray. We used a casserole dish.
In a medium-sized bowl, toss cherries with 2 tablespoons of flour and orange juice. Pour into the casserole dish and set aside.
Next, in a separate bowl, mix together all of the crumble ingredients. Use a fork (or your hands) to cut the butter into the dry ingredients until it forms little crumbles. Evenly spread crumble topping over the cherries in the casserole dish.
Place in the oven and bake at 375ºF for 30 minutes or until the filling begins to bubble and the crumble topping begins to brown.
Banana Cherry Smoothie
Adapted from The Salty Marshmallow (www.thesaltymarshmellow.com)
Total Time ~ 8 minutes | Serves 1
One of my favorite things to do is to make smoothies with the kids. It’s something everyone can usually participate in and you get a tasty healthy treat out of it!
Ingredients:
½ cup milk of choice (I prefer unsweetened almond milk)
1 cup pitted cherries
1 large banana
¼ cup yogurt (try unsweetened or you can use vanilla if you prefer)
1 tsp almond extract, optional
A little ice, per preference
Directions:
Place the milk, frozen cherries, banana, yogurt, ice and almond extract into a blender.
Place the lid on the blender. Pulse and blend the ingredients for 1-2 minutes, until smooth. Serve immediately.
Strawberry Rhubarb Crumble Bars
Adapted from The Minimalist Baker (www.minimalistbaker.com)
Total Time ~2 hours | Serves 9
Freezer Friendly
A great summer treat, these come from a gluten free baker but there are many ingredients you can substitute as needed.
Ingredients:
Crust:
1 cup rolled oats
1 cup raw almonds
¼ tsp sea salt
3 Tbs coconut sugar (or sugar of choice)
4 ½ Tbs coconut oil (melted, or butter)
Filling:
2 heaping cups rhubarb (stems removed // chopped into 1/2 inch pieces)
1 heaping cup berries (such as strawberries or raspberries // large pieces chopped)
¼ cup orange juice
2 Tbs coconut sugar (plus more to taste, or sugar of choice)
1 Tbs cornstarch
Crumble Topping:
3 Tbs coconut sugar (or sugar of choice)
2 Tbs gluten-free flour (DIY blend or Bob’s Red Mill 1:1 Gluten Free Blend, regular flour)
¼ cup rolled oats
1 ¼ Tbs coconut oil (or butter)
Directions:
Preheat oven to 350 degrees F (176 C) and line an 8×8-inch baking dish with parchment paper.
Add oats, almonds, sea salt, and coconut sugar to a food processor or high-speed blender and pulse into a fine meal, making sure no large pieces remain.
Add melted coconut oil and pulse to incorporate. It should form a loose dough that forms when squeezed between two fingers. Add more melted oil if too dry.
Spread the mixture into the lined baking dish and press down into an even layer with your fingers or a flat object (such as a drinking glass).
Bake for 15 minutes, then increase heat to 375 degrees F (190 C) and bake for 5 minutes more, or until the crust is fragrant and the edges are slightly golden brown. Set aside.
In the meantime, add rhubarb, strawberries, orange juice, coconut sugar, and cornstarch to a medium saucepan and warm over medium-low heat until slightly softened and bubbly – about 5-7 minutes. Stir frequently to prevent sticking. Then remove from heat and set aside.
Next prepare crumble by adding all ingredients to a small mixing bowl and using a fork or your fingers to mix ingredients into a crumble. Set aside.
Add strawberry-rhubarb mixture to the pre-baked crust and spread into an even layer. Then top with crumble topping and spread evenly to cover fruit.
Reduce oven heat back to 350 degrees F (176 C) and bake for another 15-20 minutes or until the strawberry topping is warm and bubbly and the crumble is golden brown.
Remove squares from oven and let cool completely – 1-2 hours. Once cooled, gently lift bars from pan and slice into 9 even squares or 10 bars (amounts as original recipe is written // adjust if altering batch size).
These should be firm enough to pick up and eat with your hands, but are best enjoyed with a fork and plenty of coconut whipped cream or Vanilla Bean Coconut Ice Cream!
Store leftovers in a well-sealed container at room temperature for 2 days, in the refrigerator for 3-4 days, or the freezer up to 1 month.