
How to Roast Peppers Like a Pro (and Save Some Money)

Are you swimming in peppers right now?
If you’re like me, your garden might be overflowing with these colorful beauties. But don’t worry – I’ve got the perfect exit strategy for you: roasting them! Roasted peppers are incredibly versatile and can be used in everything from sauces to soups, salads, and sandwiches. Plus, they’re so much cheaper (and tastier) when you make them yourself, rather than buying those expensive jarred ones from the store.
Red peppers are on sale in our online store this week, as a “BULK BUY.” Grab them and load up!!
Let’s dive in!
Step 1: Prep Your Oven
First things first, preheat your oven to 450°F. You want it hot enough to blister and blacken the skin, but not so hot that it burns them to a crisp.
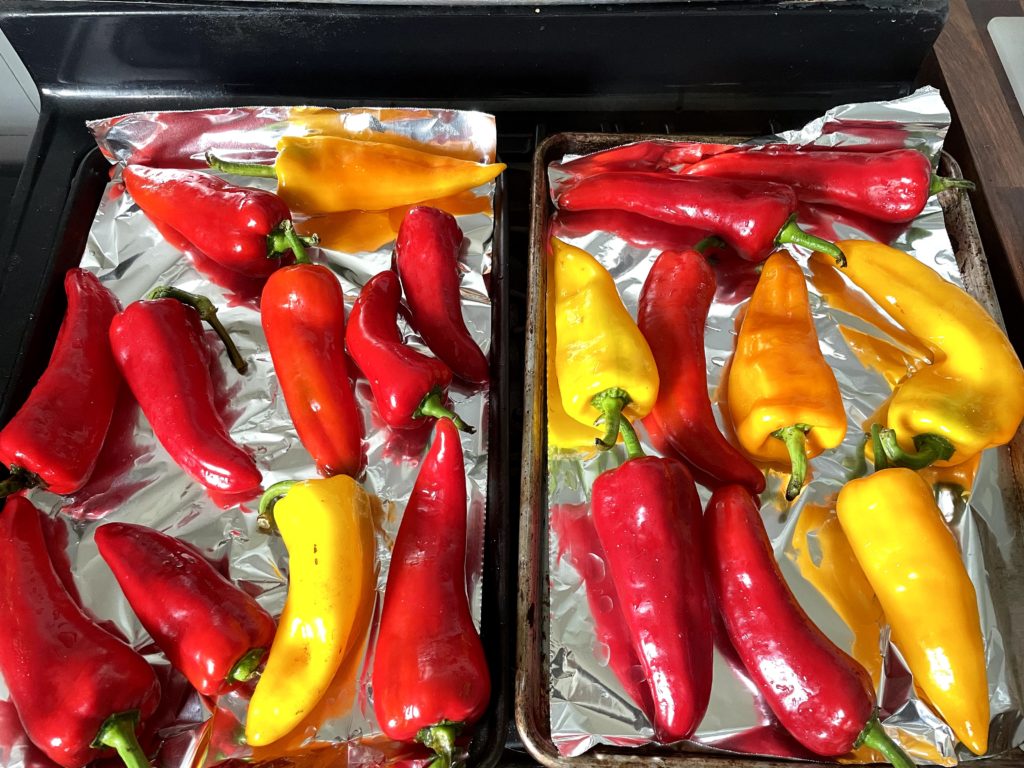
Place your peppers whole on a sheet pan lined with foil
Step 2: Roast the Peppers
Take your whole peppers and lay them out on a sheet pan—don’t bother cutting them up or removing the seeds yet; that comes later! Once your oven is ready, pop the pan in. Roasting will take about 15-20 minutes. Keep an eye on them, though. You’re aiming for the skins to blacken in spots, but don’t let them burn entirely. Halfway through, flip them over to ensure even roasting. The peppers should end up looking wrinkly and floppy, with their juices just starting to escape.
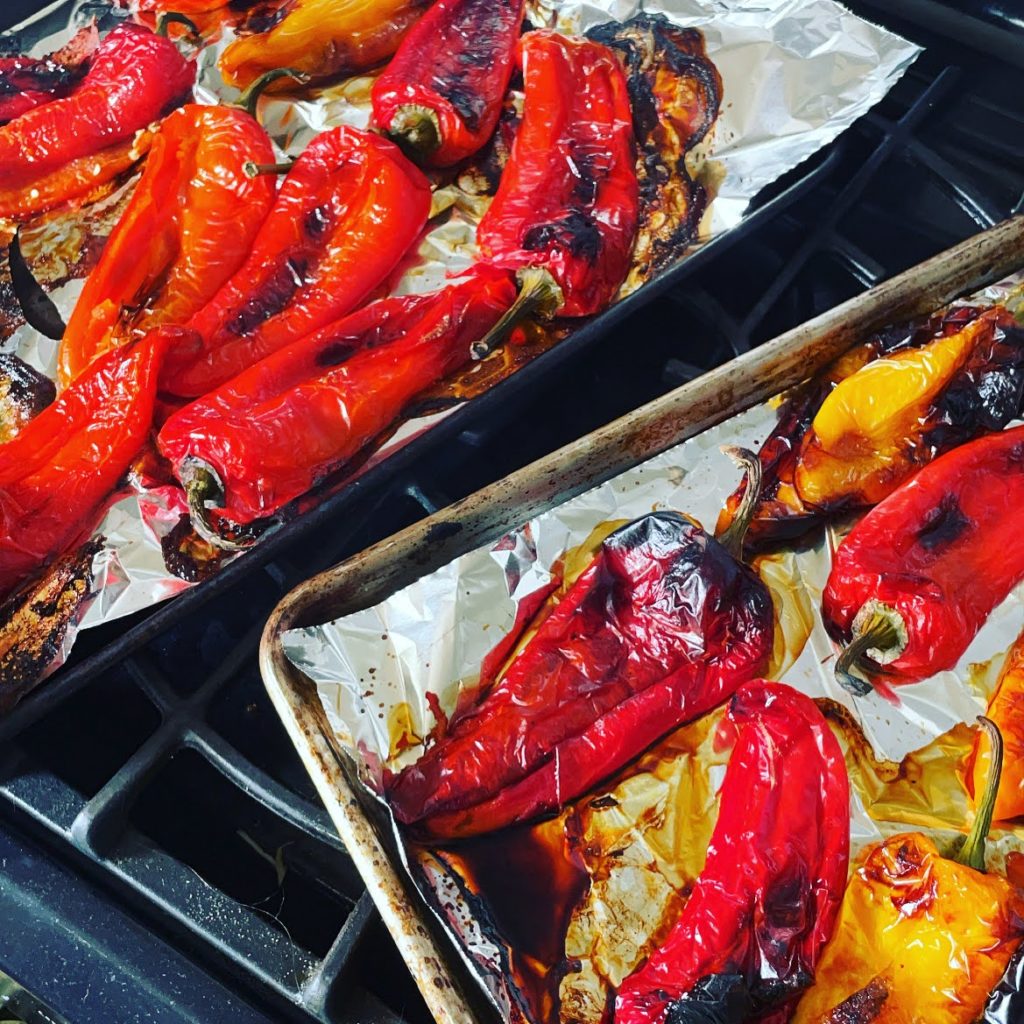
Your peppers are done when they look like this.
Step 3: Steam for Easy Peeling
As soon as your peppers are done, transfer them to a large bowl and cover it with plastic wrap. This step is super important because it lets the peppers steam, making it much easier to peel off the skins later. If you’re avoiding plastic, another great trick is to place a second sheet pan on top of the bowl to trap the steam. Let them sit and cool down for 10-15 minutes.
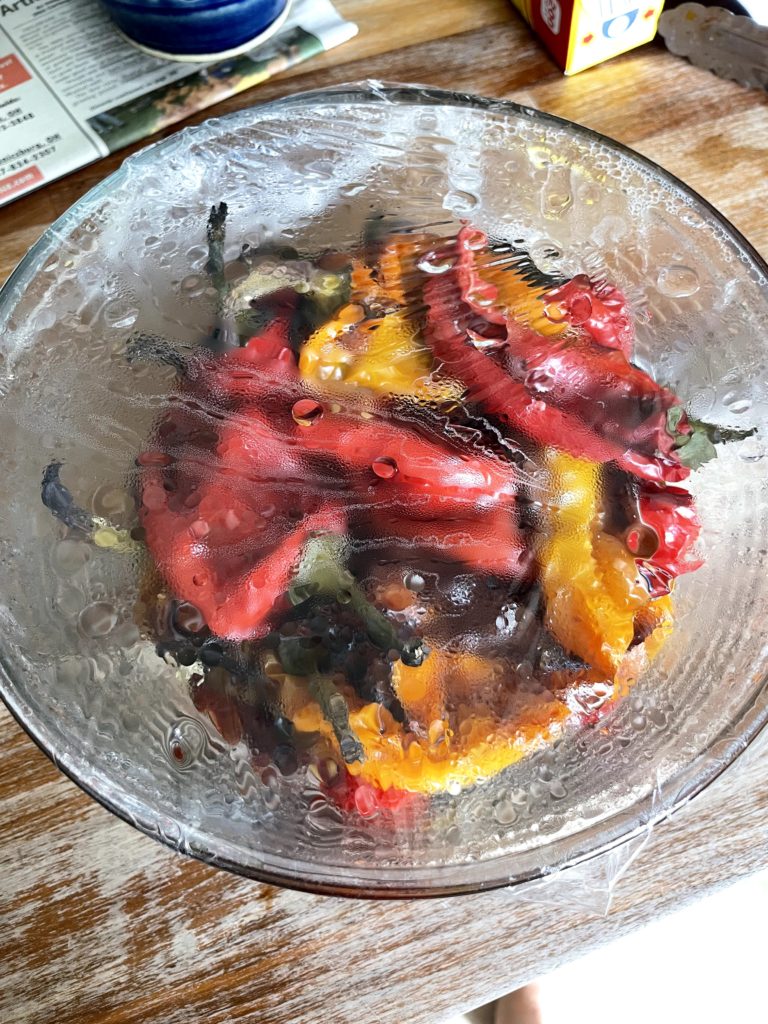
Put the peppers in a bowl covered with plastic wrap. Let them steam. It will make the skins slide off when cool.
Step 4: Peel & Store
Once the peppers are cool enough to handle, peel off the skins. They should slip off easily, revealing soft, roasted pepper flesh underneath. Don’t worry about getting every little bit of skin off—it’s okay if some charred bits remain. Now’s the time to remove the stems and seeds if you want.
You can store the peppers in a couple of different ways:
- Freezing: Place them in Ziploc bags in portion sizes that work for you. Another tip is to freeze them individually as “blobs” on a sheet pan first, then transfer the frozen peppers to bags. That way, they won’t clump together, and you can grab just what you need later.
- Preserve in oil and vinegar in a Mason Jar: If you’re planning to use them within the next few months, try my favorite storage method. In this video, I show you how to pack roasted peppers into mason jars, smother them in vinegar, and seal them with a layer of olive oil. This method keeps them fresh for up to four months in the fridge.
Why You Should Roast and Freeze Peppers
Imagine pulling out a stash of roasted peppers in the dead of winter for your stews, soups, or pasta dishes. It’s one of those little kitchen luxuries that feel like a gift to yourself. Plus, they’re so expensive in stores, especially the jarred kind. When you have your own roasted peppers on hand, it’s a major money saver!
Give this roasting method a try, and I promise you’ll be hooked. Whether you’re storing them for later or using them in a recipe tomorrow, roasted peppers add a smoky, rich flavor that enhances any dish. It’s such a simple, satisfying way to use up your pepper bounty and preserve that summer freshness all year long.