CSA Newsletter Week 3 (July 5-10, 2020)
CSA Newsletter Week 3
July 5-12, 2020 | “A” Week
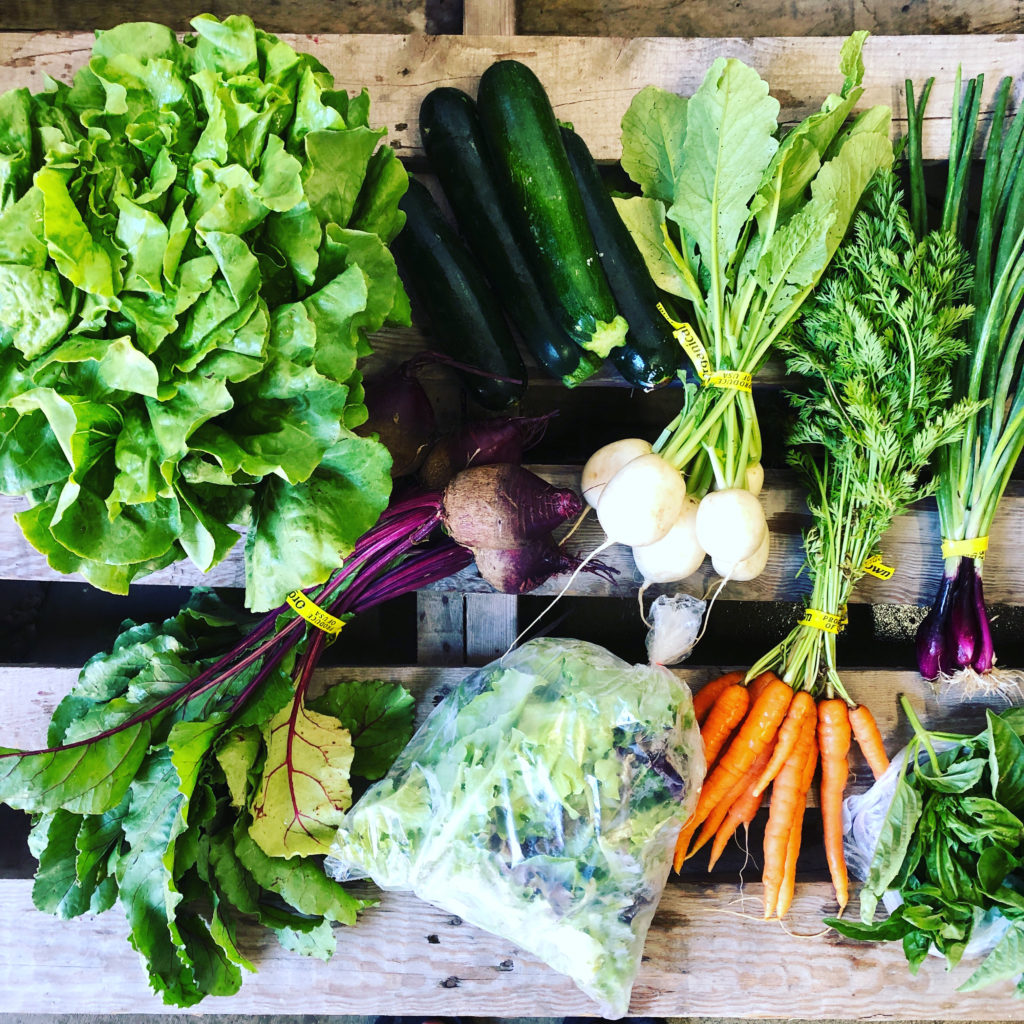
The week 3 share!
HEAD LETTUCE (1 HEAD) ~ I wouldn’t rinse this until you’re ready to use it. In the meantime, put your head lettuce in a Debbie Meyer Green bag or Tupperware FridgeSmart container right away and leave it in the fridge. Use within a week, although if stored properly, our lettuce will last up to 4 weeks. Lettuce technically falls into the category of “danger zone veggies” — ie they have a short shelf life. So use your lettuce early on in the week for maximum efficiency.
CUT LETTUCE (0.4 lb.) ~ Store in a Debbie Meyer Green bag or Tupperware FridgeSmart container right away and leave it in the fridge. Use within a week, although if stored properly, our lettuce will last up to 2 weeks. Lettuce technically falls into the category of “danger zone veggies” — ie they have a short shelf life. So use your lettuce early on in the week for maximum efficiency.
CARROTS (WITH TOPS) ~ Remove tops ASAP. Do not make this common rookie storage mistake. If you fail to remove the tops of the carrots, the root will become soft after a few days. That’s because the greens soak up the moisture from the carrot root. Store the unwashed tops in a loosely wrapped Debbie Meyer plastic bag in the crisper bin of your refrigerator (try carrot top pesto!). Or you can dry them from a string, and use them later as an herb in place of parsley. Store the roots dry and unwashed in a plastic bag in the refrigerator for up to 4 weeks.
TURNIPS (Not sure if they’ll have tops) ~ Remove tops ASAP. Store the unwashed tops in a loosely wrapped Debbie Meyer plastic bag in the crisper bin of your refrigerator. Store the roots dry and unwashed in a plastic bag in the refrigerator for up to 3 weeks.
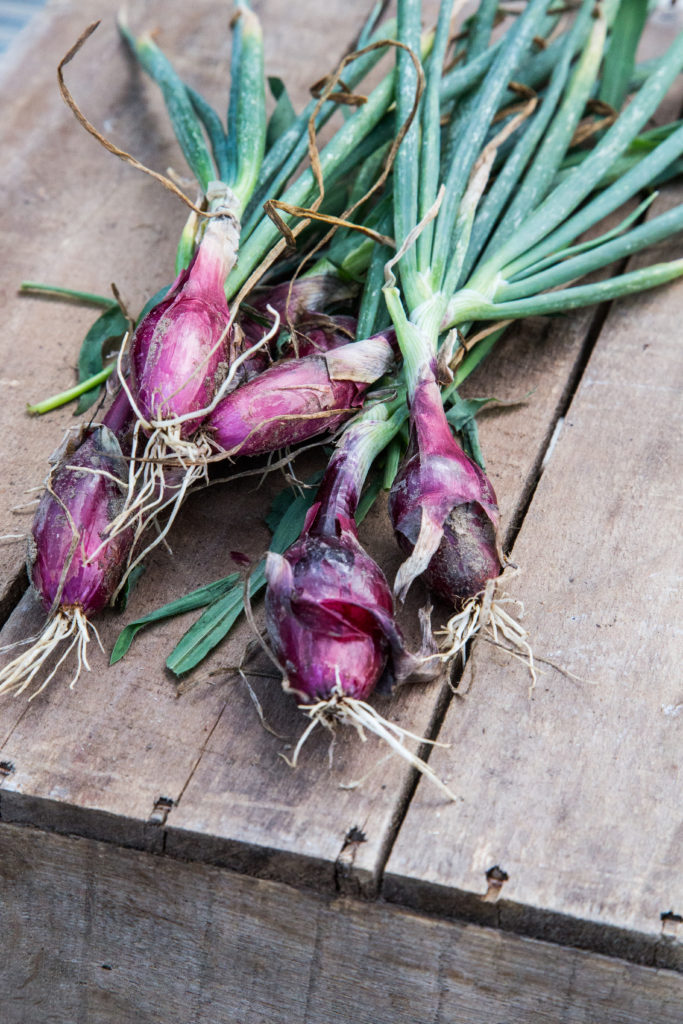
This is called a purple bunching onion.
RED BUNCHING ONIONS ~ I recommend storing this in a Mason jar filled with an inch of water so the roots can “drink.” Then put it in the fridge. Place a Ziploc baggie over the green tops to keep them from drying out. (I’ve also stored them on my countertop this way) If you don’t have room for this way of storing, then just wrap them in a plastic bag and store in the fridge. You can chop off the green tops into one inch segments and throw them in a Ziploc baggie and freeze them. (Use them later in stir fries or soup).
GREEN BASIL ~ I recommend storing this in a Mason jar filled with an inch of water so the roots can “drink.” Then leave on your counter. DO NOT REFRIGERATE! Or place wrapped in a paper towel inside a baggie on your counter. Use them to make a pesto, to top your next pizza, or in a salad.
SUMMER SQUASH (3-4 pieces) ~ Try grilling these, zucchini fries, making zucchini boats, sauteing in olive oil, or roasting. To store, place in a Debbie Meyer Green bag and put in the fridge. Try to use it within 6-7 days, as sometimes they can start to mold fast. You’ll get better storage results in the Fridgesmart container. To use: rinse under water to remove the dirt or prickles, and slice off the stem and blossom ends. Then slice or chop. These squash come from our partner farm Mile Creek Farm (also certified organic).
RED BEETS WITH TOPS ~ Take the tops off the beet roots and store them in a Debbie Meyer Green bag separately. Use them as greens in salad or in a spaghetti sauce, or blanch/freeze them into green cubes. The red roots should be stored separately in a bag in the fridge and they will last for 5-7 weeks. They are great pickled, grilled, roasted, or even grated raw on a salad.

The Webers’ hens are producing eggs like crazy! We’ll be doubling up on egg shares this week as a result.
EGG SHARE
All weekly and Week A egg shares will be getting a “double portion” of their share this week. Why?… The Webers have a huge stockpile of eggs from their hens who were laying early in the spring. They want to try and get “caught up” and make some space in their cooler.
As a result, the egg share is going to “speed up” by a week. If you’re a weekly egg share or Week A biweekly share member, you’ll get 2 dozen eggs this week. Next week, B week will get 2 egg share (and weekly shares will get their usual 1).
FRUIT SHARE (A Week)
SWEET CHERRIES (3 LB.) (from Quarry Hill Orchard, Berlin Heights) ~ store these in a Fridgesmart container or Plastic baggie in your fridge and eat them within 3-5 days. Not organic.
RHUBARB (from Wayward Seed Farm, Fremont) ~ the simple way to store rhubarb is just to wrap it in a plastic bag and store it in the fridge. If you’re going to keep it for a while, you might want to try wrapping it in foil OR cutting it in smaller lengths and letting it sit in some water to keep it crisp. Rhubarb is extremely sour. It is often used in baking in conjunction with sugar. If there are any leaves attached, remove them. Chop into slices like celery. Certified organic.
MADDIE & BELLA COFFEE SHARE
Brazil Santos — dark chocolate, brown sugar, hazelnut — sourced exclusively for our CSA
CHEESE SHARE
Lake Erie Wabash and Charloe (my favorite!) — Canal Junction
Onion & Dill Cheese Curds — goat cheese from Turkeyfoot Creek Creamery
FARMER KURT’S FIELD NOTES
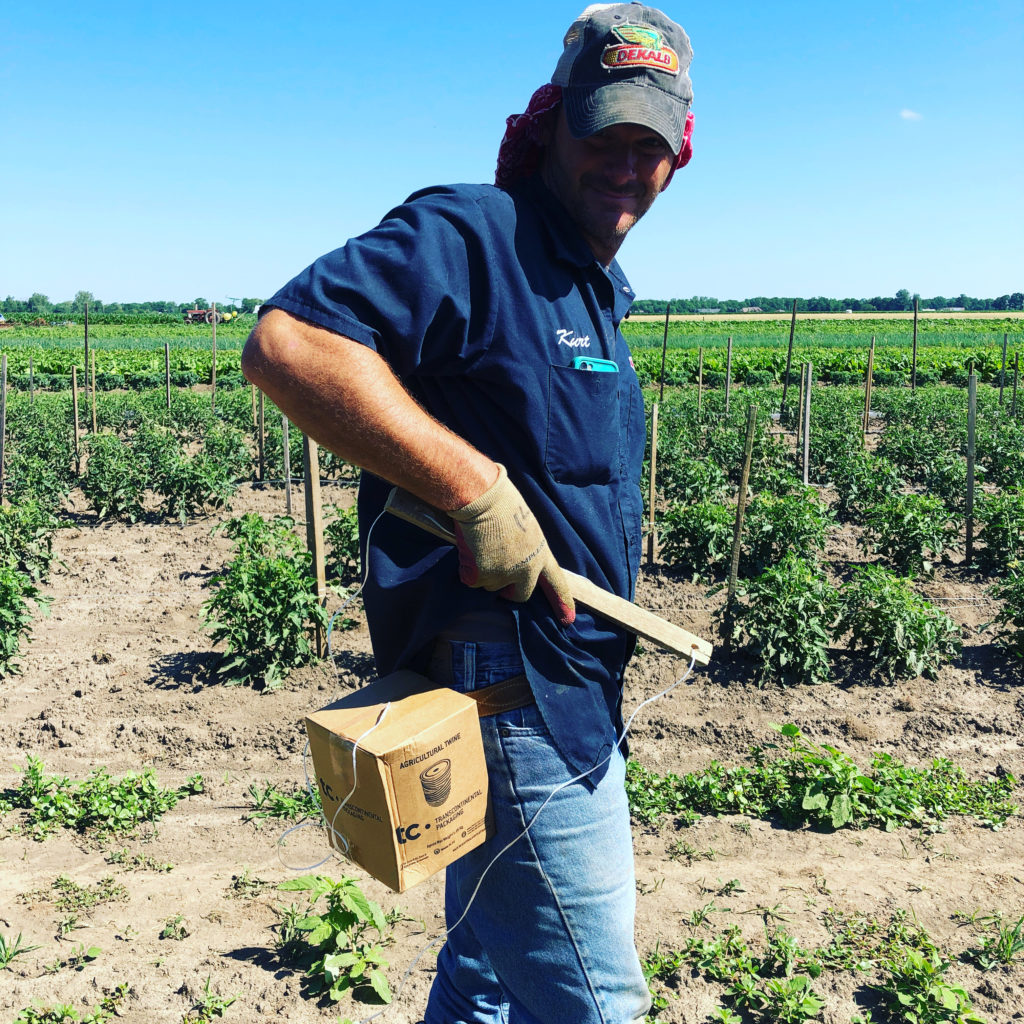
Kurt ties tomatoes with this tomato twine. Here he is showing off his cool accessory on his belt loop.
It was another hot one this week! We’ve been fortunate to have enough rainfall to keep things going good. –But these continued hot conditions will make things a bit stressful. I’ve been irrigating quite a bit. This week’s big job is to set up the “drip irrigation” system all around my fields. This involves a maze of perforated hoses that twine around the field blocks, and it’s definitely a big job that takes a few days. In the meantime, I’m running our air conditioner in the house full-time to keep the edge off.
Thanks for all the fun car signs this past week! We got a real kick out of them. Blinking Christmas lights, people sticking out of the the car sunroof, shameless attempts to impress your farmer with cleverness… Congratulations to our two winners, who get a 4 pack of assorted Knueven Creamery ice cream sandwiches. I wanted to share a picture with you of some of the different entries. You can see them below…
COOLER UPDATE ~ Well, I’ve figured out my cooler solution, but I haven’t actually done it yet. Looks like the most economical course of action is to install a second AC unit and CoolBot inside the enlarged silver cooler. I got the AC ordered from Lowe’s yesterday; and the CoolBot is here. Hopefully I can take care of this early this week.
This week was also a busy weeding week. I finally hired in some extra custom help ~ about 12 people from my cousin Bobby’s crew to just come out and knock down all the weeds in the farm. Cleaning things up makes me feel a lot better.

Here are just some of the car signs we saw last week!
The crew mulched the tomato beds with straw. This will keep the weeds from taking over and help with water loss through evaporation. We also finished pounding tomato stakes and tying the tomato plants. We also finally covered the chicken house with new plastic and shadecloth. A big wind storm had slashed the roof a couple weeks ago, and our poor hens have been sitting targets for hawks and other predators. I lost a couple birds to my friend Mr. Coyote this week.
The early summer crops are beginning to come into play now. You’ll begin to see cucumbers and summer squash. I’m not sure if my broccoli plants are going to head. I’ll definitely be able to get some leave/greens off of them, but it’s just so dang hot, that the broccoli is likely to bolt.

Uncle Torsten is here for a visit! He brought his camper!
Did you notice the small camper parked in our drive this week? Uncle Torsten (Corinna’s brother from Texas) is here for his annual summer visit. He drives up from Texas every year and hangs out over Fourth of July. The boys LOOOVE their uncle, and they get to sleep in the camper every night (and play cards until 1 AM apparently too). I’ve gone easy on them with farm chores this week. They’re also really into playing Dungeons and Dragons — anyone know what that is? (I don’t). Thanks to CSA customer Tammy Eley for letting my family come out to swim at her house this week. We’ll be heading out to the Turnow’s house (my cousin) for a dip in their pond on the Fourth. Like many of you, our summer vacations are turning into “Stay-cations” in these weird times.
Thanks to all the volunteers who have been helping us out at the site pickups and packing nights. All those sweaty gloves and sweaty masks — LOL — we’ll remember these times fondly some day.
~Your Farmer, Kurt
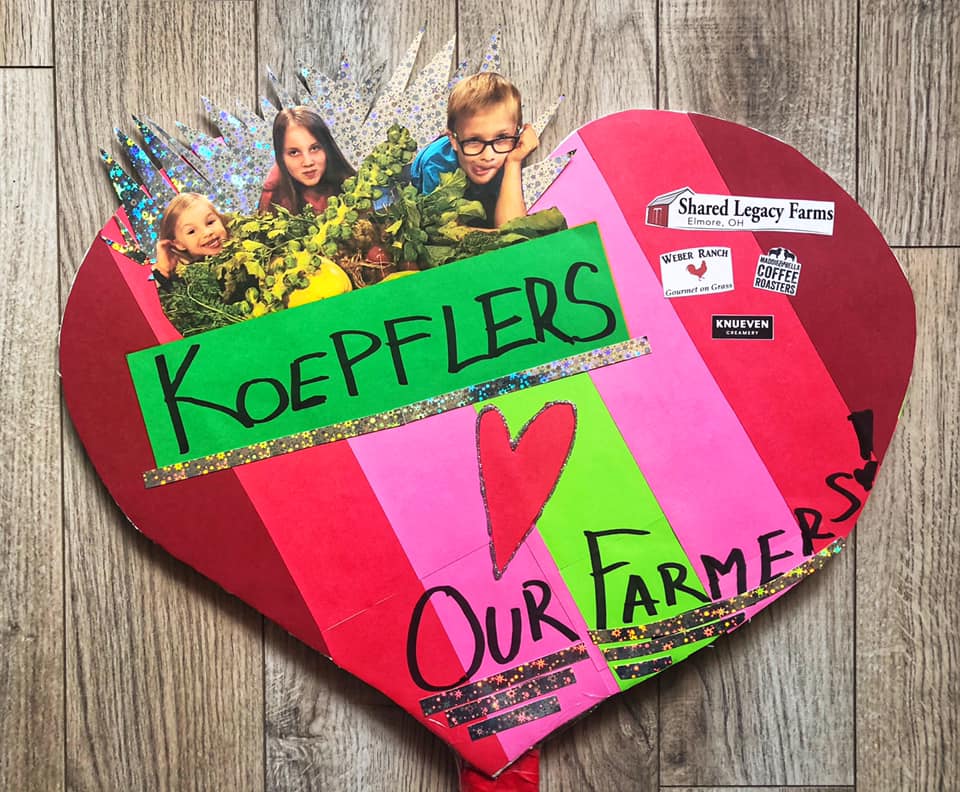
The Koepflers won the Car Sign contest with this lovely heart sign. We think it really pops!
WEEK 3 ANNOUNCEMENTS
- Take a look at some of our Car Sign entries above! We had so many enthusiastic participants. It was a hard decision for your farmers. Our winners will receive a 4-pack of ice cream sandwiches at the Knueven Creamery store Our 2 Car Sign Co-Champions are:
- Team Rife Family
- Team Koepfler Family
- Weekly egg shares and “A” week egg share customers will get a double portion of eggs this week due to the Webers needing to clear out their packed egg cooler of backed-up eggs! B week members will get their double portion on week 4. This will mean that the egg share will end on week 17 for weekly members and B members, and on week 16 for A week members.
- Pickup times are going so smoothly now that we want to try going back to our previously planned pick-up times, starting week 3. That means we will be shaving off 30 minutes from 3 locations:
- Sylvania: 5-6:30 PM
- PBurg: 5-6:30 PM
- Elmore: 5-6:30 PM
- Toledo: 8:30-10 AM (stays the same)
- Port Clinton: 6-6:30 PM (stays the same)
- Watch our weekly Live Unboxing video this Tuesday around 8 PM inside the private Facebook group. Cadie Jardin, our CSA coach and dietitian, will show you what’s in the box, share storage tips and ideas for how to use your product. You can find the Facebook group at this link.
- You can order additional items from the Shared Legacy Farms online store. Our store link is super easy to remember: www.sharedlegacyfarms.com/store ==> grab a DIY microgreen kit, honey, syrup, and bonus veggie items (like an extra bunch of lettuce or carrots that what’s already in your box). Just be sure to select the right pickup site that coincides with your pickup location. If the pickup option is greyed out or not available, it means you missed the window to order. You need to place your order 2 days before your site. I reload the store and set new pickup dates on Sunday afternoon.
What Does “Bolting” Mean?
One of my favorite stories to tell from my rookie farm days was when I walked out to our small family garden and spotted my strange-looking lettuce. I ran to find Kurt. “Kurt, this is so cool! Our lettuce is making a tower!”
To which he responded with a chuckle: “No Corinna, that’s just bolting.”
Bolting lettuce?
Some of you missed out on cilantro last week because our crop “bolted” before we could harvest. I posted this in the Facebook group, and many of you also asked, “What does bolting mean?”
I created an educational video which you can watch above. It shows a dramatic example of a bolting lettuce and radish plant. The plant is literally growing fast, straight up like a tower. (Hence the word “bolting.”)
Here’s what’s going on…The goal of every plant is to propagate itself — i.e. make more seed. This is no different for vegetable plants. A lettuce plant, if not harvested, will eventually begin to “bolt,” or form its seed head. It does this by growing taller and taller, and then shooting out a spray of flowers, which hide the seeds.
Bolting will eventually occur to any leftover plant in the soil not harvested. But hot temperatures accelerate it for these spring crops.
Once the lettuce (and other plants) starts to bolt they turn bitter and are no longer edible.
I have since seen this same phenomenon with several other plant varieties. Last week, I saw the cilantro begin to flower (this is how coriander seed comes to be). I also spied some red bok choy shooting up its yellow flower. Some spinach plants were forming tell-tale towers. And the radish bed — those small radish greens — are now towering five feet tall with gorgeous flowers.
If the plant successfully reaches the flowering stage, it may drop its seeds, leading to future reseeded lettuces in the next season.
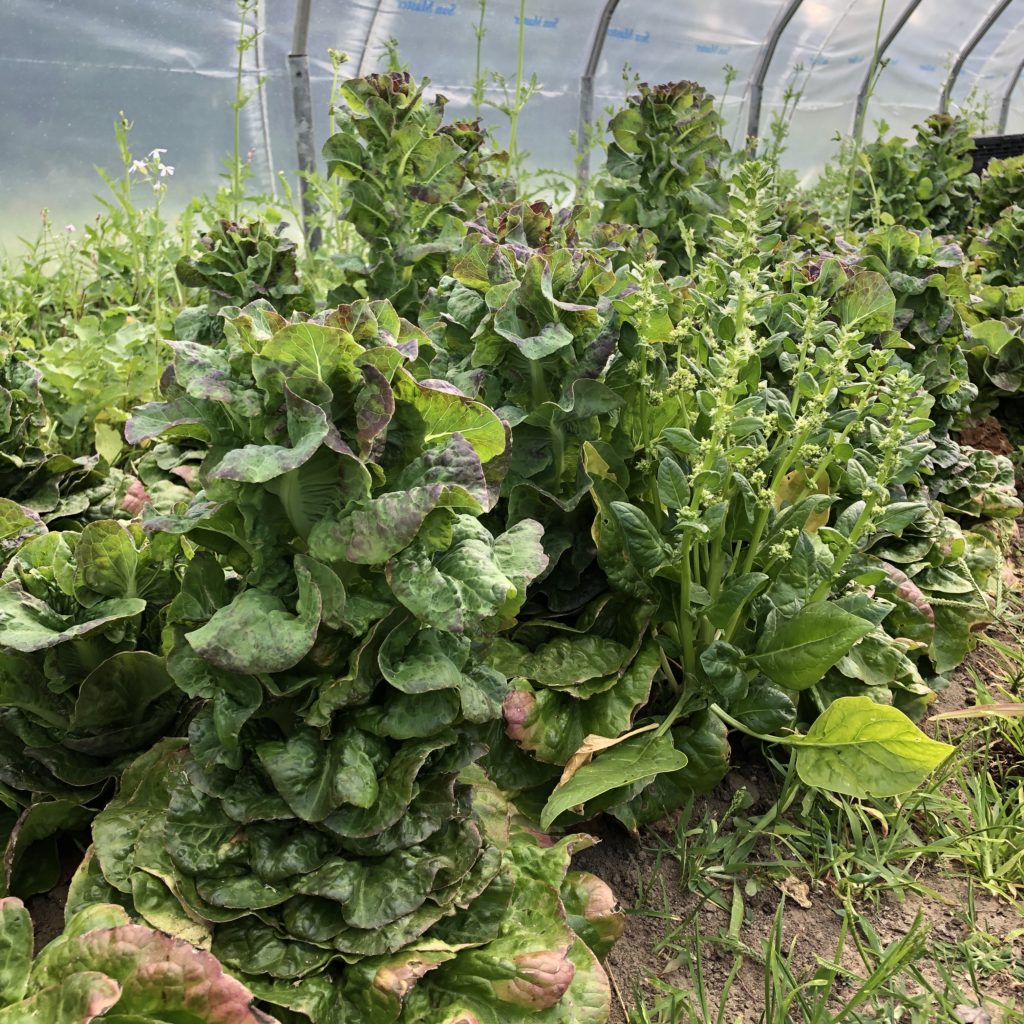
This is an example of what bolting lettuce looks like. The lettuce plant shoots up and forms a tall tower. You can’t eat lettuce once it’s bolted. It’s too bitter.
WEEK 3 CSA RECIPES
Members: You can download these recipes as a PDF inside the Membership Academy.If you aren’t a member of this year, email Corinna at slfarms2@gmail.com — your entry is free as a CSA member.
Curried Carrot Soup
Adapted from A Couple Cooks (www.acouplecooks.com)
Total Time ~20 minutes | Serves 4
This is a super delicious way to enjoy those crack carrots, or save this for a cooler day if you’re not a fan of soup in the summer. Make your own broth if that scrap bag is filling up!
Ingredients:
1 small onion
1 Tbs minced ginger
4 cups chopped carrots
1 Tbs EVOO
2 ½ cups vegetable broth
14-ounce can full fat coconut milk
2 Tbs red curry paste
½ tsp kosher salt
Cilantro, lime wedges, and red pepper flakes (to garnish)
Directions:
Dice the onion, mince the ginger. Peel and chop the carrots.
In a medium stockpot or Dutch oven, heat the olive oil over medium heat. Add the onion and sauté until translucent, about 6 to 7 minutes. Add the ginger, carrots, and vegetable broth, and bring to a boil. Lower to a simmer; cover and cook until carrots are tender, about 15 to 20 minutes.
When the carrots are soft, carefully blend with an immersion blender (or in a blender) until the carrots are smooth. Return the carrot mixture to the pot and add the coconut milk and red curry paste. Stir until well blended.
Simmer gently for 10 minutes. Add the kosher salt, then taste and adjust seasonings as desired.
Serve with cilantro, lime wedges, and red pepper flakes if desired.
Quick and Easy Vegetable Fritters
Adapted from Just a Taste (www.justataste.come)
Total Time ~25 minutes | Makes 12 Fritters
Such a great way to use some of that summer squash, you can also add in other shredded veggies. This almost like an exit strategy meal!
Ingredients:
2 cups shredded zucchini
2 cups shredded carrots
2 garlic cloves, minced
2/3 cup flour
2 large eggs, lightly beaten
1/3 cup sliced scallions
2 Tbs EVOO
sour cream or plain yogurt for serving
Directions:
Place the shredded zucchini in a colander and sprinkle it lightly with salt. Let the zucchini sit for 10 minutes then using your hands, squeeze out as much liquid as possible.
Transfer the zucchini to a large bowl then add the carrots, garlic, flour, eggs, scallions, 1/4 teaspoon salt and 1/8 teaspoon pepper. Stir the mixture until it is combined.
Line a plate with paper towels. Place a large sauté pan over medium-high heat and add the olive oil. Once the oil is shimmering, scoop 3-tablespoon mounds of the vegetable mixture into the pan, flattening the mounds slightly and spacing them at least 1 inch apart.
Cook the fritters for 2 to 3 minutes then flip them once and continue cooking them an additional 1 to 2 minutes until they’re golden brown and crispy. Transfer the fritters to the paper towel-lined plate, season them with salt and repeat the cooking process with the remaining mixture.
Serve the fritters immediately topped with sour cream or yogurt.

The Rife family won the Car Sign contest with this creative drawing.
Cheese Zucchini Tots
Adapted from Lil Luna (www.lilluna.com)
Total Time ~25 minutes | Makes 2 dozen tots
Thanks to Mike for sharing this recipe, you can even use your frozen zucchini for this as long as you try to squeeze out the extra water!
Ingredients:
1 medium zucchini
2 eggs
¼ cup panko bread crumbs
¼ cup regular bread crumbs
1 tsp salt
¼ tsp pepper
¾ tsp garlic powder
1 cup shredded cheddar cheese
marinara
Directions:
Preheat the oven to 400. Line a baking sheet with parchment or spray with cooking spray.
Grate the zucchini into a clean dish towel. Wrap the towel up and squeeze out as much liquid as possible.
In a large bowl, stir together the zucchini, eggs, panko, bread crumbs, salt, pepper, garlic powder, and cheese.
Scoop by rounded spoonfuls onto the prepared baking sheet. Bake 20-25 minutes, or until golden brown. Serve warm with marinara sauce for dipping.
Grilled Summer Squash with Lemon-Scallion Dressing
Adapted from Country Living (www.countryliving.com)
Total Time ~35 minutes | Makes 8 servings
Love this use of basil, scallions and summer squash all on one plate!
Ingredients:
oil for grill grates
3 small zucchini halved lengthwise
3 small yellow squash, halved lengthwise
2 Tbs EVOO, divided
Kosher salt and freshly ground black pepper
½ tsp lemon zest, plus 1/2 a whole lemon
½ small jalapeño pepper, thinly sliced
½ tsp pure honey
2 scallions, thinly sliced
½ cup fresh basil, torn
Directions:
Set up grill for direct cooking and heat to medium-high. Once hot, clean and lightly oil grates with canola oil. Brush zucchini and squash with 1 tablespoon olive oil. Season with salt and pepper.
Grill zucchini, squash, and lemon half, cut sides down, until charred and just tender, 3 to 4 minutes. Transfer to a cutting board; cut zucchini and squash into 2-inch pieces.
Squeeze juice from grilled lemon into a bowl. Add lemon zest, jalapeño, honey, and remaining tablespoon olive oil and whisk to combine. Season with salt and pepper.
Add zucchini, squash, scallions, and basil and toss to combine.
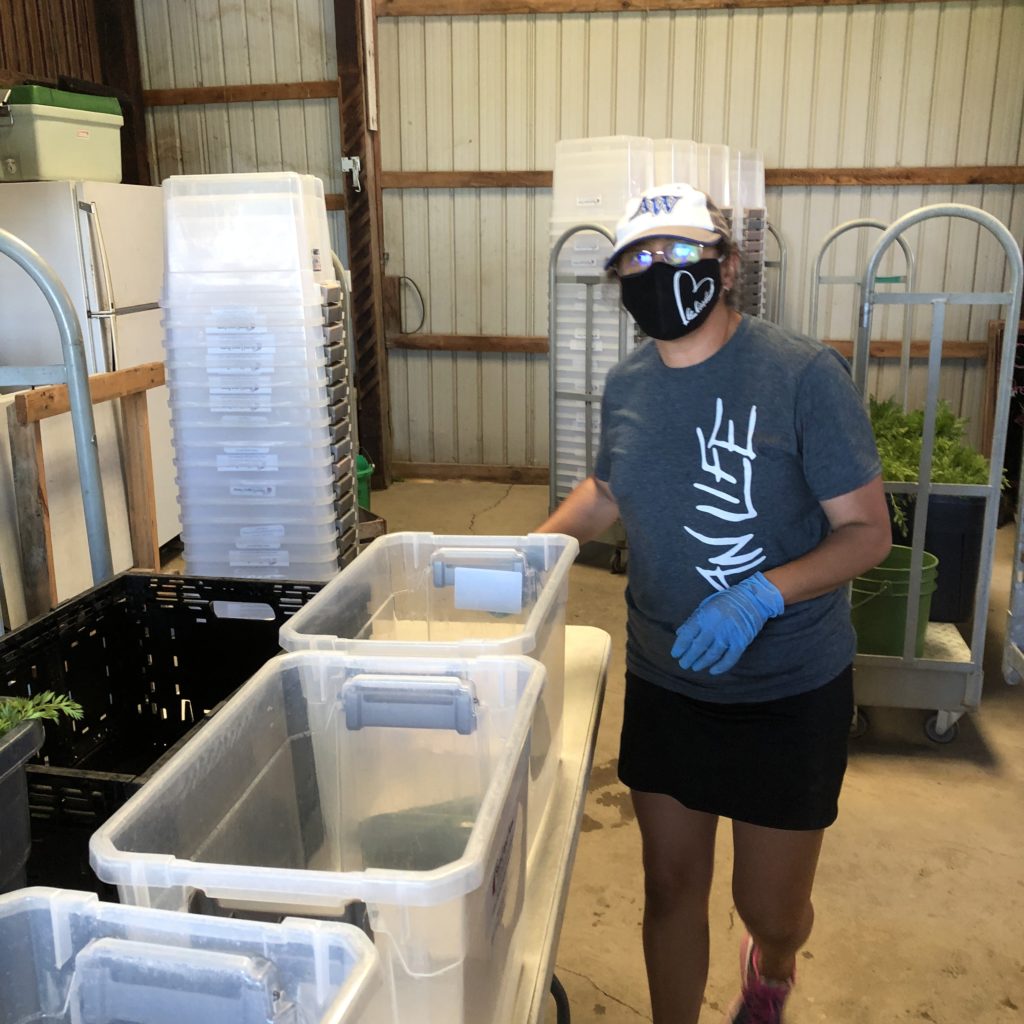
Itzel Krauss and her daughter Sam volunteer on a regular basis on pack nights each week.
Roasted Beet and Carrot Salad
Serves 4. From Cook’s Illustrated.
A submission by Corinna. Whenever I bring this dish to a dinner party, it is a show stopper. If using a dark-colored nonstick baking sheet, line the pan with aluminum foil to prevent scorching.
Ingredients:
1 lb. beets, peeled and cut into 1/2 inch thick wedges
1 lb. carrots, peeled and cut on bias into 1/4 inch thick slices
3 Tbs extra virgin olive oil
1/4 t. sugar
2 Tbs. white wine vinegar
1 t. honey
1 medium shallot, minced
Directions:
Adjust oven rack to lowest position, place large rimmed baking sheet on rack, and heat oven to 500 degrees. Toss beets and carrots with 2 tablespoons oil, 1/2 teaspoon salt, 1/4 teaspoon pepper, and sugar in large bowl. Remove baking sheet from oven and, working quickly, carefully transfer beets and carrots to sheet and spread in even layer. (Do not wash bowl.) Roast until vegetables are tender and well-browned on one side, 20 to 25 minutes (do not stir during roasting).
Meanwhile, whisk remaining tablespoon oil, vinegar, honey, shallots, 1/4 teaspoon salt, and 1/8 teaspoon pepper in now-empty bowl.
Toss hot vegetables with vinaigrette and cool to room temperature, about 30 minutes. Serve on top of a bed of cut lettuce, or top with micorgreens.
Vegan Double Chocolate Muffins
Adapted from Minimalist Baker (www.minimalistbaker.com)
Total Time 30 minutes | Makes 12 muffins
This recipe was a HOT one in our Facebook group last summer! I’m sharing again in case you haven’t seen it! Multiple people have made these and have been successful in getting those picky eaters to eat those beets! I used regular eggs, milk and an all all-purpose GF flour and it turned out fantastic.
Ingredients:
2 flax eggs (or regular eggs)
1 cup SLF beet puree (or sub butternut squash, applesauce, or another hearty fruit puree)
¼ cup maple syrup (sub honey if not vegan)
⅓ cup brown sugar
¼ tsp sea salt
1 ½ tsp baking soda
¼ cup melted coconut oil or vegan butter (such as Earth Balance)
¼ cup unsweetened almond milk (or regular milk if not vegan)
½ cup unsweetened cocoa powder
1 ⅓ cups whole-wheat pastry flour (or unbleached all-purpose, I used an all purpose GF flour)
⅓ cup dairy-free semisweet chocolate chips + more for topping
Directions:
Roast, boil or steam beets prior to peeling. Peel and puree until smooth.
Preheat oven to 375 degrees and line 12 muffins with paper liners, or lightly grease.
Prepare flax eggs in a large mixing bowl and let rest for 5 minutes OR crack 2 eggs into large bowl.
Add beet puree, melted oil, maple syrup or agave, brown sugar, baking soda, salt and whisk for 45 seconds.
Stir in the milk and whisk once more.
Add cocoa powder and flours and stir with a spoon or spatula until just combined, being careful not to over-mix. If the batter appears too thick, add a touch more almond milk. But it should be quite thick and NOT pourable – rather, scoopable.
Lastly, stir in chocolate chips. Then divide batter evenly between muffin tins (should be enough for between 11-12) and sprinkle with a few more chocolate chips (optional but recommended).
Bake for 17-22 minutes or until a toothpick inserted into the center comes out clean. Let cool for a few minutes in the pan, remove from tins and let cool on a cooling rack.
Will keep covered for several days. Freezer for longer-term storage.
Beetroot and Feta Cheese Salad
Adapted from Scrambled Chefs (www.scrambledchefs.com)
Prep time 10 minutes, cook time 45 minutes | Serves 6
Beets and feta are a go to combination; this salad is fairly easy and has the perfect combination of what sweet and salty should be!
Ingredients:
4 medium beets
½- ¾ cup feta cheese
2 Tbs chopped parsley
Lemon Vinaigrette
For the Lemon Vinaigrette-
3 Tbs lemon juice
3 Tbs EVOO
2 garlic cloves- minced
½ tsp pepper
½ tsp salt (to taste)
Directions:
For Salad-
Boil the beetroot on medium heat for 45 mins or until it can be easily pierced through with a knife.
The skin will easily peel off. After removing the skin of the beetroots, chop the beetroot into cubes and do the same with the feta cheese.
Roughly chop the parsley.
Combine beetroot, feta cheese, parsley with the lemon vinaigrette and serve.
For Lemon Vinaigrette-
Mix all ingredients together in a bowl and whisk slightly.
Scallion and Basil Pesto Spaghetti
Adapted from Lord Byron’s Kitchen (www.lordbyronskitchen.com)
Total Time ~15 minutes | Serves 4
Bonus to you if you sub out the regular pasta and use your summer squash to make zoodles!
Ingredients:
4 cups scallions, chopped
1 cup fresh basil, roughly chopped
2 Tbs fresh chives, chopped, plus more for garnish
½ cup EVOO
¼ cup parmesan cheese, plus more for garnish
3 Tbs fresh lemon juice
1 tsp salt
~2 cups cooked spaghetti,
½ tsp dried red chili flakes, optional
Directions:
Add all ingredients (except cooked spaghetti) to a food processor or blender and puree until smooth.
Transfer pesto sauce to a clean, sterile mason jar and secure with a clean lid and seal.
Refrigerate 12 hours until ingredients marry together. This pesto can be used immediately, but allowing the pesto to sit results in a more cohesive taste.
Pesto will last up to seven days if keep in the refrigerator.
When ready, cook your spaghetti according to the package instructions. Drain and add back to the pot. Pour in the entire amount of pesto and use tongs to toss and coat.
Serve hot with dried red chili flakes, parmesan cheese, and chives for garnish.
Roasted Hakurei Turnips and Radishes
Adapted from Just a Little Bit of Bacon (www.justalittlebitofbacon.com)
Total time ~25 minutes | Serves 4
Love the combination of these two root veggies, try them roasted! I like this recipe even more because it uses the tops of these gems too! You could also sub in some carrots instead of radishes.
Ingredients:
1 bunch radishes
1 bunch Hakurei turnips, or other mild salad turnips
3 Tbs EVOO
1 tsp kosher salt
Directions:
Move the rack in the oven to the lower middle position. Place the roasting pan in the oven. Preheat oven to 425F.
Slice the greens off the turnips and radishes. Scrub the turnips and radishes well to remove all the dirt and grit from the vegetables, and rinse the greens repeatedly until they are grit free. If you left a little bit of the stem on the radishes and turnips, make sure you clean around it well since dirt collects there. I find scraping around the stem as I wash cleans it up nicely.
Cut the turnips and radishes into wedges. Halve the small ones, and quarter or sixth the larger ones. In a large bowl, toss the vegetables with 2 tbsp of olive oil and 1/2 tsp of salt. Pour the vegetables into the roasting pan, arranging them so most have a flat side down in the pan. Roast for 15 minutes, stirring and turning the vegetables at 7 minutes.
Dry the washed greens to remove most of the water. Roughly chop the greens into bite-sized pieces, then toss them in the large bowl with the rest of the olive oil and the salt. Pull the roasting pan out of the oven, turn and stir the vegetables again and then make a space for the greens. Spread out the greens in the space and return the pan to the oven. Roast for 5 minutes more.
Glazed Hakurei Turnips
Adapted from Epicurious (www.epicurious.com) | Makes 10 servings
Great template recipe for other types of root veggies!
Ingredients:
3 bunches baby hakurei turnips, baby turnips, or red radishes, trimmed, greens reserved
¼ cup unsalted butter
3 Tbs sugar
Kosher salt
Directions:
Place turnips in a large skillet; add water to cover turnips halfway. Add butter, sugar, and a large pinch of salt; bring to a boil.
Cook, stirring occasionally, until liquid is syrupy and turnips are tender, about 15 minutes (if turnips are tender before liquid has reduced, use a slotted spoon to transfer turnips to a plate and reduce liquid until syrupy. Return turnips to pan and stir to coat well).
DO AHEAD: Can be made 4 hours ahead. Let stand at room temperature. Rewarm before continuing.
Add turnip greens to skillet and cook over medium heat, stirring occasionally, until just wilted, 2-3 minutes. Season with salt.
Easy Rhubarb Relish
Adapted from Taste of Home (www.tasteofhome.com) | Makes 4 pints
Add this to your cheese board and you’ll be famous forever! Make it now and freeze for later!
Ingredients:
12 cups finely chopped fresh or frozen rhubarb
1 medium onion, chopped
2 cups sugar
1 cup cider vinegar
1 tsp salt
1 tsp ground cloves
1 tsp ground allspice
¼ tsp paprika
1 tsp ground cinnamon
Directions:
Rinse four 2-cup freezer containers and lids with boiling water. Dry thoroughly.
In a large saucepan, combine all ingredients. Bring to a boil. Reduce heat and simmer until mixture thickens, about 2 hours, stirring occasionally.
Fill all containers to within 1/2 in. of tops. Wipe off top edges of containers; cover with lids.
Refrigerate up to 3 weeks or freeze extra containers up to 12 months. Thaw frozen relish in refrigerator before serving.
Raspberry Rhubarb Margarita
Adapted from The Manual (www.themanual.com)
Ingredients:
2 ounces tequila blanco
2 ounces fresh lime juice
2 ounces raspberry rhubarb syrup*
2-3 jalapeno slices
Fresh raspberries, limes, jalapeno for garnish
Directions:
Raspberry Rhubarb Syrup:
Add .5 cup chopped rhubarb, .75 cup raspberries, 1 cup water, .5 cup sugar, and the juice of .5 a lemon to a small saucepot and cook over medium-high heat until the mixture comes to a low boil.
Reduce heat to low and simmer for 10 minutes, or until the rhubarb is soft.
Remove from heat and allow to cool. Once cooled, mash the rhubarb and raspberries with the back of a fork or a wooden spoon.
Strain mixture through a fine-mesh sieve, extracting as much liquid as possible. Pour the liquid into a jar or sealed container and place in the refrigerator to cool.
To make the cocktail:
Place a thin layer of flake salt on a small plate. Rim glass with lime juice and dip each glass into the salt. Set aside.
Fill a cocktail shaker with ice and 2-3 jalapeño slices. Add the tequila, lime juice, and raspberry rhubarb syrup to the cocktail shaker and shake vigorously for 15 seconds.
Fill prepared glass with ice and, using a cocktail strainer, pour the mixture over the ice. Garnish with fresh limes, fresh raspberries, and jalapeño slices, if desired.
Grilled Pork Tenderloin with Cherries
Adapted from Eating Well (www.eatingwell.com)
Total Time ~ 40 minutes | Serves 4
Use your fruit for something a little more savory, spice up that grilled protein.
Ingredients:
1 pound pork tenderloin, trimmed
2 Tbs EVOO divided
2 tsp chopped fresh thyme, divided
½ tsp chipotle chile powder
¾ tsp salt, divided
¼ cup chopped shallots
2 cups cherries, pitted and halved
2 Tbs dry red wine
2 Tbs chopped fresh basil, plus more for garnish
Directions:
Preheat grill to medium-high.
Brush pork with 1 tablespoon oil and sprinkle with 1 teaspoon thyme, chile powder and ½ teaspoon salt. Grill, flipping occasionally, until an instant-read thermometer inserted in the thickest part registers 145 degrees F, 14 to 20 minutes. Transfer the pork to a cutting board and let rest for 5 minutes.
Meanwhile, heat the remaining 1 tablespoon oil in a medium skillet over medium heat. Add shallots and the remaining 1 teaspoon thyme and cook, stirring occasionally, until softened, about 2 minutes.
Add cherries and cook, stirring occasionally, until the cherries are softened, 3 to 6 minutes. Stir in wine and increase the heat to high; cook for 1 minute. Remove pan from heat and stir in basil and the remaining 1/4 teaspoon salt.
Slice the pork and stir any juices into the cherries. Serve the pork with the cherries. Garnish with more basil, if desired.
Cherry Basil Lemonade Spritzers
Adapted from Cooking Light (www.cookinglight.com)
Serves 8
Love this one! So refreshing, make without vodka for an amazing mocktail!
Ingredients:
2 cups fresh sweet cherries, pitted and halved, divided
½ cup sugar
4 cups water, divided
6 basil sprigs
1 (1/2-in.) piece peeled fresh ginger, thinly sliced
2/3 cup fresh lemon juice
1 ½ cups vodka
3 cups chilled seltzer water
8 basil sprigs (for garnish)
Directions:
Combine 1 ½ cups cherries and sugar in a small saucepan; let stand 10 minutes or until juices have released, stirring occasionally. Place pan over medium-high. Add 1 cup water, 6 basil sprigs, and ginger to pan; bring to a boil.
Cook 10 minutes or until sugar dissolves and cherries have broken down. Remove pan from heat. Gently mash cherry mixture with a potato masher or a fork. Let stand 30 minutes at room temperature
Strain cherry mixture through a mesh sieve over a large pitcher; discard solids. Add remaining 3 cups water, lemon juice, and vodka to pitcher; stir gently to combine. Stir in remaining ½ cup fresh cherries.
Add seltzer water to pitcher just before serving. Pour about 1 cup cherry mixture into each of 8 ice-filled glasses.
Garnish each glass with a small basil sprig.
