Week 5 CSA Newsletter (July 19-25, 2020)
CSA Newsletter Week 5
July 19-25, 2020 | “A” Week
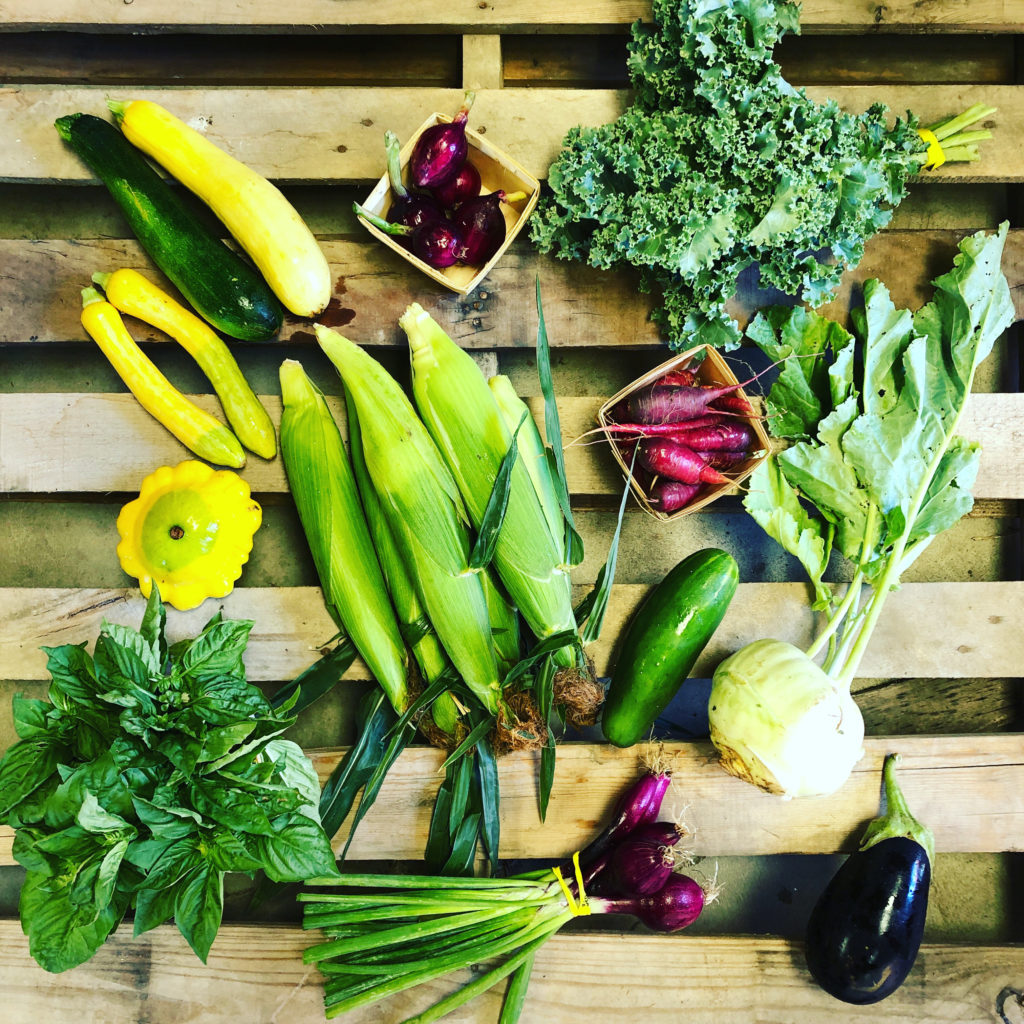
The Week 5 Box
COLLARDS (1 BUNCH) ~ (from our partner farm Wayward Seed Farm in Fremont, OH) Store these in a Debbie Meyer Green bag or Tupperware FridgeSmart container right away and leave it in the fridge. Use within a week. This crop technically falls into the category of “danger zone veggies” — ie they have a short shelf life.
KOHLRABI ~ Remove the tops/leaves and store them in a Debbie Meyer green bag. Use them like kale. The bulb can be stored in your fridge in a bag for up to 2 months. To use, cut off the thick skin around the bulb. Then chop or slice the kohlrabi as desired. The inside is crisp like a potato. Farmer Kurt likes to eat it raw with peanut butter.
RED DRAGON CARROTS ~ Store the roots dry and unwashed in a plastic bag in the refrigerator for up to 4 weeks.
RED CABERNET ONIONS ~ These are not cured, so they will need to be stored in the fridge. Wrap these in a Debbie Meyer Green Bag and store in the fridge. You can chop off the green tops into one inch segments and throw them in a Ziploc baggie and freeze them. (Use them later in stir fries or soup).
SUMMER SQUASH (4 pieces) ~ You will get some variety of Yellow Zephyr, Green Zucchini, or Patty Pan squashes. Try grilling these, zucchini fries, making zucchini boats, sauteing in olive oil, or roasting. To store, place in a Debbie Meyer Green bag and put in the fridge. Try to use it within 6-7 days, as sometimes they can start to mold fast. You’ll get better storage results in the Fridgesmart container. To use: rinse under water to remove the dirt or prickles, and slice off the stem and blossom ends. Then slice or chop.
SCALLIONS ~ Store these in a Mason jar with an inch of water and leave on your counter or in your fridge. Put a Ziplock baggie over the top of the green tops to prevent moisture loss. Change the water out every few days. These will last for a couple of weeks, stored this way.
BASIL ~ Store this bag of basil in your fridge for 2-3 days. The leaves will start to blacken so you’ll want to use it quickly. You can dehydrate them, chop and freeze in ice cube trays with a bit of water, or turn it into pesto.

Meet Emanuel and Leo — brothers and members of our harvest crew this year. These are your farmers!
EGG Share — cardboard egg cartons are back!!
FRUIT SHARE
BLUEBERRIES – store these in their pint containers in the fridge or in a Fridgesmart container.
PEACHES — these will be coming from Southern Georgia, as the local peach crop is not quite ready.
MADDIE & BELLA COFFEE SHARE
Tanzania Peaberry: Medium body, rich, uncommonly fruity
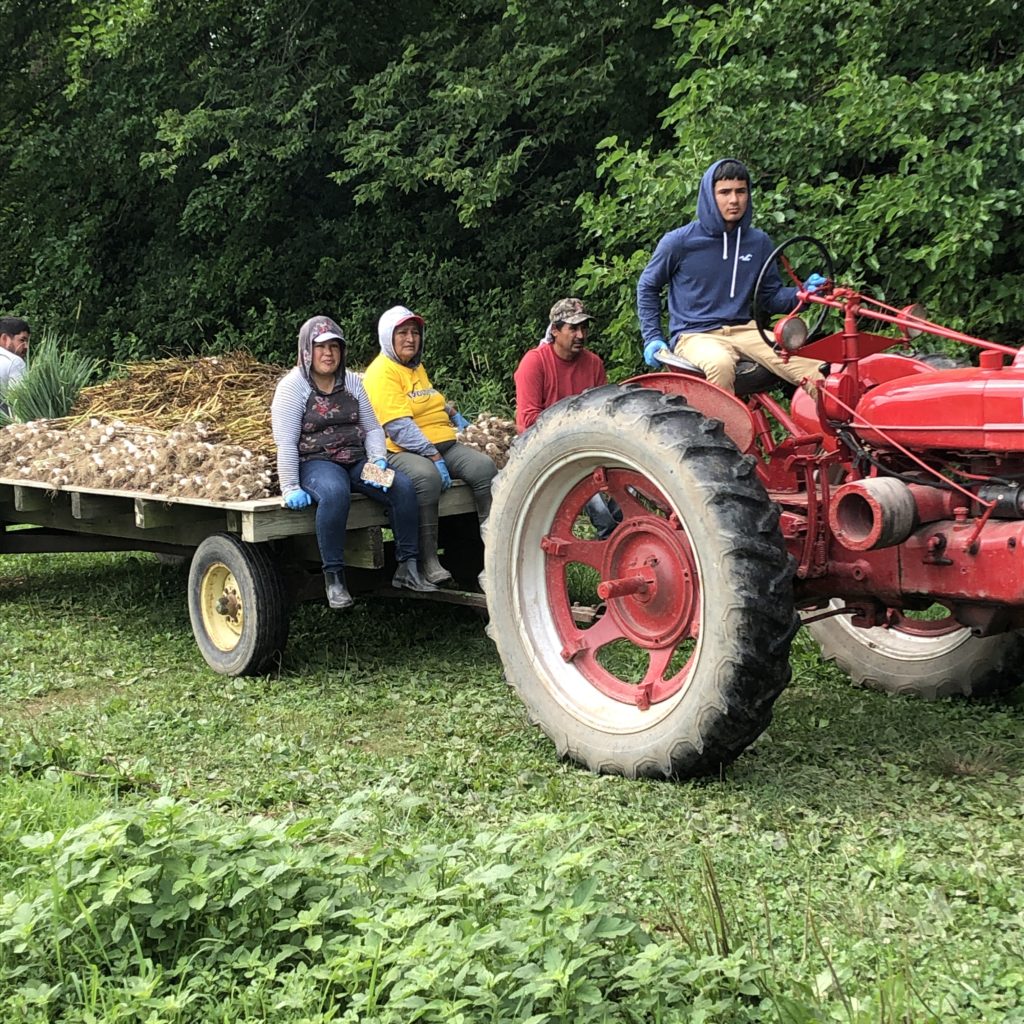
The crew brings back the pulled garlic on a wagon.
The Pay It Forward Update
How Our CSA Community Pulled Together & Raised $4470 for Our Members
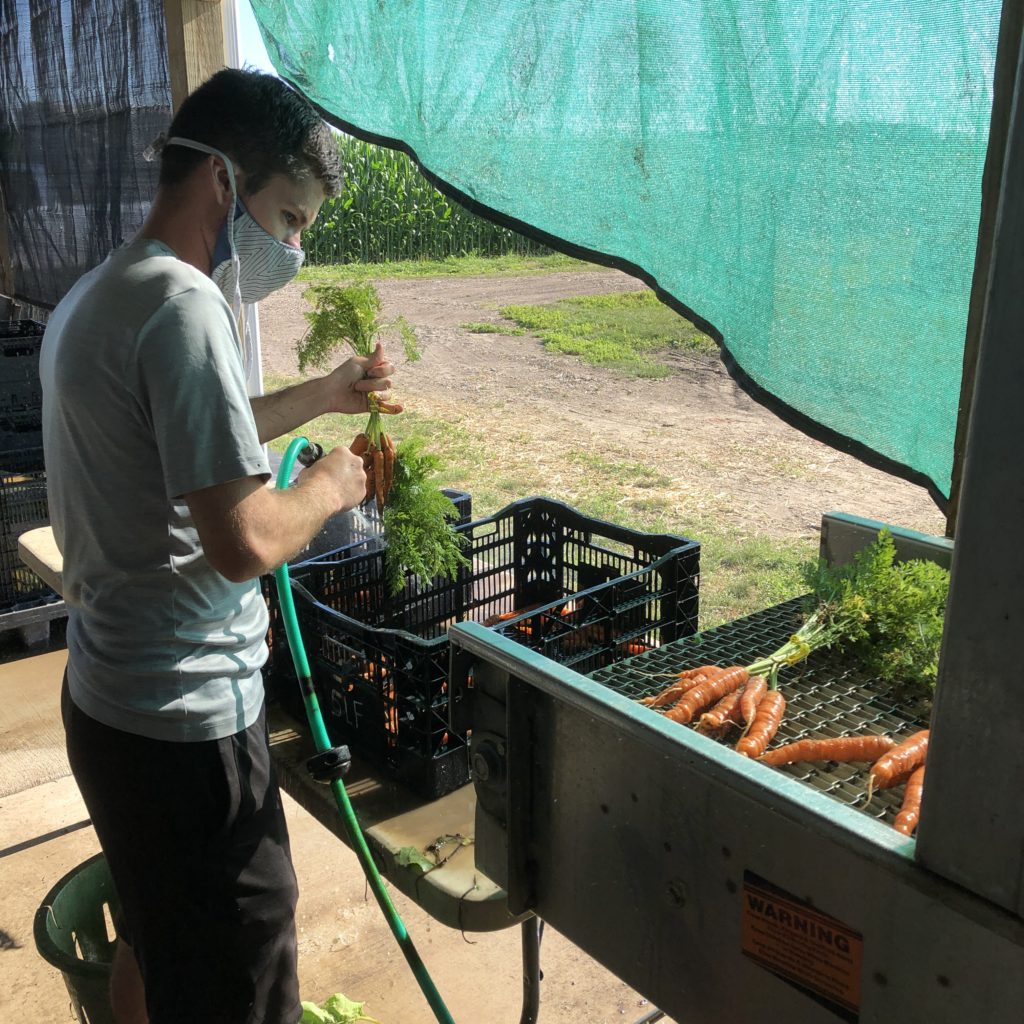
An old friend stopped by this Friday to help us harvest. It’s Travis!! Travis used to be one of our growers. It’s always fund to have veteran staff show up to say hi. This farm is an incubator for so many future growers and entrepreneurs.

Farmer Kurt signs off on the delivery of our giant Air Conditioner unit for our cooler. Read Kurt’s Field Notes to find out the story behind this “event.”
FARMER KURT’S FIELD NOTES
The garlic was pulled this week. Normally this is an open “CSA family” work party event, so it felt strange doing it alone. We’ve stored them all on a wagon in the shade for now. Our crew will be laying them in the covered greenhouse on the tables where they will cure for a few weeks — a process where their outer skin turns papery white and dry so you can store them long-term. After that, we’ll be able to clean up their outer skin, cut off the roots and stem, and prepare them for sorting. This year will still be a leaner year for garlic in your shares, because I’m going to keep a big portion of the crop for seed for next year, as I try to rebuild my seed stock. (History lesson for all you newbies: last year we suffered a 95% garlic loss which crippled my seed stores).
Sweet corn will be ready for the first pulling this weekend. There likely won’t be enough for the first box just yet, but hopefully by week 6, we can get you some of the first corn in your share. This is always an exciting event for the Benches — Dad is incredibly proud of his sweet corn legacy, so he’ll be out here managing the picking and making it feel like an event. I hired 3 new workers this past week — partly to help with the regular chore of sweet corn harvest every day. We’ll try them out and see how they do.

The eggplants are beginning to form! See this beauty? Summer crops will begin soon.
Nick visits. My buddy Nick Giandonato from Chicago came out to visit again this week to work on a couple projects… 1. The Cooler Button-Up (see below) and 2. The Barn Build-Out. A few weeks ago, Nick was out here to frame out a “room” in the back barn area that will eventually become a storage area for clean harvest bins and lids. This week, Nick helped us cut out the tin siding of that barn wall that leads out onto the wash bay. The project should be completed by the end of next week. Me and the boys will remove the concrete “step” into the barn, install a door, and some side panels to create walls in the space.
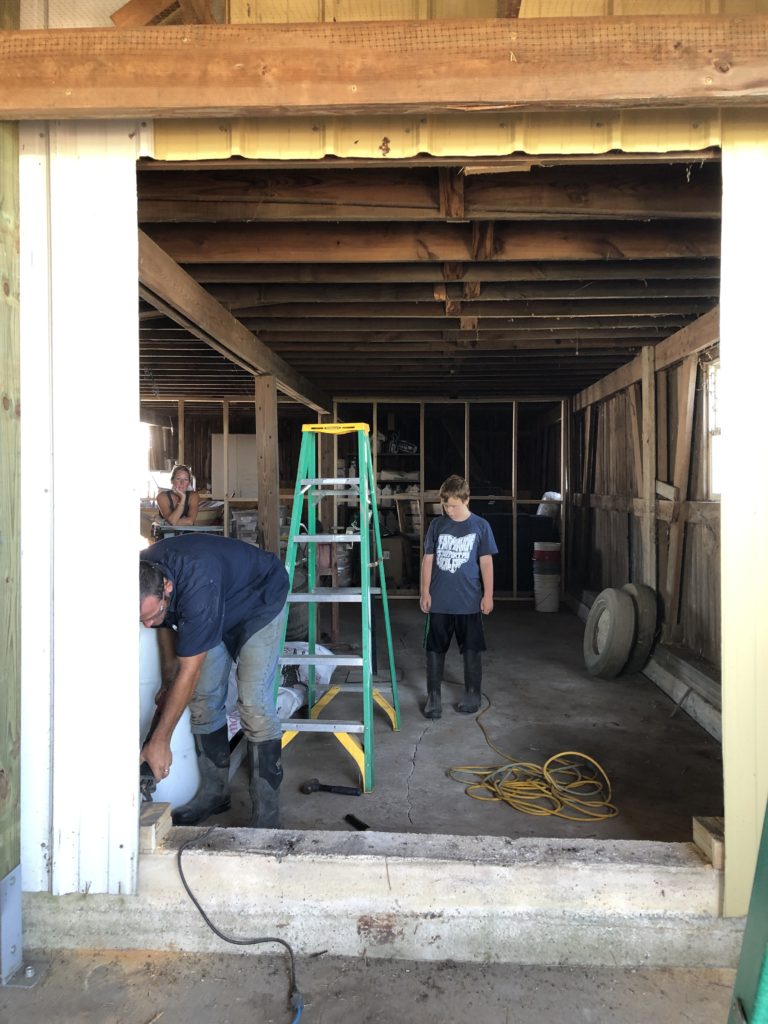
Farmer Kurt cut a giant doorway into the barn from the wash bay side. We’ll remove this concrete step this week and cover the inside walls to create an interior room to store crates and bins.
The Cooler Update: On Friday at 7:30 PM, a box truck pulled down the driveway, carrying our giant AC unit for the cooler expansion project. I was starting sweat bullets this week because it still hadn’t arrived. My wife was placing bets on whether this would show up in time. (I need it for the sweet corn season, so we were really cutting it close with timing). In the meantime, our buddy Nick from Chicago had arrived for the weekend to work on the cooler installation. So not having an AC unit would have been a little awkward.
So the clock was ticking…

Josiah holds up the new AC unit that was installed this week. Our cooler is operational!
Then, unbelievably, the Enterprise truck comes rolling down the lane as we’re grilling burgers with Nick. Just under the wire. I did a little yahoo, gave the two drivers some beers, and felt a little smug. Meanwhile, my type A wife can’t believe that this is all working out for me, but even she kissed the box as it was being unloaded. I always tell her, “Have a little faith. Things will work out.” They always do.
CROPS: We’re making a switch from spring crops to summer crops very soon. Basil is starting to take off. Tomatoes are SO close — I’ve got a few starting to change color. Sweet corn is just about ready. Eggplant looks beautiful. The only disappointing crop for us right now is cucumbers. Although they’re producing, they look ugly as sin with blemishes and scarring. I also laid T-tape with my boys on Sunday morning on the entire pepper crop. Should get some storms this weekend — won’t have to irrigate. We’ve been mighty lucky with the rains. Most farms around us are bone dry, so I am counting my blessings.
~Your Farmer, Kurt
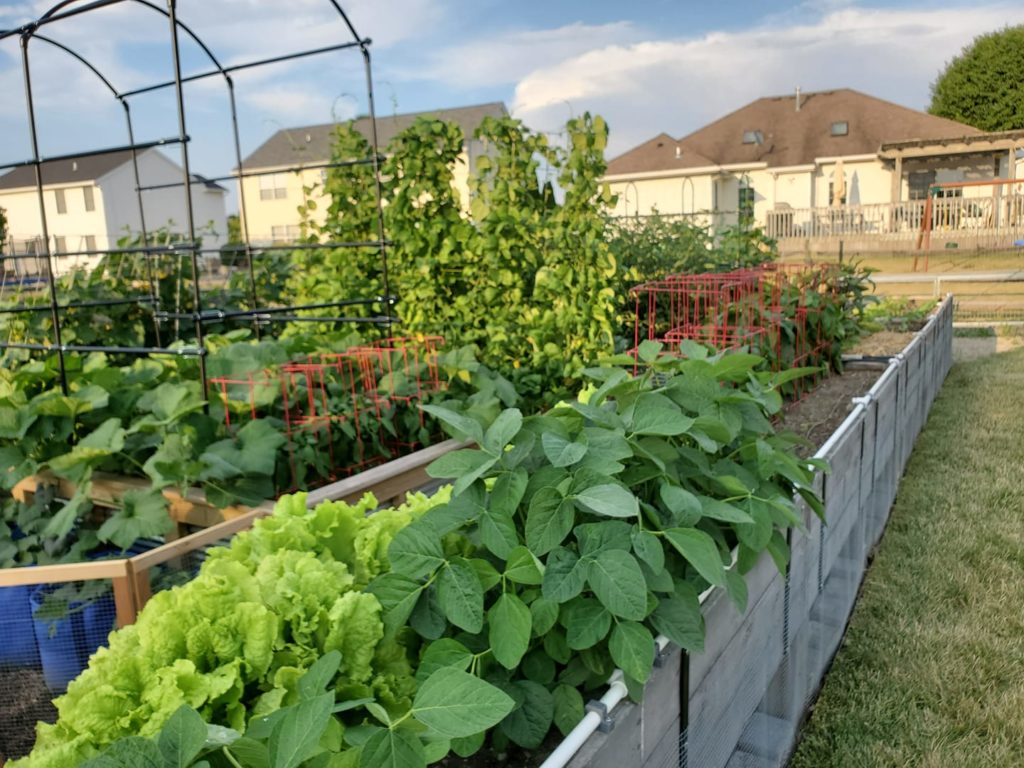
The winner of our “Vegetable Garden Photo Contest” is Beth Deakins! Beth wins a gift bag from Rancho Gordo!
WEEK 5 ANNOUNCEMENTS
- Who won the Vegetable Garden Photo Prize? Congrats to CSA Member Beth Deakins for her entry in our spontaneous contest this week, where we asked you to post a picture of your vegetable garden! (See her winning entry above). We wanted to see how our transplants are doing in YOUR garden beds, and we were pretty impressed with Beth’s numerous raised beds! Beth wins a variety pack of heirloom Rancho Gordo dried beans.
- Look for a special email this week on how to place a bulk blueberry order. I should know from Ben at Quarry Hill in a day or two what the price will be.
- DID YOU GET THE MEMO ON THE NEW PICKUP TIMES!? We are back to our original pre-COVID pickup times since pickup is going so smoothly. Here are the new pickup times:
- Sylvania: 5:30-6:30 PM
- PBurg: 5:00-6:30 PM
- Elmore: 5:30-6:30 PM
- Toledo: 8:30-10 AM (stays the same)
- Port Clinton: 6-6:30 PM (stays the same)
- Watch our weekly Live Unboxing video this Tuesday around 8 PM inside the private Facebook group. Cadie Jardin, our CSA coach and dietitian, will show you what’s in the box, share storage tips and ideas for how to use your product. You can find the Facebook group at this link.
- You can order additional items from the Shared Legacy Farms online store. Our store link is super easy to remember: www.sharedlegacyfarms.com/store ==> grab some syrup or bonus veggie items (like an extra bunch of carrots). Just be sure to select the right pickup site that coincides with your pickup location. If the pickup option is greyed out or not available, it means you missed the window to order. You need to place your order 2 days before your site. I reload the store and set new pickup dates on Sunday afternoon.

Laying “T Tape” — or drip tape under the plants.
WEEK 5 CSA RECIPES
Members: You can download these recipes as a PDF inside the Membership Academy.If you aren’t a member of this year, email Corinna at slfarms2@gmail.com — your entry is free as a CSA member. This week’s recipes are:
Summer Squash Tart
Crispy Kohlrabi and Apple Salad
Stir Fried Rice Noodles with Kohlrabi and Basil
Sautéed Kohlrabi, Onions and Basil
Zucchini Pizza Boats
Roasted Carrot Hummus
Cabernet Onion Jam
Baked Parmesan Zucchini
Zucchini Onion Pie
Wok Fried Ginger Scallion Carrots
Quick Collard Greens
Pot Likker Soup
Collard Greens with Bacon (and carrots)
Cherry Berry Crisp
Blueberry Raspberry Muffins
Pink Greens
Summer Squash Tart
Adapted from Bon Appetit (www.bonappetit.com)
Total Time ~50 minutes | Serves 6-8
Alright you guys, Robert Seaney said he’s making this tart this week. Can someone beat him to it?
Ingredients:
½ lb of summer squash
1 sheet of puff pastry
1 egg
3 oz parmesan or other hard cheese, shaved thinly with a vegetable peeler
1 Tbs of pesto, homemade or store bought
½ small red onion, sliced as thinly as possible (could sub in scallion)
2 lemons, zested and juiced
1 tsp dry oregano
4 sprigs of thyme, picked
¼ cup EVOO
Salt to taste
Black pepper to taste
Micro herbs to taste
Directions:
Preheat oven to 400F. In the meantime, allow the puff pastry to thaw for about 30 minutes.
While this is happening, wash and dry the squash. Carefully use a mandoline to slice the squash lengthwise into thin strips that are the width of a quarter. If you do not have a mandoline, you can use a sharp knife to slice bias cuts of the same thickness.
Again using the mandoline or sharp knife, slice the red onion as thinly as you can.
In a mixing bowl, combine the olive oil, thyme, dry oregano, lemon zest and juice, and a heavy pinch of salt. Whisk these ingredients together until the oil is dispersed in small droplets. Add the shaved squash and onion to the bowl and toss well. Allow the vegetables to marinate while you carry on with the rest of the process.
Crack the egg and add ½ Cup of water. Whisk together. When the pastry has tempered enough to handle, transfer it to a baking tray lined with an oiled baking mat. Brush the top side of the pastry with egg mixture and bake until golden brown and crisp, about 15-20 minutes.
Pull the pastry from the oven and place on the counter. Allow it to cool for about 10 minutes before brushing with the pesto over the entirety of the surface. While the Pastry cools, remove the marinating vegetables from the bowl and allow them to drain on a plate.
After brushing the pastry with pesto top it with the vegetables and cheese. Crack black pepper over the entire item and return to the oven until the pastry is warm and the squash just starts to bubble.
Remove the tart from the oven and transfer it to a cooling rack. Allow it to cool for a couple minutes before transferring it to a cutting board and portioning into 6-8 pieces.

Laurie Knueven shared this photo last week of her beets.
Crispy Apple and Kohlrabi Salad
Adapted from Cookie and Kate (www.cookieandkate.com)
Serves 4
Favorite combo with kohlrabi, shared by Deidra in the group and I have to agree with her. Try this!
Ingredients:
2 small kohlrabi, cut into matchsticks about ¼″ wide
1 large Honeycrisp apple (about ½ pound), cored and cut into matchsticks about ¼″ wide
⅓ cup grated gouda cheese (optional)
¼ cup fresh tarragon leaves
3 Tbs toasted sunflower seeds*
Lemon zest, to taste
1 to 2 Tbs EVOO, to taste
1 to 2 Tbs lemon juice, to taste
Flaky sea salt (like Maldon) and freshly ground black pepper, to taste
Directions:
In a large serving bowl, combine the kohlrabi and apple matchsticks. Add the cheese, if using, and the tarragon leaves and sunflower seeds. Shave lemon zest liberally over the bowl.
Drizzle in 1 tablespoon olive oil and 1 tablespoon lemon juice, then sprinkle lightly with salt and black pepper. Use your hands to gently toss the salad, then add another drizzle of olive oil and lemon juice if the salad seems dry. Finish with another light sprinkle of salt and pepper and serve immediately.
HOW TO TOAST YOUR OWN SUNFLOWER SEEDS: If you only have raw, unsalted sunflower seeds at home (like me), toast them in a small skillet over medium heat with a pinch of salt. Cook, stirring frequently, until they’re turning lightly golden on the edges, about 5 minutes.
Stir Fried Rice Noodles with Kohlrabi and Basil
Adapted from Food and Wine (www.foodandwine.com)
Serves 4
This recipe was made for week 5! If you’re not into raw kohlrabi give this stir fry a shot!
Ingredients:
8 cups water
10 ounces dried rice noodles (about 1/3 inch wide)
5 Tbs soy sauce
1 Tbs dry white wine
1 Tbs sugar
½ tsp Chinese chili oil
3 Tbs peanut oil
1 pound kohlrabi—peeled, halved and thinly sliced
1 red bell pepper, thinly sliced
1 ½ Tbs minced garlic
2 large eggs, lightly beaten
1 cup mung bean sprouts
2 scallions, sliced on the diagonal
1 cup chopped basil
Directions:
Bring the water to a boil. Remove from the heat, add the rice noodles and let soak until the noodles are tender, about 7 minutes. Drain well.
In a small bowl, stir together the soy sauce, white wine, sugar and chili oil.
In a large skillet or a wok with a handle, heat the oil. Add the kohlrabi and cook over moderately high heat until browned, about 3 minutes. Stir and cook for 1 minute. Add the red pepper and garlic and stir-fry until the garlic is fragrant, about 2 minutes. Add the eggs; stir-fry until just set, about 30 seconds.
Add the rice noodles, bean sprouts, scallions, basil and the soy sauce mixture. Cook over moderately low heat, tossing gently, until the noodles are heated through and coated with sauce, about 1 minute. Transfer noodles and sauce and plate at once.
Sautéed Kohlrabi, Onions and Basil
Adapted from Real Food Tastes Good (www.realfoodtastesgood.com)
Serves 4
Kohlrabi is so wonderful raw, but if you’re looking for a different way to prepare, try this combination with your fresh basil!
Ingredients:
1 good sized kohlrabi bulb (no stems and leaves)
½ tsp salt
½ onion, sliced
2 Tbs butter, ghee or coconut oil
1 Tbs (more or less) chopped fresh basil
Directions:
Grate the peeled kohlrabi (food processor or hand grater). Sprinkle with salt and allow to sit in a colander for 30 minutes (set colander inside a bowl).
Squeeze water out (can press with the back of a spoon, or squeeze w/ hands).
Melt butter in a saute pan.
Cook onions over medium heat until golden and stir in kohlrabi. Turn heat to low, cover and simmer for 10 minutes.
Uncover and raise heat to medium. Cook another 2 minutes.
Stir in basil and serve.
Zucchini Pizza Boats
Adapted from Well Plated (www.wellplated.com)
Total time ~ 40 minutes | Makes 8 boats
Inspired by Shari Myers and her zucchini pizzas, you need to try this! How did I forget about this meal loaded with zucchini!
Ingredients:
4 medium zucchini
¼ tsp kosher salt
1 cup pizza sauce
1 ¼ cups shredded mozzarella cheese or cheese blend
1 tsp Italian seasoning
¼ – ½ tsp crushed red pepper flakes – optional
¼ cup mini pepperoni – or mini turkey pepperoni or regular-size pepperoni, sliced into quarters
2 Tbs freshly ground Parmesan
2 Tbs chopped fresh basil, thyme, or other fresh herbs
And any other veggies you want to add
Directions:
Place a rack in the center of your oven. Preheat the oven to 375 degrees F. Lightly coat a rimmed baking sheet or 9×13-inch baking dish with nonstick spray.
Halve each zucchini lengthwise. With a small spoon or melon baller, gently scrape out the center zucchini flesh and pulp, leaving a border of about 1/3 inch on all sides. Arrange the zucchini shells on the baking sheet. Sprinkle the insides of the zucchini with salt.
Spoon the pizza sauce into each shell, dividing it evenly. You may need a little more or less, depending upon the size of your zucchini. Put a generous amount, but don’t feel like you need to fill it all the way to the very top.
Sprinkle the mozzarella over the top, then evenly sprinkle with Italian seasoning and red pepper flakes (if using). Scatter on the pepperoni and any other desired toppings. Last, sprinkle with Parmesan.
Bake for 15 to 20 minutes, until the cheese is hot and bubbly and the zucchini is tender. If desired, switch the oven to broil and cook the zucchini for 2 to 3 additional minutes, until the cheese is lightly browned.
Remove from the oven and sprinkle with chopped fresh basil. Serve immediately.
Roasted Carrot Hummus
Adapted from Food Network (www.foodnetwork.com)
Total time ~ 1 hour | Makes 4 servings
I loved the beet hummus I made in the tutorial, and this one is up there with it!
Ingredients:
1 pound carrots, peeled and cut into ½ inch pieces
2 cloves garlic, unpeeled
EVOO
1 tsp ground cumin
½ tsp kosher salt
¼ tsp ground black pepper
3 Tbs tahini
1 Tbs chopped fresh cilantro, plus 1 teaspoon for garnish
1 lemon, juiced
Directions:
Preheat the oven to 400 degrees F.
On a baking sheet, toss the carrots and garlic cloves with 1 tablespoon olive oil and the cumin, salt and pepper. Roast until the carrots are tender and lightly caramelized, stirring halfway through, 20 to 25 minutes. Remove from the oven and let cool until warm. Peel the garlic cloves.
In a food processor, combine the roasted carrots and garlic with the tahini, cilantro, lemon juice and 5 tablespoons water. Pulse until smooth. With the processor running, slowly add 2 to 3 tablespoons olive oil. Transfer to a serving bowl.
Make a small well in the center of the hummus and fill with olive oil. Sprinkle the remaining 1 teaspoon cilantro over the top. Serve with crudites and pita chips.
Cabernet Onion Jam
Adapted from Fine Cooking (www.finecooking.com)
Try this one out to make you feel fancy! Keeps for 2 weeks in the fridge and is fantastic on bread!
Ingredients:
2 Tbs EVOO
4 medium onions, peeled, halved, and thinly sliced
1 tsp kosher salt
1 cup full-bodied red wine, such as Cabernet Sauvignon; more as needed
Directions:
In a large, straight-sided sauté pan, warm the oil over medium-low heat. Add the onions and salt. Cover and cook until the onions are soft, about 20 minutes, stirring occasionally to prevent sticking.
Add the wine, making sure it covers the onions, and cook uncovered at a very gentle simmer until all the liquid has evaporated and the onions are thick and jam-like, about 2 hours, stirring frequently during the last half hour.
Store in an air tight container for up to two weeks in the refrigerator.
Baked Parmesan Zucchini
Adapted from Damn Delicious (www.damndelicious.com)
Total time ~ 30 minutes | Serves 4
Super simple and flavorful! Use your fresh herbs if you’ve got them!
Ingredients:
4 zucchini, quartered lengthwise
½ cup freshly grated Parmesan
½ tsp dried thyme
½ tsp dried oregano
½ tsp dried basil
¼ tsp garlic powder
Kosher salt and freshly ground black pepper, to taste
2 Tbs EVOO
2 Tbs chopped fresh parsley leaves
Directions:
Preheat oven to 350 degrees F. Coat a cooling rack with nonstick spray and place on a baking sheet; set aside.
In a small bowl, combine Parmesan, thyme, oregano, basil, garlic powder, salt and pepper, to taste.
Place zucchini onto prepared baking sheet. Drizzle with olive oil and sprinkle with Parmesan mixture. Place into oven and bake until tender, about 15 minutes. Then broil for 2-3 minutes, or until crisp and golden brown.
Serve immediately, garnished with parsley, if desired.

Did you know you can freeze shredded or diced zucchini?
Zucchini Onion Pie
Adapted from Taste of Home (www.tasteofhome.com)
Total time ~ 30 minutes | Serves 6
This is a crowd pleaser, and I don’t think it can get any easier!
Ingredients:
3 eggs
1 cup grated Parmesan cheese
½ cup oil
1 Tbs minced fresh parsley
1 garlic clove, minced
¼ tsp salt
1/8 tsp pepper
3 cups sliced zucchini
1 cup biscuit/baking mix
1 small onion, chopped
Directions:
In a large bowl, whisk the first seven ingredients.
Stir in the zucchini, baking mix and onion. Pour into a greased 9-in. deep-dish pie plate.
Bake at 350° for 25-35 minutes or until lightly browned. Serve.
Wok Fried Ginger Scallion Carrots
Adapted from Inquiring Chef (www.inquiringchef.com)
Total time ~ 30 minutes | Serves 2
You could really add a variety of veggies to this! Throw in some greens if you have some.
Ingredients:
2 Tablespoons vegetable oil
2 medium carrots, cut into 2-inch matchsticks
1 large bunch of green onions, sliced
2 Tbs of roughly chopped cilantro
2 Tbs of ginger, finely minced
1 Tbs chopped garlic
1 Tbs chopped shallots
2 tsp fish sauce
1 Tbs toasted sesame seed oil
1 Tbs honey
1 tsp rice wine vinegar
2 tsp soy sauce
1 crushed red chile pepper or 1 teaspoon red chile flakes
kosher salt to taste
Directions:
Heat the oil in a saucepan over high heat until the oil is shimmery and hot, but not smoking. Add the carrots and cook until tender and golden brown in spots, about 4 minutes.
Add the green onions, cilantro, ginger, garlic and shallots at once and stir until hot and fragrant, about 2 minutes. Add the fish sauce, sesame seed oil, rice wine vinegar, soy sauce, honey, crushed red chile pepper and salt to taste. Cook until the sauce thickens slightly and coats the carrots, about 1 minute longer.
Serve immediately.
Pot Likker Stew
Adapted from AddaPinch.com
Serves 8 | Total Time: 1 hour
If you’ve never heard the term pot likker before, it is the liquid left over after you’ve cooked collard, turnip or mustard greens. Sometimes it is spelled as pot liquor soup, potlikker, or pot likker.
Ingredients:
5 slices about 1.5 pounds baked ham – chopped
1 tablespoon olive oil
1 medium onion diced
3 medium carrots chopped
2 garlic cloves minced
2 cups chicken broth
2 cups fresh collard, turnip, beet greens, or chard — washed with hard stems removed
8 cups water
pinch red pepper flakes
Directions:
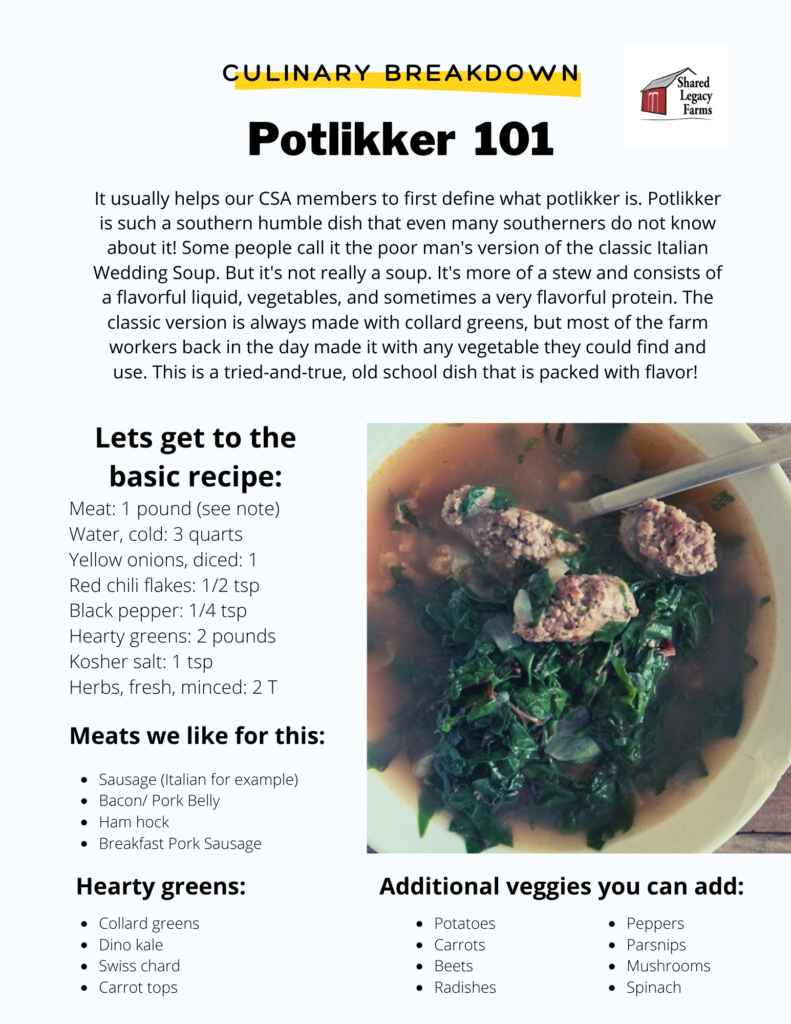
Here’s a great recipe you can try with those collard greens or last week’s chard and beet greens!
Quick Collard Greens
Adapted from Cookie and Kate (www.cookieandkate.com)
Total time ~ 15 minutes | Serves 2
Really easy way to enjoy these greens, make sure to squeeze the lemon on when serving!
Ingredients:
1 large bunch (about 10 ounces) collard greens
1 ½ Tbs EVOO
¼ tsp fine sea salt
2 medium cloves garlic, pressed or minced
Pinch of red pepper flakes (optional, scale back or omit if sensitive to spice)
A couple lemon wedges, for serving
Directions:
To prepare the collards: Cut out the thick center rib out of each collard green. Stack the rib-less greens and roll them up into a cigar-like shape. Slice over the “cigar” as thinly as possible (⅛″ to ¼″) to make long strands. Shake up the greens and give them a few chops so the strands aren’t so long.
Heat a large, heavy-bottomed skillet over medium-high heat, then add the olive oil. Once the oil is shimmering, add all of the collard greens and the salt.
Stir until all of the greens are lightly coated in oil, then let them cook for about 30 seconds before stirring again. Continue stirring in 30-second intervals until the greens are wilted, dark green, and some are starting to turn browns on the edges (this is delicious). This will take between 3 to 6 minutes.
Once the collards are just about done, add the garlic and red pepper flakes (if using). Stir to break up the garlic and cook until it’s fragrant, about 30 seconds. Remove the pan from the heat.
Immediately divide the cooked collards onto plates, and serve with a lemon wedge each.
Collard Greens with Bacon
Adapted from Savory Spice (www.savoryspice.com)
Total time ~ 15 minutes
Greens and carrots, great combination and a tasty way to introduce your family to greens.
Ingredients:
6 slices bacon, diced
4 carrots, diced
1 onion, diced
4 tsp lemon pepper
¼ tsp garlic, minced
¼ tsp crushed red pepper flakes
3 Tbs balsamic vinegar
4 (10 oz.) packages fresh, chopped collard greens
2 cups chicken broth
Directions:
Cook bacon in a large Dutch oven (or similar pot) over medium-high heat until just crisp; transfer to a paper towel-lined plate to drain.
Add carrots to pot with bacon drippings and cook over medium-high heat for 5 min. Add onions and cook another 5 min., or until carrots and onions soften and begin to brown. Stir in lemon pepper, garlic, crushed red pepper, and vinegar and cook for 1 more min.
Add reserved bacon, collard greens, and broth and bring to a boil. Reduce to a simmer, cover, and simmer for 1 hour or until greens are tender. Serve.
Cherry Berry Crisp
Adapted from Food (www.food.com)
Time ~ 40 minutes | Serves 8
Use any combination of berries this in this favorite crisp!
Ingredients:
Crisp:
2 cups blueberries
2 cups raspberries
2 cups cherries
2 Tbs brown sugar
1 Tbs all purpose flour
1 Tbs fresh lemon juice
Topping:
2/3 cup all purpose flour
½ cup packed brown sugar
½ cup oats
¾ tsp ground cinnamon
4 ½ Tbs chilled butter, cut into small pieces
Directions:
Preheat oven to 375°.
Combine first 6 ingredients in a medium bowl; spoon into an 11 x 7-inch baking dish.
Lightly spoon flour into a dry measuring cup, and level with a knife. flour, brown sugar, oats, and cinnamon, and cut in the butter with a pastry blender or in food processor until the mixture resembles coarse meal. Sprinkle over the blueberry mixture.
Bake for 30 minutes or until bubbly. Top each serving with 1/4 cup frozen yogurt.
Blueberry Raspberry Muffins
Adapted from Natasha’s Kitchen (www.natashaskitchen.com)
Time ~ 30 minutes | Makes 12 muffins
Sub in or out any berries in this simple recipe, feel free to freeze those muffins to enjoy months from now!
Ingredients:
2 large eggs room temperature
1 cup granulated sugar
1 cup Greek yogurt (or sour cream)
½ cup oil
1 tsp vanilla extract
¼ tsp sea salt
2 cups all-purpose flour
2 tsp baking powder
½ cup strawberries hulled and diced
½ cup raspberries
½ cup blueberries
Directions:
Line a 12-count muffin tin with cupcake liners and preheat oven to 400˚F. In a large mixing bowl, using an electric mixer, beat 2 eggs with 1 cup granulated sugar on high speed 5 minutes, or until thick and light in color.
Add 1 cup Greek yogurt, 1/2 cup oil, 1 tsp vanilla. Set mixer to low speed and mix just until combined.
In a small bowl, add 2 cups flour, 2 tsp baking powder and 1/4 tsp salt and whisk to combine. Using a hand held whisk, add flour mixture into the batter 1/3 at a time, stirring to incorporate with each addition. DO NOT OVERMIX or muffins will be dense.
Use a spatula to fold in 1 1/2 cups mixed berries, folding just until combined.
Divide batter into prepared muffin tip, filling to the top or until all of the batter is used up. Bake in the center of the oven at 400˚F for 20-22 minutes or until tops are golden and a toothpick inserted into the center come out clean.
Transfer muffins to a wire rack to cool. Serve warm or at room temperature.
Pink Greens
This recipe came highly recommended by CSA member Nike Mendenhall. If you still have chard or beet greens left from last week, use this recipe!
Ingredients:
1 large bunch beet greens
2 teaspoons chopped garlic
1 shallot, chopped
1/4 teaspoon crushed red pepper flakes
1 teaspoon olive oil
1/2 teaspoon coarsely ground black pepper
2 teaspoons sugar
1/4 teaspoon salt
2 teaspoons sherry vinegar
Directions:
Wash and trim the beet greens. If the stems are very thick, it’s worth trimming them back a bit.
In a large sauté pan over medium heat, sauté the garlic, shallot, and red pepper flakes in the olive oil until slightly browned. Add the black pepper, sugar, and salt.
Place the beet greens in the pan, pour 1/4 cup water over them, and immediately cover. Once the greens have cooked down, 1 to 2 minutes, remove the lid and stir. Cook for another 1 to 2 minutes, allowing the water to evaporate.
Just before serving, pour the vinegar over the greens. Serve and enjoy!
